To set up billing, perform the following steps. To display this page, see Accessing ConnectWise Manage Integrations.
- At the ConnectWise Manage Integrations ribbon, select Billing.
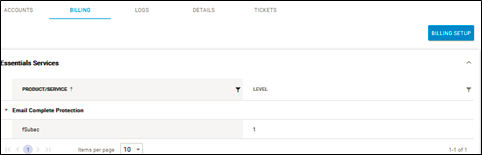
The Billing page is displayed.
Note: If you have set up billing for Intronis Backup in ECHOplatform the data is displayed as read-only. - Select the service for which you want to set up billing, and then click the Billing Setup button.
The Billing Setup page is displayed.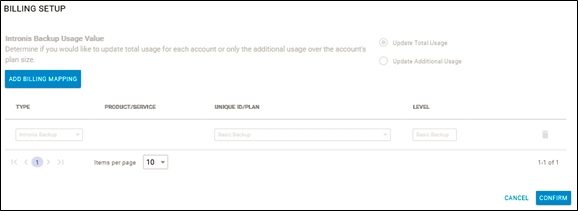
- Click the Add Billing Mapping button.
The Select Type field is displayed.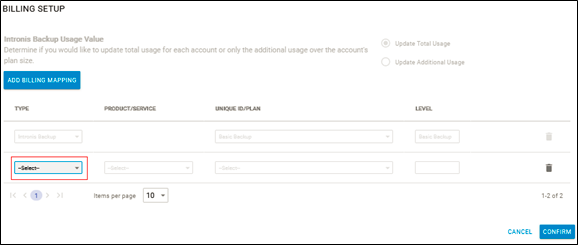
- Select the Select down arrow to display and select the service type you want to set up for billing, as shown below.

The Select Product/Services field is displayed.
- Select the Product/Services field down arrow.
The product/service types are displayed.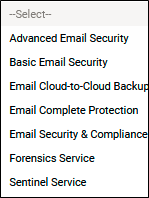
- Select the product/service type from the list.
The Unique ID/Plan field and the Level field (on the right) are displayed.
- Select the Unique ID/Plan field down arrow.
The Unique ID/Plan types are displayed.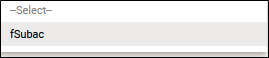
- Select the Unique ID/Plan from the list.
- At the Level field, type the level number, as shown below.

Note: The Level number allows you to set different billing rates to each unique ID assigned. - When satisfied with your selections, click Confirm, as shown below.
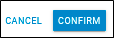
To void your selections, select Cancel.
To delete selections, select the trashcan icon, as shown below.
- After clicking Confirm, the new billing account is displayed under the Billing tab.