Barracuda SecureEdge supports multiple Microsoft Azure Virtual WANs. Microsoft's Azure Virtual WAN technology allows fast, secure, and uninterrupted network availability to both your cloud-hosted or hybrid data center and your branch offices through Microsoft's global network. Follow the steps below to create a Virtual WAN with a hub in Microsoft Azure.
Before You Begin
Create a Microsoft Azure account.
Step 1. Create a Microsoft Azure Virtual WAN
Log into the Azure portal: https://portal.azure.com
In the left menu, click Create a resource and search for Virtual WAN.
Click Virtual WAN.
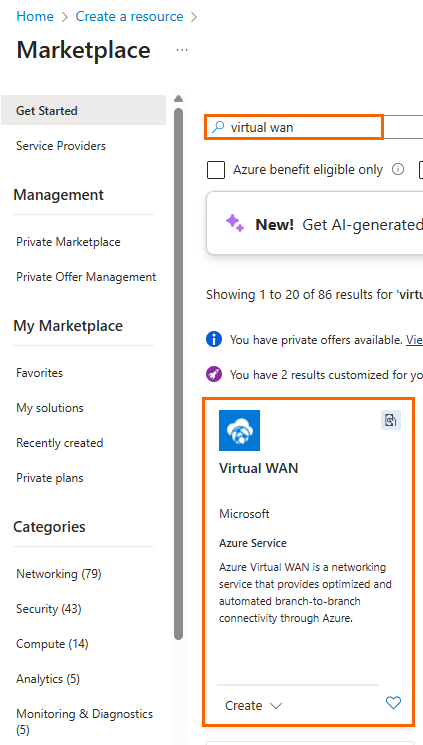
The Virtual WAN marketplace entry opens.
Specify values for the following:
Subscription – Select your Microsoft Azure subscription.
Plan – Select Virtual WAN.
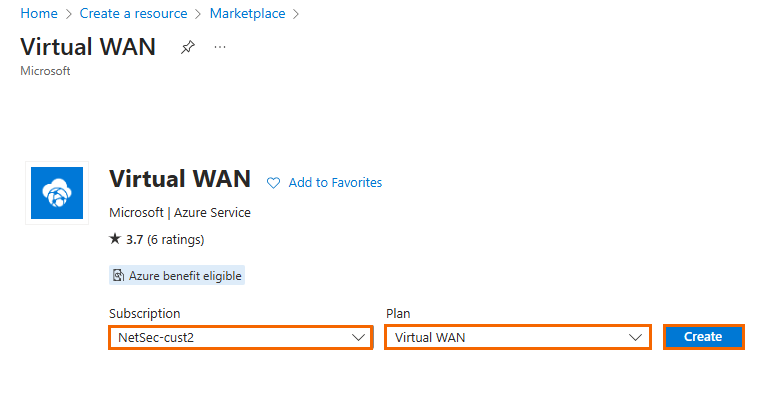
Click Create.
In the Create WAN blade, specify values for the following:
Resource Group – Select an existing resource group from the drop-down menu, or create a new one.
Resource group location – Select the region of the Virtual WAN, e.g., West Europe.
Name – Enter a name for your Virtual WAN. The Virtual WAN will be displayed with this name in the SecureEdge user interface.
Type – Select Standard.
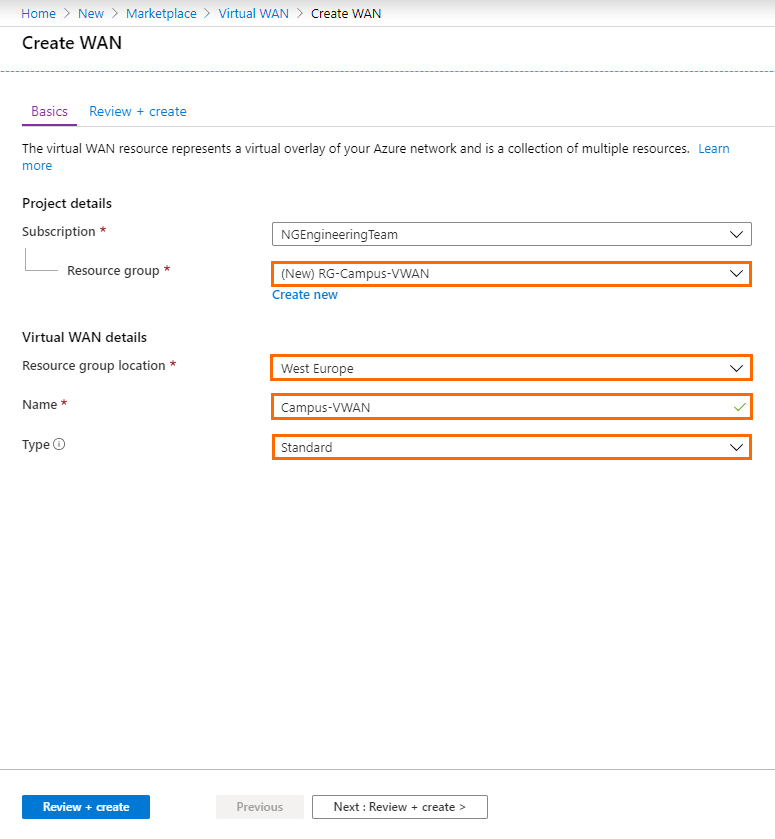
Click Review + Create.
Click Create to finish Virtual WAN creation.
Step 2. Create a Hub in Your Microsoft Azure Virtual WAN
Create a hub in each region where you want to use Barracuda SecureEdge.
Log into the Azure portal: https://portal.azure.com
In the left menu, click All services and search for Resource groups.
Click on the resource group your vWAN is attached to. See Step 1.
Click on your vWAN created in Step 1.
On the left side, click Hubs.
In the next blade, click + New Hub.
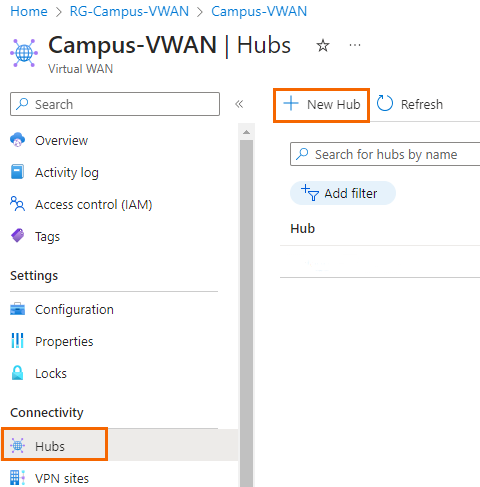
The Create virtual hub blade opens. Specify values for the following:
Region – Select a region from the drop-down list, e.g., West Europe.
Name – Enter a name for the hub, e.g., doc-vwan-hub.
Hub private address space – Enter the hub's address range in CIDR, e.g., 10.0.0.0/24 . Select a unique network that is dedicated for the hub only.
Virtual hub capacity – Select the virtual hub capacity according to your requirements.
Hub routing preference – Select the hub routing preference, e.g., ExpressRoute. Note that ExpressRoute is the default setting but can be changed depending on your requirements.
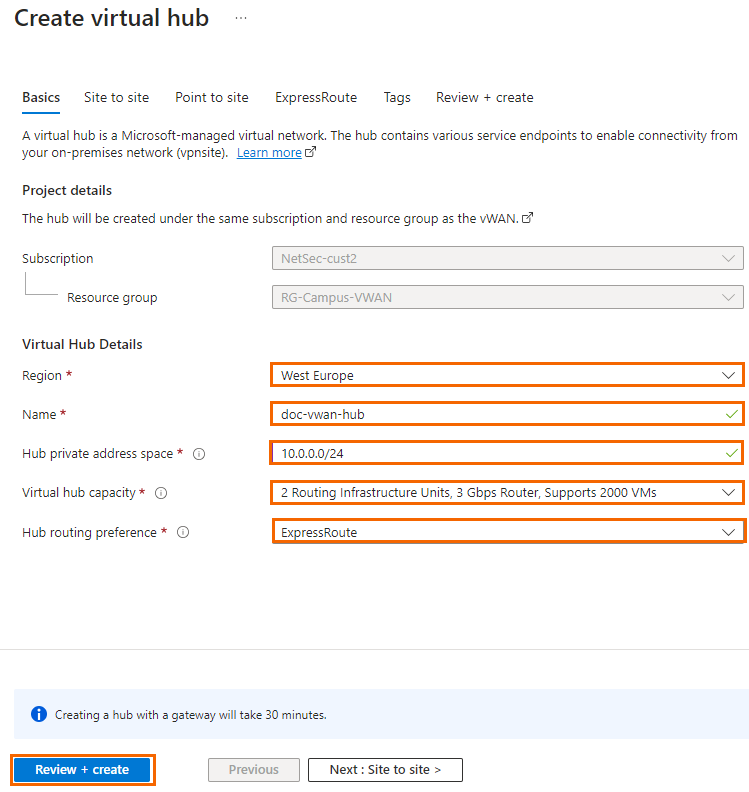
Click Review + create.
Review your settings and click Create to start the creation of the hub.
After the hub deployment succeeds, click All services in the left menu and search for Resource groups.

Click on the resource group your vWAN is attached to. See Step 1.
Click on your vWAN created in Step 1.
On the left side, click Hubs.
Click on the hub you just created.
Wait until the routing status becomes green and Provisioned is displayed.

Next Steps
How to Create a SecureEdge for Virtual WAN Edge Service in Microsoft Azure
