WAN connections can be configured either during deployment or later through the Sites tab. For more information on configuring during deployment, see How to Create a T/VT Site Configuration in Barracuda SecureEdge.

WAN Configuration
Go to https://se.barracudanetworks.com and log in with your existing Barracuda Cloud Control account.
Select the workspace containing your site.
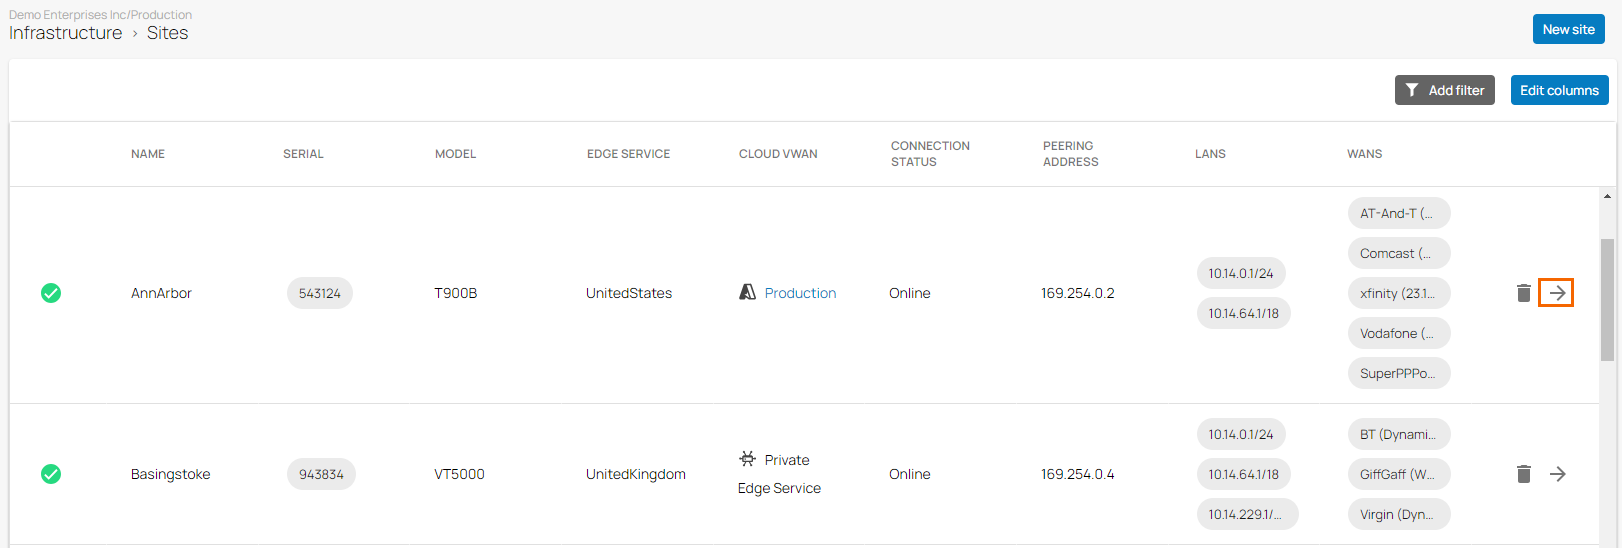
Go to Infrastructure > Sites. The Sites page opens.
Select the site you want to edit. You can either search for the name or serial, or use filters to tailor the list of displayed sites. You can also simply scroll through the list. Click on the arrow icon next to site you want to configure.

In the site menu, go to Settings > WAN and click Add WAN Interface.

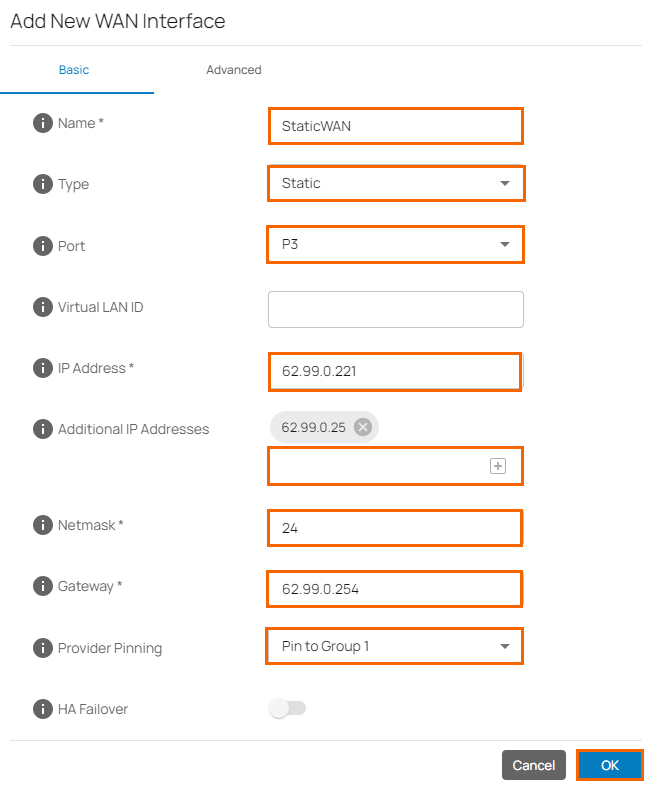
The Add NEW WAN Interface window opens. Specify values for the following:
Name – Enter a name for your uplink
Type – Select Static from the drop-down list.
Port – Select the port where your uplink is connected to. Default for DHCP connections is p4. Note: Port 1 is reserved for High Availability.
Virtual LAN ID (Optional) – If required, enter the Virtual LAN ID this interface is connected to.
IP Address – Enter the IP address assigned to your appliance.
Additional IP Addresses – Enter one or more valid additional IP address and click +. Note: You must enter valid and distinct additional IP addresses. For more information, see How to Configure Additional IP Addresses to a Static WAN Interface.
Netmask – Enter the CIDR netmask suffix.
Gateway – Enter the gateway IP address.
Provider Pinning – Select a provider classification from the drop-down list.
HA Failover – Only available in a High Availability cluster. Click to enable. For more information, see How to Enable Interface Monitoring in a High Availability Cluster.

Click OK.
Click Save.
