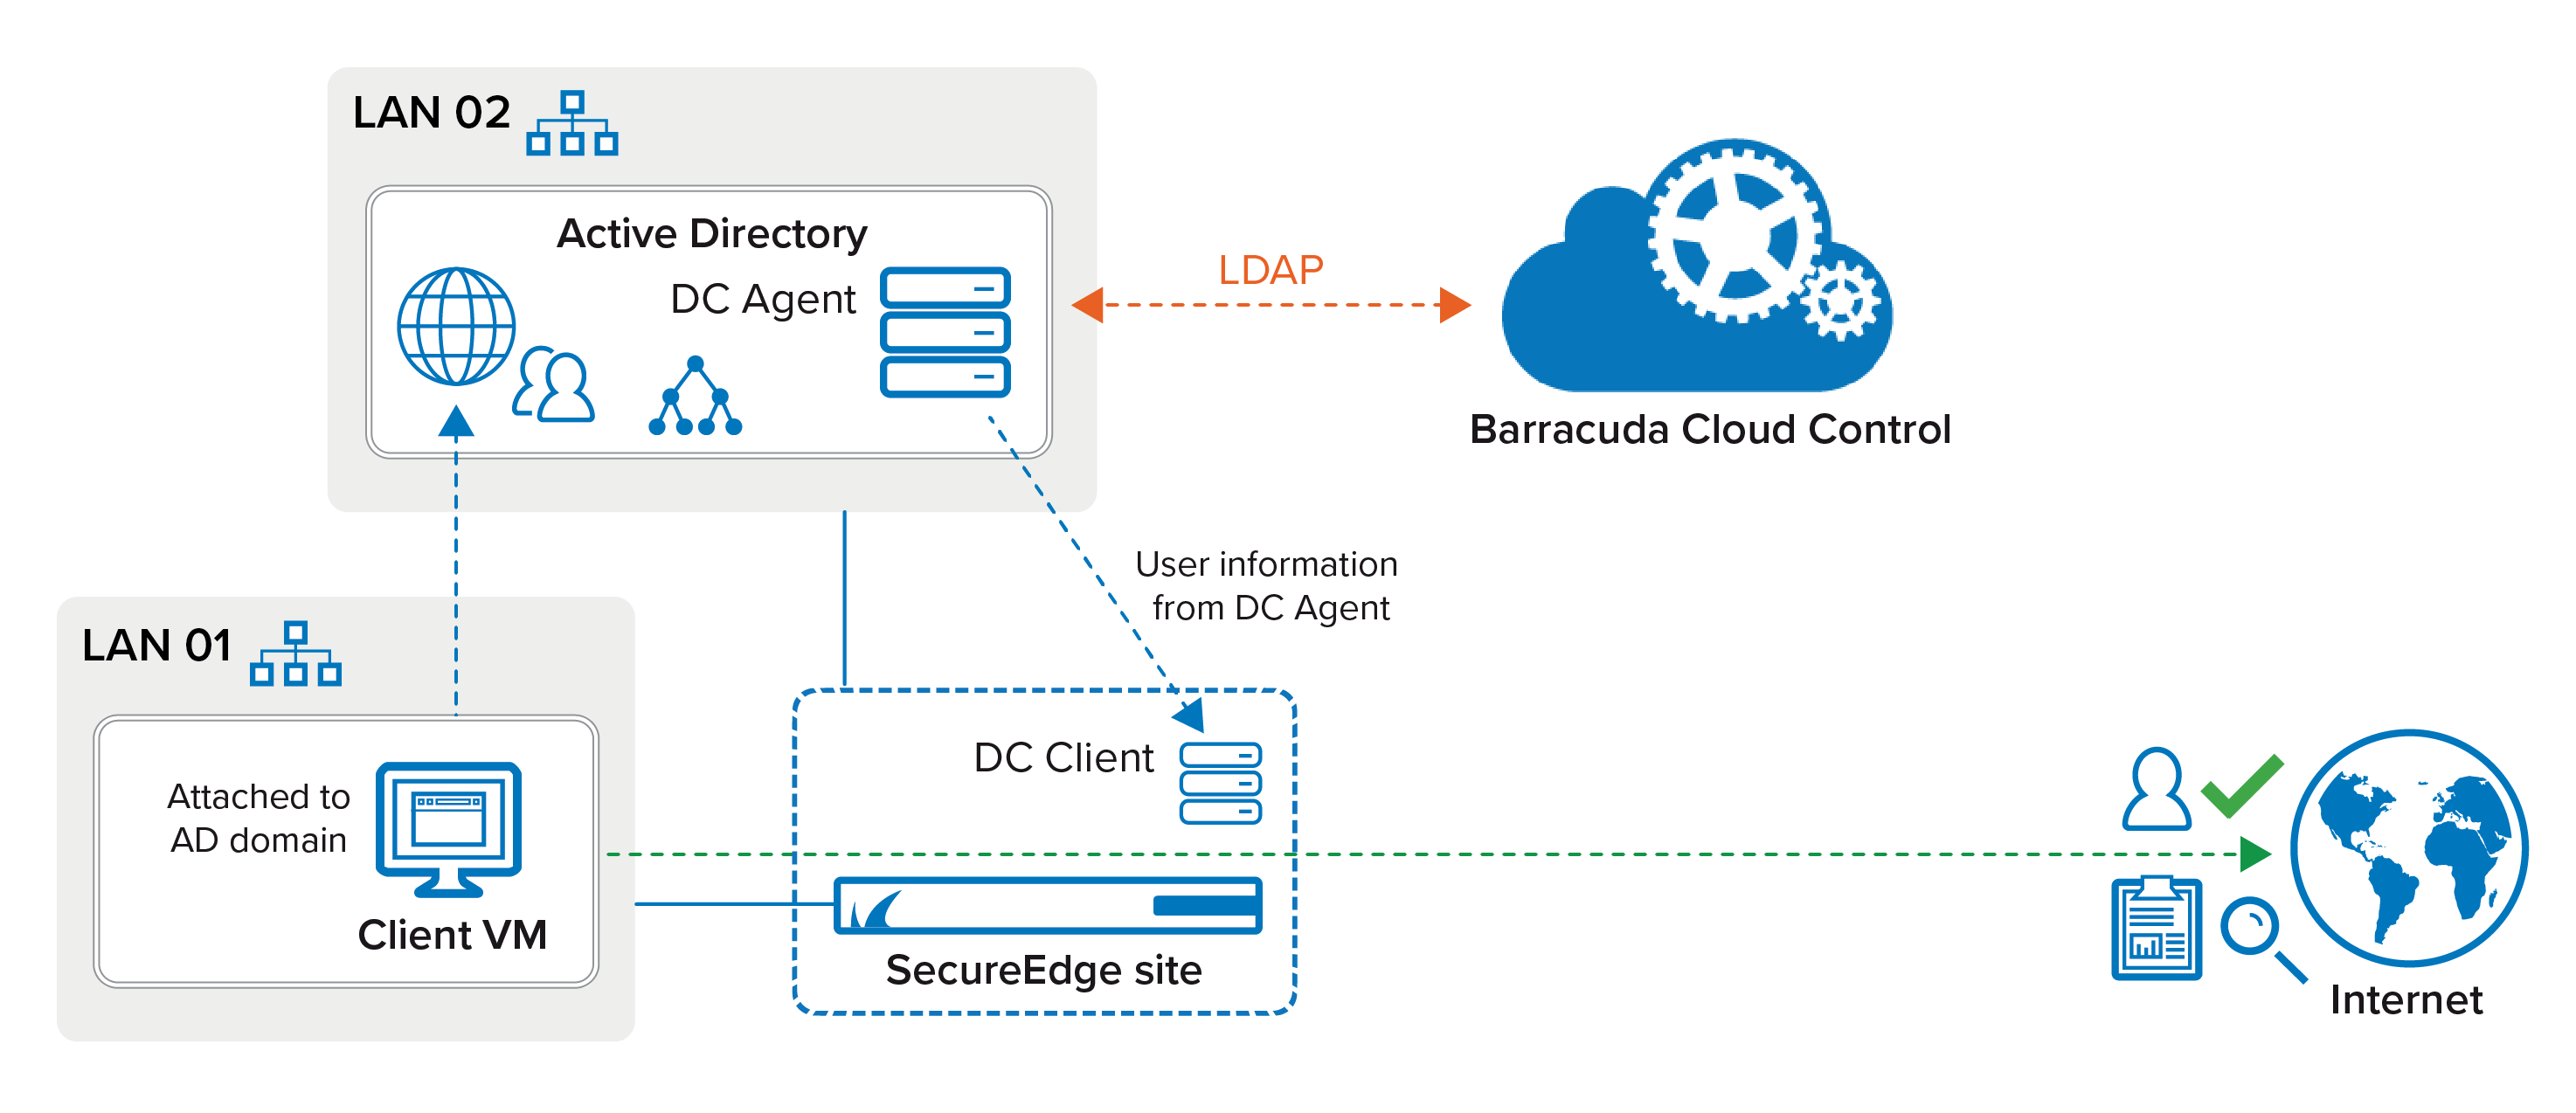
The Barracuda SecureEdge Manager allows administrators to configure the Domain Controller (DC) Agent, which acts as the connector between various Barracuda Networks products and Microsoft domain controllers to transparently monitor user authentication. For Barracuda SecureEdge, the DC Agent setting is workspace scoped. The DC Agent maps user logins to IP addresses and can provide user identity information when traffic from a LAN address arrives at a SecureEdge site or private Edge Service. To enable this functionality, you need to install the Barracuda DC Agent on the AD server. All SecureEdge appliances must able to reach and connect to the DC Agent on the AD server and retrieve the User-IP mappings from it.

Requirements and Limitations
For the Barracuda DC Agent to work, you must install DC Agent version 7.2.4 or higher.
If the machine is being used by several users, mapping IP addresses to users is restricted to the user who last logged into a machine. This is a known limitation for the DC Agent.
Before You Begin
Before you configure the DC Agent authentication, you must install the Barracuda DC Agent on the Microsoft Active Directory server. For more information, see Barracuda DC Agent for User Authentication. For more information on how to sync your LDAP Active Directory in the Barracuda Cloud Control account, see LDAP Active Directory and Microsoft Entra ID.
Configure the DC Agent on the SecureEdge Manager
Configure the DC Agent settings on Barracuda SecureEdge:
Go to https://se.barracudanetworks.com and log in with your existing Barracuda Cloud Control account.
In the left menu, click the Tenants/Workspaces icon and select the workspace you want to configure the DC Agent for your sites or private Edge Services.
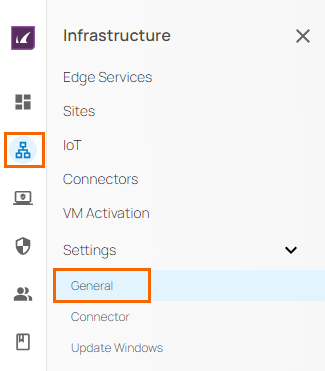
Go to Infrastructure > Settings.
Expand the Settings menu on the left and select General.

The General windows opens. In the Site Specific DC Agent IP section, specify the following:
Global DC Agent IP – Enter the valid IP address of the Domain Controller Agent that you have configured. By default, the Domain Controller Agent setting is empty for new workspaces.
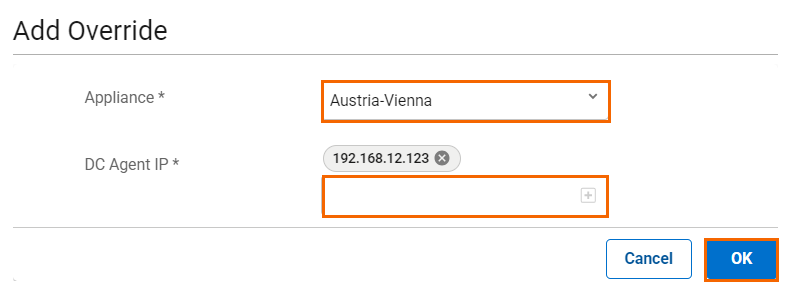
Site Specific DC Agent IP – Click + to enter the DC Agent IP address for a specific Site or Private Edge Service. The Add Override window opens. Specify the values for the following:
Appliance – Select the appliance from the drop-down menu.
DC Agent IP – Enter the valid IP address for the DC Agent.


Click Save.
After the configuration is complete, you can verify that changes to the DC Agent setting in the Audit Log have been made and that notifications have been sent. In the selected workspace, all SecureEdge appliances should receive a DC client entry with the provided IP.
Configure the Barracuda DC Agent for UPN Settings
First install the latest 7.x version of the Barracuda DC Agent either on the domain controller or on a dedicated Windows PC on your office network.
After installing the Barracuda DC Agent, verify that the DC Agent service is running correctly.
Launch the application and complete the following steps:
For more information on how to set up Active Directories, appliances, and filters on the DC Agent, see How to Get and Configure the Barracuda DC Agent.On the Active Directories tab, define the location and login credentials for your Active Directory.
On the Appliances tab, add the internal IP address and a description for the Barracuda Networks appliance you want to use the DC Agent with.
On the Filters tab, add filters for the IP address, user, or group you don't want the DC Agent to capture and send login information to your Barracuda Networks products for.
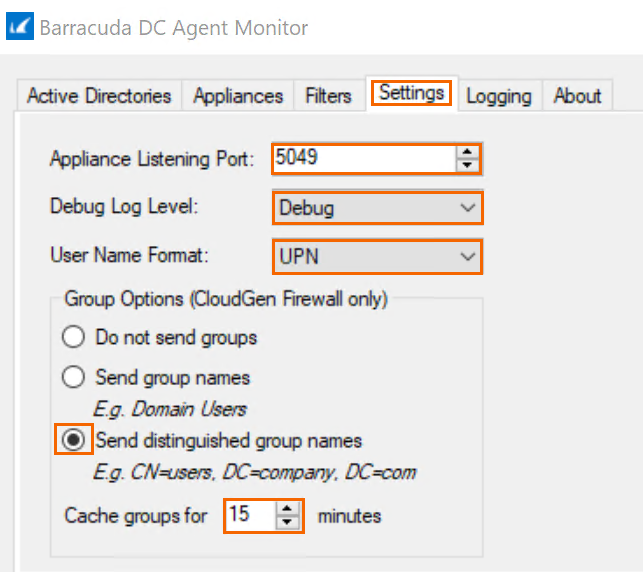
To set up a User Principal Names (UPN) on the Barracuda DC Agent, click Settings.
On the Settings tab, specify the following:
Appliance Listening Port – The default is port 5049. If required, you can change the TCP listening port. Note: Make sure that you also specify the same port on all configured Barracuda Networks products.
Debug Log Level – Select the debug log level from the drop-down menu. You can choose between the following: Errors Only = log errors only, Info = informational, and Debug = verbose (most information logged). For example, in this case, select Debug.
User Name Format – Select UPN.
Group Options ( CloudGen Firewalls only) – Select Send distinguished group name. Note: Select the option that best fits your logging requirements. If group information is required for authenticated users, select one of these group name types.
Cache groups for – Select the amount of time, in minutes, to allow the DC Agent to rely on cached login information. Note: Since users will most likely log in once/workday, the default time is 480 minutes (8 hours). The shorter this time is, the more often the DC Agent will retrieve login event information from the domain controller and pass it to the Barracuda Networks product, which requires more processing overhead.

Click Save.
