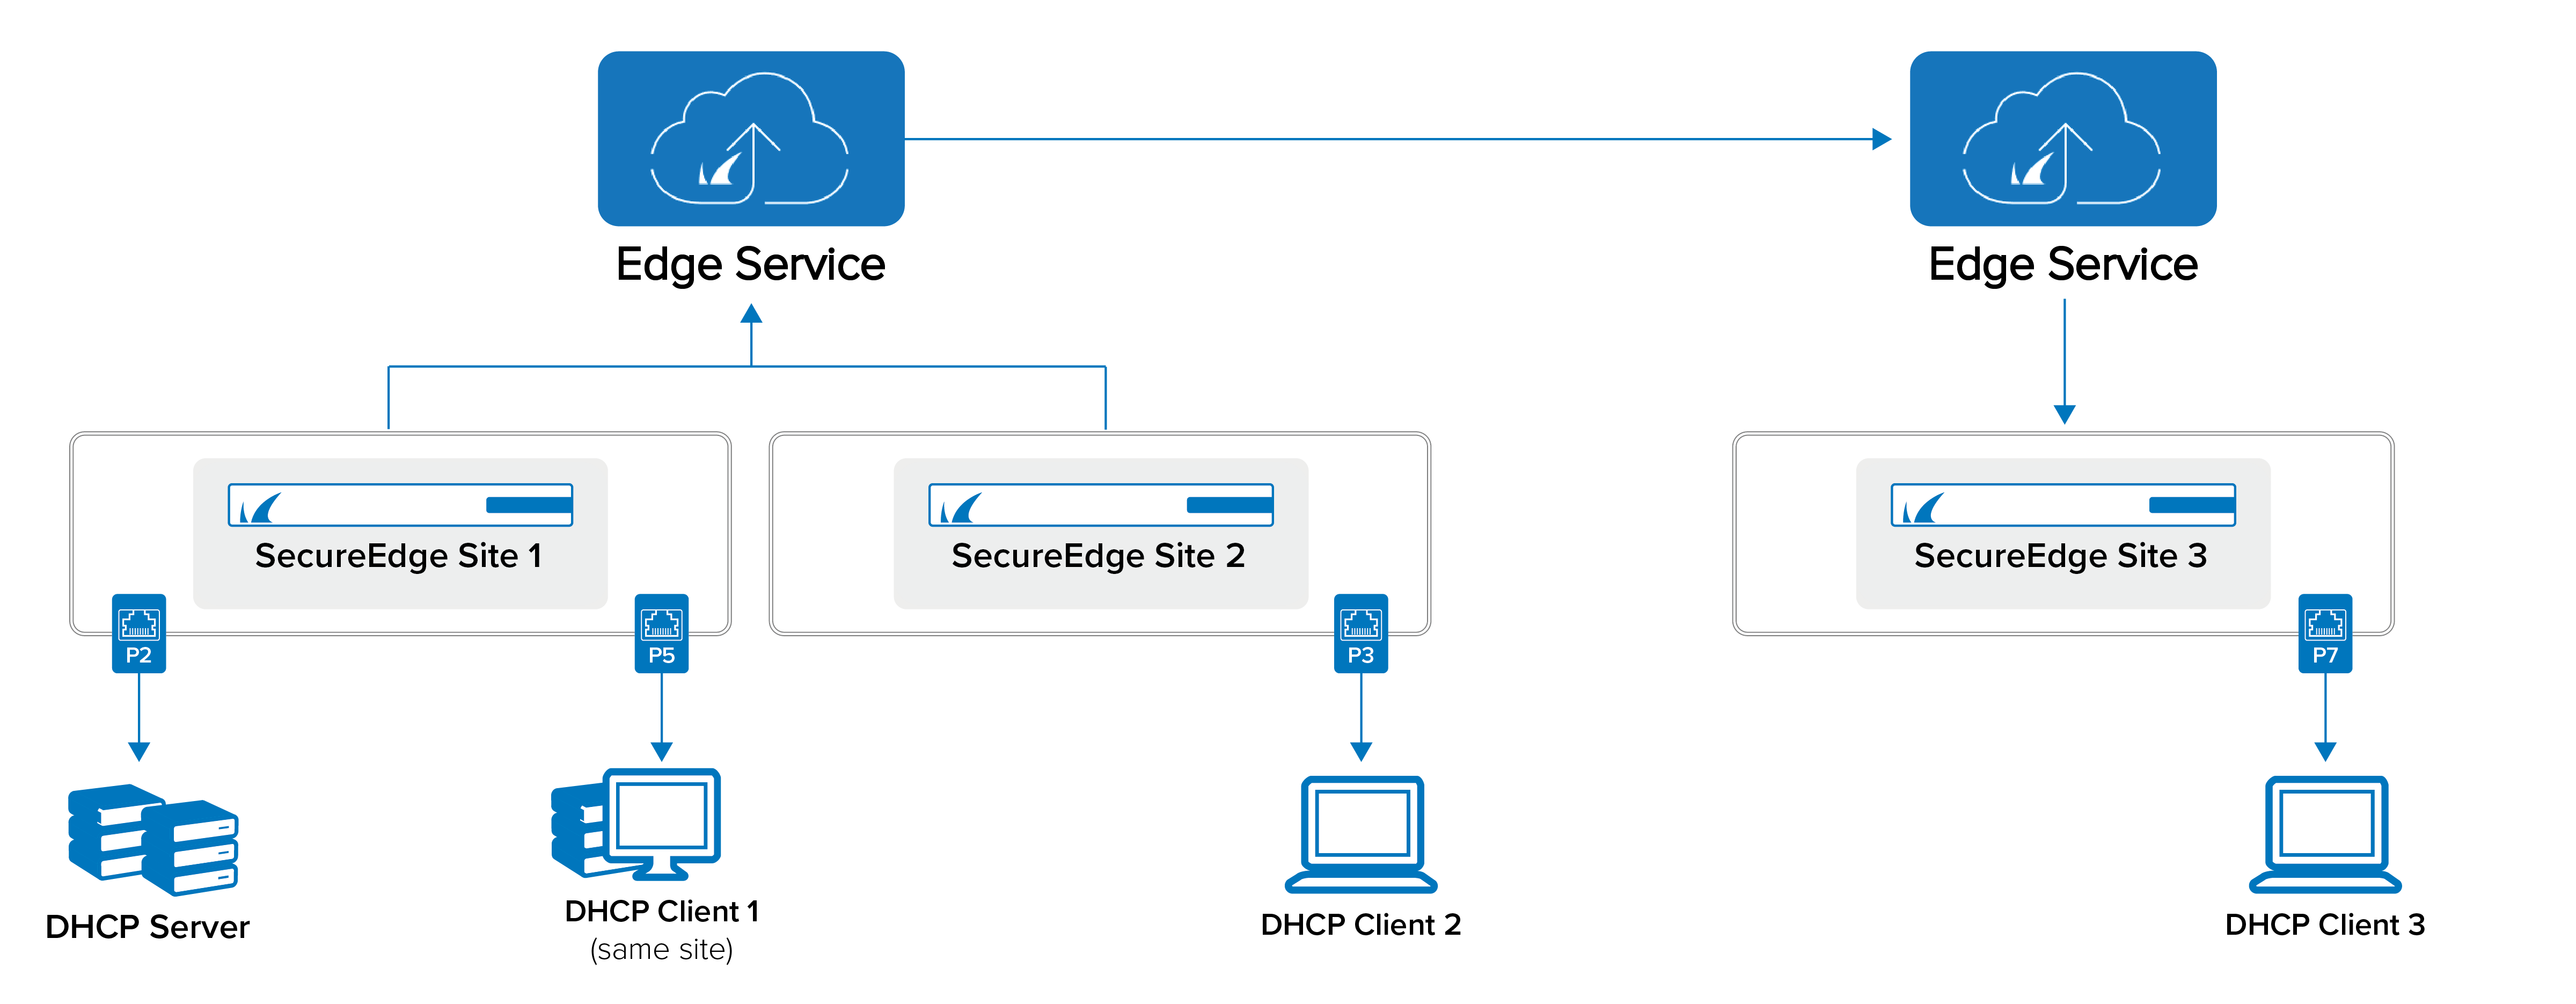
Barracuda SecureEdge now allows you to configure DHCP relay of requests received on specific LAN ports of SecureEdge devices, such as a Site or a Private Edge Service. DHCP relay can be used to share a single DHCP server across logical network segments that are separated by a SecureEdge appliance. DHCP relay works with both hub-and-spoke setups and through multiple hubs. DHCP relay can be configured either during deployment or later through the Sites / Private Edge Service configuration page. For more information on configuring during deployment, see How to Create a T/VT Site Configuration in Barracuda SecureEdge.

Requirements and Limitations
- You cannot configure a DHCP server on SecureEdge and DHCP relay on the same port.
- DHCP relay is configurable only on SecureEdge Sites and Private Edge Services.
- The DHCP server can run in an Azure VNET.
If you configure a WAN interface as an inline bridge, you cannot enable DHCP relay on the whole appliance.
Step 1. Configure the DHCP Relay Server
- Go to https://se.barracudanetworks.com and log in with your existing Barracuda Cloud Control account.
- In the left menu, click the Tenants/Workspaces icon and select the workspace you want to configure the DHCP server for your Sites or Private Edge Services.
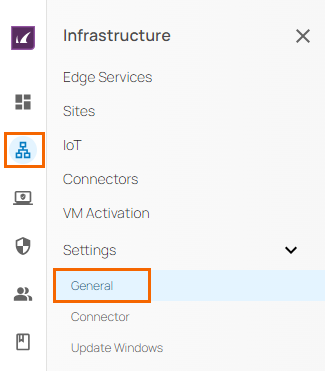
- Go to Infrastructure > Settings.
- Expand the Settings menu on the left and select General.

- In the DHCP Relay Server section, specify the following:
- IP Address – Enter the valid IP address of the DHCP server that you want to use. By default, the DHCP Server setting is empty for new workspaces.

- IP Address – Enter the valid IP address of the DHCP server that you want to use. By default, the DHCP Server setting is empty for new workspaces.
- Click Save.
After the configuration is complete, you can verify that changes to the DHCP server setting in the Audit Log have been made and that notifications have been sent.
Step 2. Enable DHCP Relay on Site/Private Edge Service
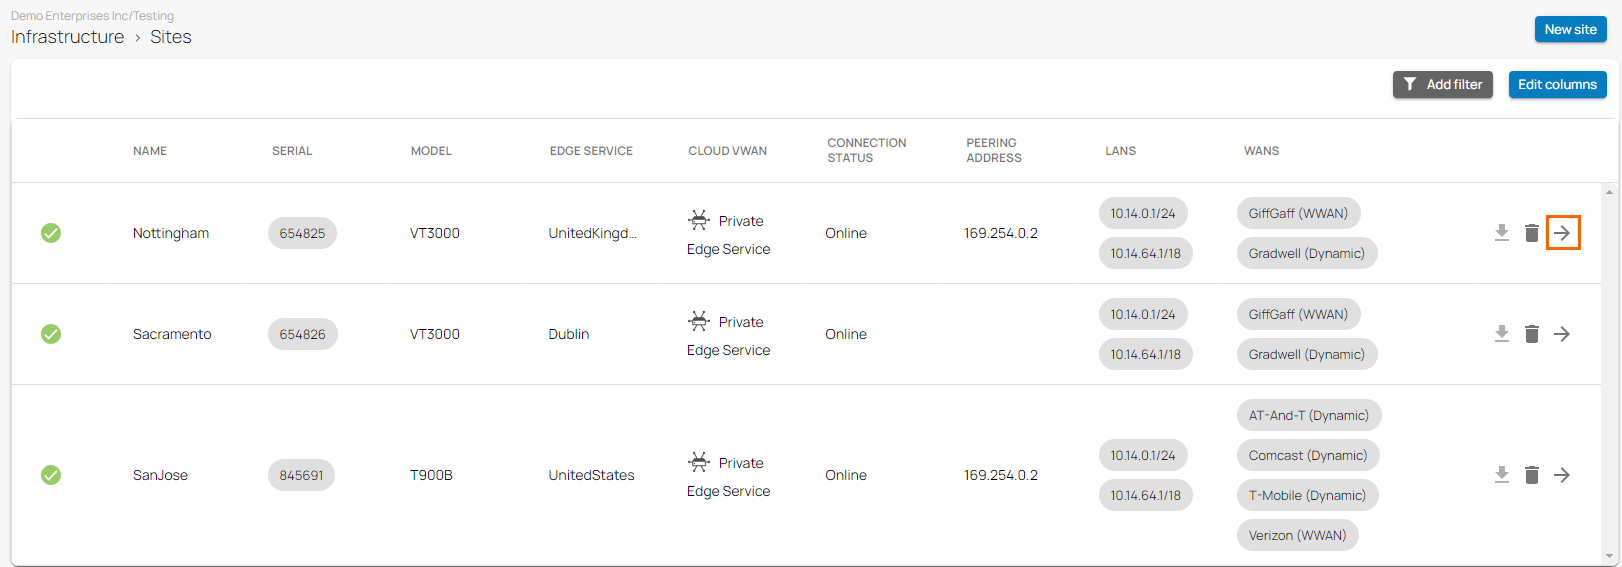
- Go to Infrastructure > Sites. The Sites page opens.
- Select the site where you want to enable the DHCP relay. You can either search for the name or serial, or use filters to tailor the list of displayed sites. You can also simply scroll through the list. Click on the arrow icon next to the site you want to edit.

- In the site menu, go to Settings > DHCP and in the DHCP NETWORKS section, click on the pencil icon next to the LAN interface you want to configure DHCP relay for.

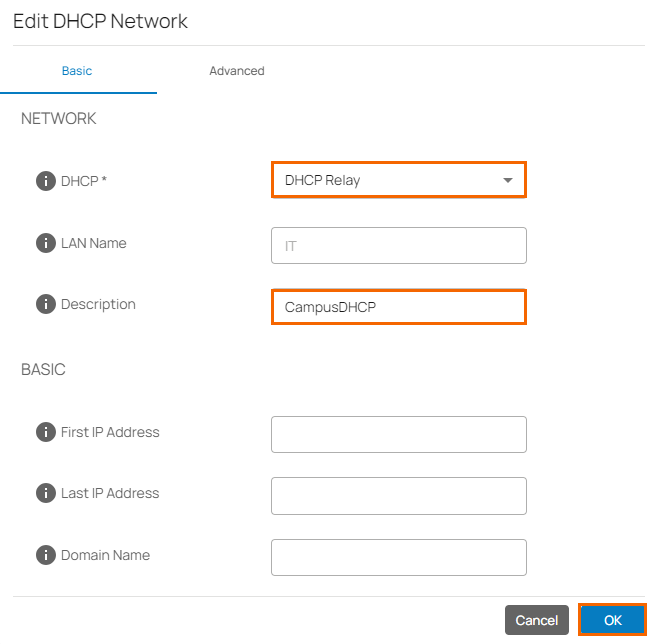
- The Edit DHCP Network window opens.
- In the BASIC tab, specify a value for the following:
DHCP – Select DHCP as DHCP Relay from the drop-down menu and specify a value for the following:
Description (Optional) – Enter a brief description.

Click OK.
After the configuration is complete, you can see that DHCP relay appears on the DHCP user interface table. In addition, you can verify that changes to the DHCP setting in the Audit Log have been made and that notifications have been sent.
