

This article outlines the procedure to create a SecureEdge Notification Profile. A Notification Profile is a configurable setting that defines how and when notifications are sent to users, including the event types to monitor and communication channels to use.
Create a Notification Profile
Go to https://se.barracudanetworks.com and log in with your existing Barracuda Cloud Control account.
The chosen Tenant/Workspace is displayed in the top menu bar.
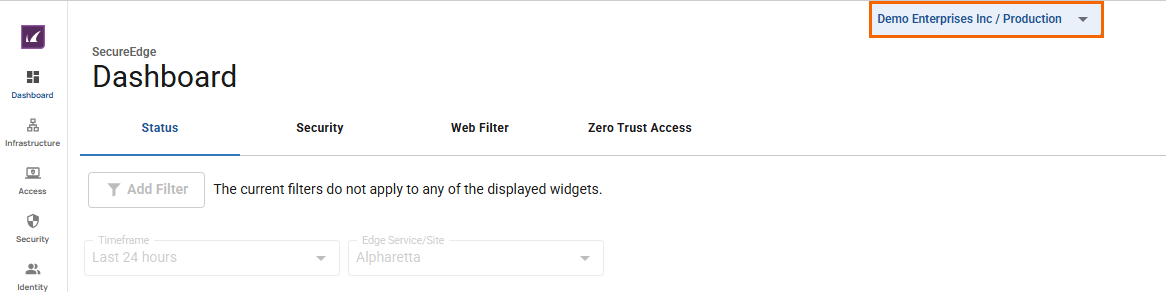
Click the expandable drop-down menu and select the workspace you want to add a notification for.

Go to Reports > Notifications.
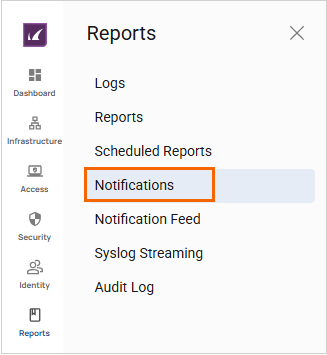
The Notifications page opens. Click Add Notification Profile to add a new notification profile.

The Add Notification Profile window opens. Specify values for the following:
Name – Enter a unique name for the notification. This field is mandatory.
Description – Provide a brief description.
In the Actions section, specify the value for:
Action type – Select Email from the drop-down menu.
Email address – Enter an email address and click +. This field is mandatory. Repeat to add more mail addresses to the list of recipients of this notification.
In the Scope sections, specify values for the following:
Scope – From the drop-down menu, select the notification scope. You can choose between the following:
All Sites – Allows you to set notifications for all Sites in your workspace. Note that if you select All Sites as your scope, only Site-related events will be available, such as Infrastructure and Security.
All Edge Services – Allows you to set notifications for all Edge Services in your workspace. Note that if you select All Edge Services as your scope, only Edge Services-related events will be available, such as Infrastructure and Security.
Custom Sites and Edge Services – Allows you to set notifications for specific Sites / Edge Services in your workspace.
If Custom Sites and Edge Services is selected, specify a value for the following:
Device/Region – Select one or more device from the list and click +. You can add multiple devices.
SecureEdge Manager – Allows you to set notifications for the SecureEdge Manager-related events in your workspace. Note that if you select SecureEdge Manager as your scope, only audit- and SecureEdge Manager-related events will be available. For example, in this case, Scope is selected as SecureEdge Manager.
In the Notifications section, specify values for the following:
Categories – Select Audit from the drop-down menu. The available categories will depend on your defined scope criteria. You can choose between Audit, Manager, or All.
To select notification events for your categories, do the following:
Search for a specific notification event within your chosen categories, or click Select All <Your Categories> Events to select all events in those categories. Note: You must select at least one event.
Select the box for your required notification events. Repeat to add more events. For example, this case adds three events to the SecureEdge Manager scope under the category Audit: Create Workspace, Update Workspace, and Delete Workspace.

Click Save.
Verify that you receive the message Notification Profile Created Successfully and that the new notification profile appears on the Notifications page. For example, in this case, 3 events are created under Audit.

You will receive an email from the Barracuda SecureEdge Notification service.
In addition, go to Reports > Notification Feed to check your records of sent and failed notifications, including date, time, and delivery method. It offers search and filter options to review the notification status. For details, see How to Verify Notification Feed.
Edit an Existing Notification Profile
Select the workspace you want to edit a notification for.
Go to Reports > Notifications.
The Notifications page opens. Click the icon of three vertical dots next to the notification you want to edit.

Click Edit.
The Edit Notification Profile window opens. Edit the value you are interested in.
Click Save.
Verify that you receive the message Notification Profile Updated Successfully and that the updated notification profile appears on the Notifications page. You will receive an email from the Barracuda SecureEdge Notification service. In addition, you can check your notification update status under Reports > Notification Feed.
Remove an Existing Notification Profile
Select the workspace containing your notification.
Go to Reports > Notifications.
The Notifications page opens. Click the icon of three vertical dots next to the notification you want to remove.

The Delete Profile windows opens.
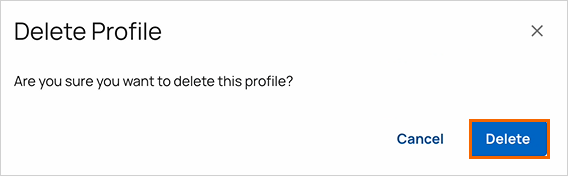
Click Delete to confirm.
Verify that you receive the message Notification Profile Deleted Successfully and that the deleted notification profile disappears from the Notifications page. You will receive an email from the Barracuda SecureEdge Notification service. In addition, you can check your notification update status under Reports > Notification Feed.
(Optional) Create Notification Profile for Site Licensing
Select the workspace you want to add a notification for.
Go to Reports > Notifications.
In the Notifications page, click Add Notification Profile.
The Add Notification Profile window opens. Specify values for the following:
Name – Enter a unique name for the notification. This field is mandatory. E.g., Default Licensing Notification
Description – Provide a brief description.
In the Actions section, specify the value for:
Action type – Select Email from the drop-down menu.
Email address – Enter an email address and click +. This field is mandatory. Repeat to add more mail addresses to the list of recipients of this notification.
In the Scope sections, specify a value for the following:
Scope – Select SecureEdge Manager from the drop-down menu.
In the Notifications section, specify values for the following:
Categories – Select All from the drop-down menu. Search for a specific notification. For example, in this case, search for “site”.
Select the box for the event Site License Expiring Soon.
Select the box for the event Site License Entered Grace Mode.
Select the box for the event Site License Expired.

Click Save.
Verify that you receive the message Notification Profile Created Successfully and that the new notification profile appears on the Notifications page. For example, in this case, 3 events are created under Manager.

In addition, you will receive an email from the Barracuda SecureEdge Notification service.