

The History page is the most powerful tool for troubleshooting. To open the page, click the FIREWALL tab and select History.

The History page displays all sessions when the slot ends. TCP sessions usually end with the FIN-FINACK-ACK sequence. This is displayed as Normal operation in the Info column. Resets are terminated with Session idle timeout or Last ACK timeout. For the stateless UDP and ICMP protocols, "pseudo" sessions are created that usually end with a timeout.
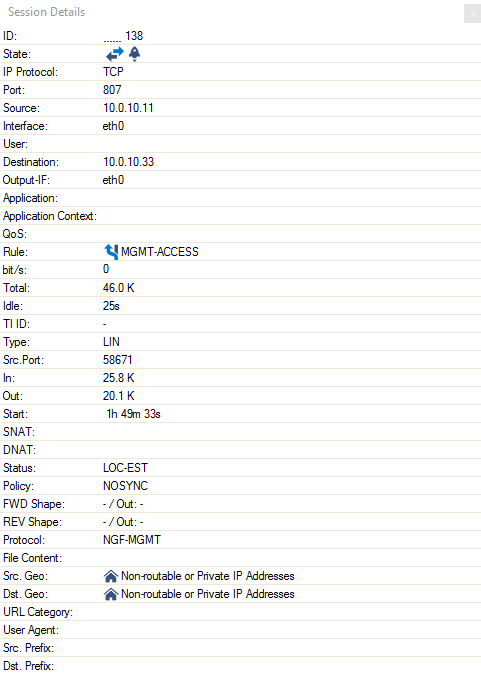
The following information is provided for each session:
AID – Access ID, including an icon for established connections (green), blocked connections (red), and impaired connections (yellow), and consecutive numbering for all connections.
IP Proto – The protocol used. For example, TCP, UDP, or ICMP.
Port – The destination port (or internal ICMP ID).
Source – The source IP address.
User – The username of the affected user and group.
Destination – The destination IP address.
Destination Info – Destination Info is a compound string of multiple partial names/symbols and relates to the template:
Output-IF – The outgoing interface.
Next Hop – The next hop.
Application – The name of the affected application, e.g., Web browsing, Ubuntu Update.
Application Context – The context of the affected application., e.g., www.barracuda.com
Count – The number of tries. The counter applies when a connection attempt hits a specific rule with Firewall History Entry enabled in the Advanced rule configuration. Removal of old entries is handled according to a fixed buffer size that can be adjusted in the Infrastructure Services > General Firewall Configuration > History Cache page.
Last – Time passed since the last try.
Rule – The name of the affected firewall rule.
Info – Additional information.
Org – Origin. The value can be one of the following:
LIN – Local In; incoming traffic on the box firewall.
LOUT – Local Out; outgoing traffic from the box firewall.
LB – Loopback; traffic via the loopback interface.
FWD – Forwarding; outbound traffic via the forwarding firewall.
IFWD – Inbound Forwarding; inbound traffic to the firewall.
PXY – Proxy; outbound traffic via the proxy.
IPXY – Inbound Proxy; inbound traffic via the proxy.
TAP – Transparent Application Proxying; traffic via the virtual interface.
LRD – Local Redirect; redirect traffic configured in forwarding ruleset.
MAC – The MAC address of the interface.
Src NAT – The source NAT address.
Dst NAT – The destination NAT address.
Out Route – Unicast or local.
Protocol – The affected protocol.
Src./Dst. Geo – The geographic source/destination of the active connection.
URL Category– Category of the destination URL.
Src. Named Network – The compound string of a named network used for a source.
Example:example.com///Location-51/Department-18/Devices-3Dst. Named Network – The compound string of a named network used for a destination.
Example:example.com///Location-51/Department-18/Devices-3Src. VR Instance – The source IP address of a virtual router instance.
Dst. VR Instance – The destination IP address of a virtual router instance.
Source Info – Source Info is a compound string of multiple partial names/symbols and relates to the template:
Source Geo: An icon that is either
a flag symbol that relates to the state at the given geo-location
a symbol of a house that stands for a private IP address
EITHER:
Source IP: the source IP address that is associated with the geographical information (Geo-IP).
Example:
OR:
Named Network: If the IP address is defined by a named network, then the name of the Named Network is used.
Destination Info – Destination Info is a compound string of multiple partial names/symbols and relates to the template:
Destination Geo: An icon that is either
a flag symbol that relates to the state at the given geo-location
a symbol of a house that stands for a private IP address
EITHER:
Destination IP: the destination IP address that is associated with the geographical information (Geo-IP).
Example:
OR:
Named Network: If the IP address is defined by a named network, then the name of the Named Network is used.
Interface – The name of the interface is a compound of multiple partial names and relates to the template:
Output interface (see also Output-IF in this list)
"@"
(Optional): Name of the tunnel
Name of the box
"_"
(Optional): Name of the cluster
"_"
(Optional): Name of the range
Example: pvpn0@PGRP-MYBOX_Cluster2_1
Column Control
Each of the upper information category names prefixes a column as the column name in the History view. Such a collection of columns is derived from the Factory Default configuration setup and handled by Barracuda Firewall Admin as a directly related configuration setup after your first login to a specific firewall.
When you log out from the firewall, all changes made to the columns during the last session are automatically saved to this configuration and will be automatically reloaded when you log in back to your firewall again.
By that way, Barracuda Firewall Admin manages such all such setups for every administered firewall.
Handling of Individual Setups
By right-clicking on the name of a column, a pop-up menu is displayed with the list entry Column at the bottom. By selected this entry, another pop-up menu is displayed depending if your firewall is operating in Policy Profiles mode or not. At that point, you have the option to select from 5 entries by which you can control how Barracuda Firewall Admin handles the changes to the defaults and whether these defaults should be used by only a specific or by all firewalls.
Non-Policy-Profile Mode | Policy-Profile-Mode | |
|---|---|---|
Live View | 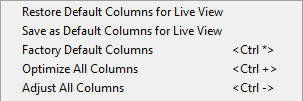 | 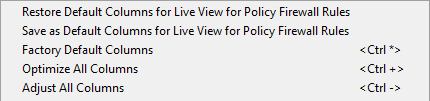 |
History View | 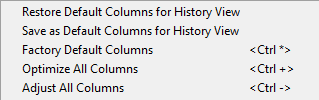 | 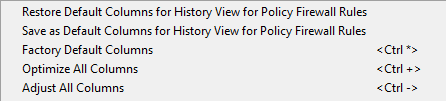 |
Threat View | 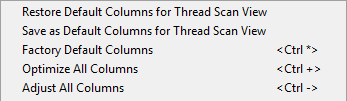 | 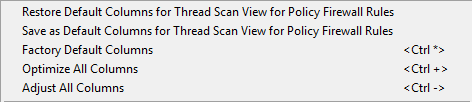 |
The common naming parts for all the upper 6 options with their meaning are:
Restore Default Columns…: Restores the column setup from your last actively saved favorite setup. This configuration setup can be used on any firewall to which you connect with Barracuda Firewall Admin. Note that when you log out from a specific firewall while using this restored setup, this setup will be stored as your firewall related default setting and will be reloaded upon your next login on the same firewall.
Save as Default Columns…: Saves the current selection of columns as your favorite setup. This setup can be used on any other firewall on demand by clicking Restore Default Columns… .
Factory Default Columns: Restores the preset factory setup of columns to the view. This will overwrite your currently used setup and can not be undone!
Optimize All Columns: Optimizes all columns to consume a minimum width within the view. This can cause an empty area to the right side of the view.
Adjust All Columns: Adjusts all columns to fit into the total width of the visible view.
Filter Options
You can filter the list of sessions by traffic type, status, and properties. Click the Filter icon on the top right of the ribbon bar to access the filtering options.
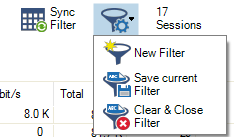
Click the Filter icon.
Select New Filter. The Traffic Selection section opens on the top left of the list.
Expand the Traffic Selection drop-down menu and select the required checkboxes:
Forward – Sessions that are handled by the Forwarding Firewall.
Loopback – System-internal data exchanged by the loopback interface.
Local In – Incoming sessions that are handled by the box firewall.
Local Out – Outgoing sessions that are handled by the box firewall.
IPv4 – IPv4 traffic.
IPv6 – IPv6 traffic.
From the Status Selection list, you can select the following options to filter for certain traffic statuses:
Closing – Closing connections.
Established – Established connections.
Failing – Failed connections.
Pending – Connections that are currently being established.
You can set additional filters based on the content of the menu list when you click the '+' symbol in the blue ribbon bar. Although these filters are displayed together in a common menu list for selection, they belong to two groups of filters:
"Single filter" – A single filter relates directly to a single column name in the table view of the window, e.g., IP Protocol, Port, Source, Destination.
"Compound filter" – A compound filter relates to two columns of the table, e.g., Source/Destination, Any Interface, VR Instance (Src/Dst), that have a certain category in common, e.g., an IP address, a Named Network Object. You can regard such a filter as consisting of two separate filters (e.g., Source and Destination) that are linked to each other with a logical 'OR' operator and substituted by the filter Source/Destination.

These additional filters can be used both on visible and blanked-out columns. As an example, you can activate a certain filter, e.g., Source/Destination, and the table view will display all matching records even if the column Destination is not visible.
Currently, there are the following compound filters you can select: Source/Destination, Any Interface, VR Instance (Src/Dst).
When you click the '+' icon in the blue ribbon bar, the menu list is created at runtime. The menu list first displays the filters that relate to the visible columns in the table view, followed by all remaining filters whose related columns are not visible. The following menu list is an example of the contained filters: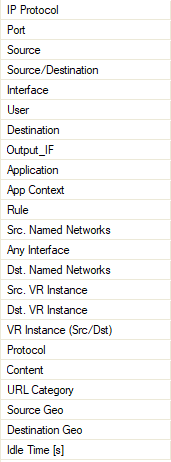
Select the requested filter category from the list.
Enter the exact value into the edit field of the filter criterion you want the data to match against, e.g., filter
Source, filter value10.17.84.65:
Some fields allow the use of wildcards (*?; !*?). Example:!Amazon*excludes all entries starting with Amazon; Y*|A* includes all entries starting with "Y" or "A". Clicking the Sync Filter icon on the top right of the ribbon bar above the filters allows you to switch to the Live view but with the same filters applied.
Managing Sessions
You can view additional information for a specific session by double-clicking an entry.
Right-click into the listing to make the following context menus available:
Remove Selected – Removes selected entries from the list. To select one or more entries, select an entry and use the shift and CTRL keys.
Clear History – Removes all entries from the access cache, depending on the criteria selected in the sub-menu.
Show Hostnames – Translates source and destination IPs to hostnames and vice versa. IP addresses are only resolved to hostnames if enabled in CONFIGURATION > Configuration Tree > Box > Infrastructure Services > General Firewall Configuration > Firewall History.
Apply Rule Tester – Offers the option for firewall rule testing.
Find – Opens a search window at the top of the list.
For more settings, see: Barracuda Firewall Admin.
The size of the caches is configured in the General Firewall settings and requires a firmware restart. For more information, see General Firewall Configuration.
Video
For a hands-on demo, please see the following training video: Firewall Policies