

The Threat Scan page lists all threats detected by the Intrusion Prevention System (IPS), the Virus Scanner service, and Advanced Threat Protection (ATP). For information on these features, see: Application Control. To access the Threat Scan page, click the FIREWALL tab and select the Threat Scan icon.
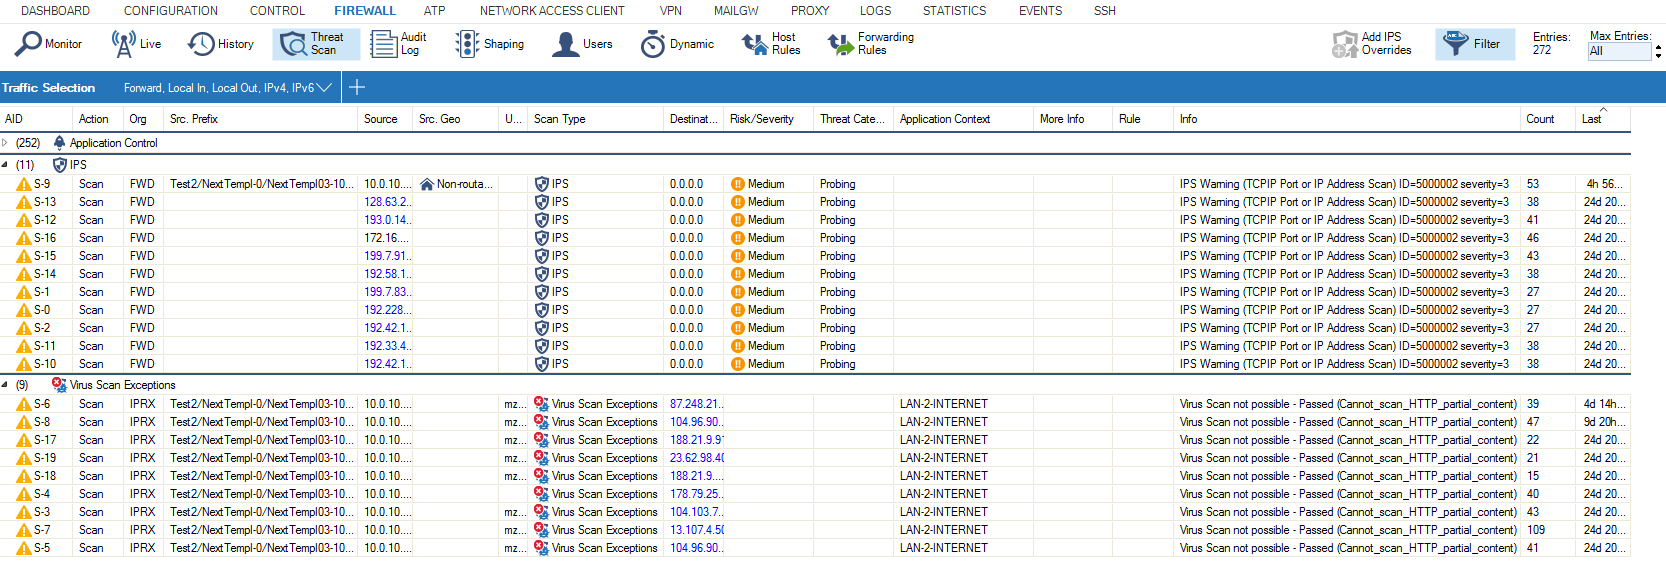
The information on the Threat Scan page is listed according to the security features (e.g., IPS, ATP, Virus Scanner service etc...) that are enabled on the firewall.
The columns display the following details:
AID – The application ID.
Action – The action performed by the IPS engine.
Scan Type – The scan type.
Org – The origin of the session.
Application – The affected application.
Protocol – The protocol used by the session.
Application Context – The application context.
Risk/Severity – The event severity.
Threat Category – The event category.
Info – Additional information (for example: IPS Warning).
Rule – The affected firewall rule.
Affected Operating System – The affected system.
Count – Displays the count.
Last – The time (h/m/s) of the last access.
IP Proto – The IP protocol.
Port – The affected port.
Source – The affected source IP address.
Destination – The affected destination IP address.
User – The affected user.
Interface – The affected interface.
MAC – The MAC address of the affected system.
Src / Dst NAT – The source / destination NAT address.
Output-IF – The output interface.
OutRoute – The routing details.
Next Hop – The next hop address.
URL Category – The URL category.
Src / Dst Geo – Displays the source / destination geolocation.
Src / Dst Prefix – Displays the source / destination prefix.
More Info – Displays additional information.
Status Icons
The status of firewall connections is indicated by the following icons:
Icon | Description |
|---|---|
Allow | |
Block | |
Fail (audit Log) Warning/Scan (History Threat Scan) | |
Drop | |
Box Selected (audit Log) | |
 | IPS Severity |
Threat Type = App Ctrl | |
Threat Type = Virus Scan | |
Threat Type = IPS |
Column Control
Each of the upper information category names prefixes a column as the column name in the Threat view. Such a collection of columns is derived from the Factory Default configuration setup and handled by Barracuda Firewall Admin as a directly related configuration setup after your first login to a specific firewall.
When you log out from the firewall, all changes made to the columns during the last session are automatically saved to this configuration and will be automatically reloaded when you log in back to your firewall again.
By that way, Barracuda Firewall Admin manages such all such setups for every administered firewall.
Handling of Individual Setups
By right-clicking on the name of a column, a pop-up menu is displayed with the list entry Column at the bottom. By selected this entry, another pop-up menu is displayed depending if your firewall is operating in Policy Profiles mode or not. At that point, you have the option to select from 5 entries by which you can control how Barracuda Firewall Admin handles the changes to the defaults and whether these defaults should be used by only a specific or by all firewalls
Non-Policy-Profile Mode | Policy-Profile-Mode | |
|---|---|---|
Live View | 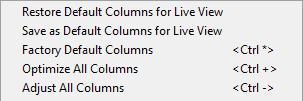 | 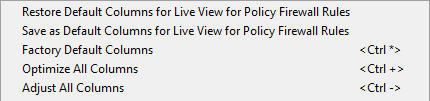 |
History View | 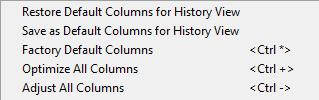 | 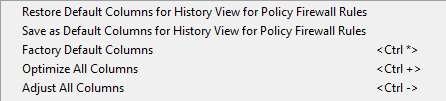 |
Threat View | 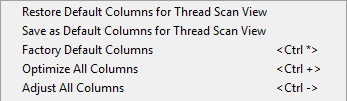 | 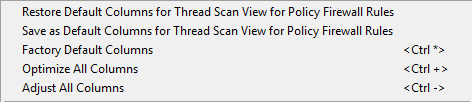 |
The common naming parts for all the upper 6 options with their meaning are:
Restore Default Columns…: Restores the column setup from your last actively saved favorite setup. This configuration setup can be used on any firewall to which you connect with Barracuda Firewall Admin. Note that when you log out from a specific firewall while using this restored setup, this setup will be stored as your firewall related default setting and will be reloaded upon your next login on the same firewall.
Save as Default Columns…: Saves the current selection of columns as your favorite setup. This setup can be used on any other firewall on demand by clicking Restore Default Columns… .
Factory Default Columns: Restores the preset factory setup of columns to the view. This will overwrite your currently used setup and can not be undone!
Optimize All Columns: Optimizes all columns to consume a minimum width within the view. This can cause an empty area to the right side of the view.
Adjust All Columns: Adjusts all columns to fit into the total width of the visible view.
Filter Options
Use the filtering functions on the Threat Scan page to display specific entries.

Click the Filter icon on the top right of the ribbon bar. The Traffic Selection section opens on top of the list.
Expand the Traffic Selection drop-down menu and select the required check boxes:
Forward – The traffic on the Forwarding Firewall.
Loopback – The traffic over the loopback interface.
Local In – The incoming traffic on the box firewall.
Local Out – The outgoing traffic from the box firewall.
IPv6 – IPv6 traffic.
To define filters for specific properties:
Click the + icon.
Select the required criteria.
Select or enter the value in the blank field.
Managing Threats Information
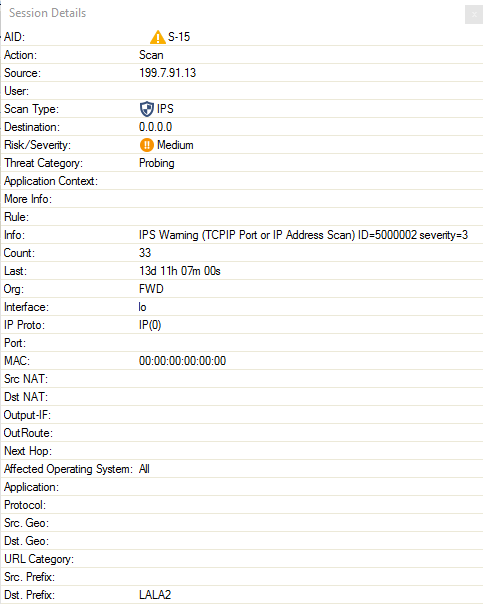
To view detailed information for a threat entry, double-click it. The Session Details window displays the ID, action, source, scan type, and destination of the threat.
To add IPS Override entries, click the Add IPS Overrides icon next to the filter on the top right of the ribbon bar. Entries will be stored in the configuration.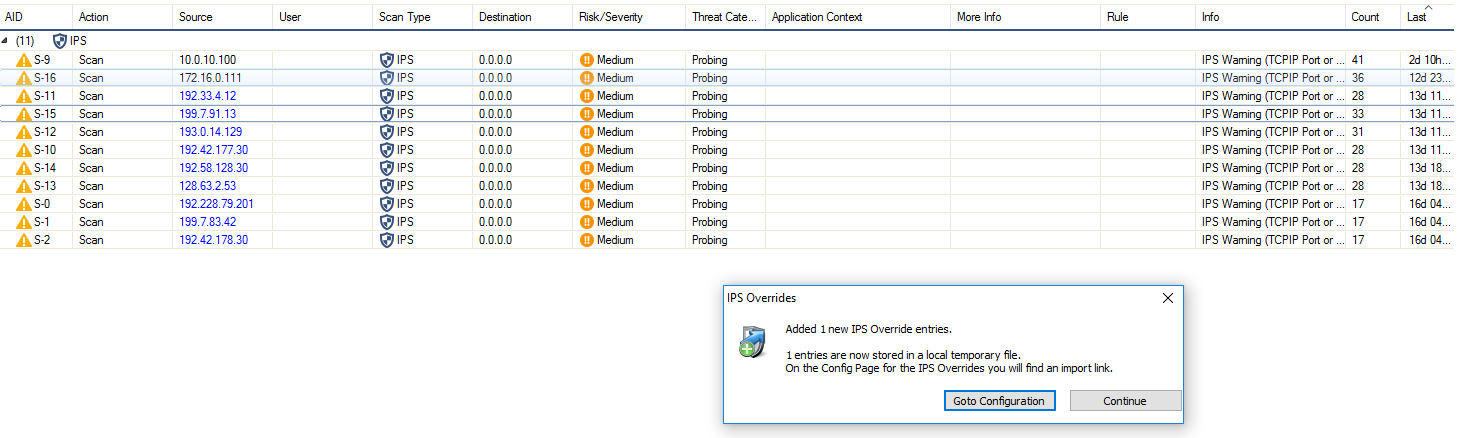
To access the IPS Overrides configuration, click Goto Configuration. For information on this feature, see: How to Manage Threats.