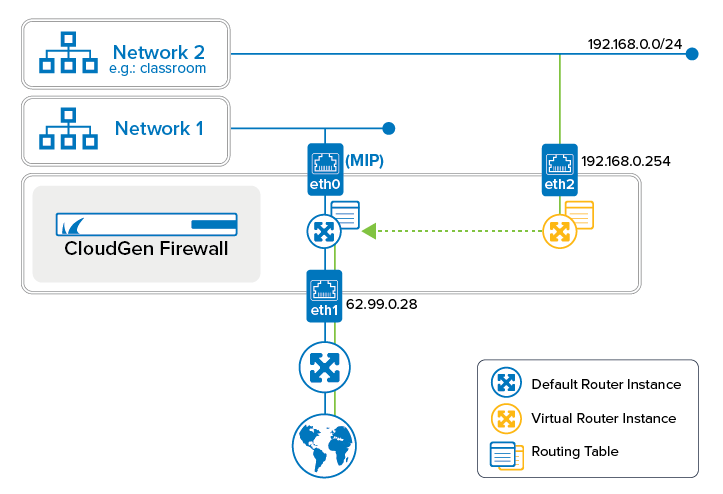
Virtual routers handle traffic on network paths that are isolated from paths handled by other routers. In certain situations, however, you might need to redirect traffic from one virtual router to another. You can redirect traffic by modifying the access rule that is directly associated with the corresponding virtual router instance.
The following example demonstrates how to redirect requests originating from the private network 192.168.0.0/24 (eth2) handled by the virtual router VR01 to the interface that is connected to the Internet (e.g., eth1) and handled by the default router. To do so, the existing access rule that forwards traffic from eth2 to eth3 must be modified.

Before You Begin
You must have already configured an additional virtual router instance. For more information, see How to Configure and Activate a Virtual Router Instance with Hardware, Virtual, VLAN, or Bundled Interfaces.
Step 1. Modify the Access Rule to Redirect Traffic
- Go to CONFIGURATION > Configuration Tree > Assigned Services > NGFW (Firewall) > Forwarding Rules.
- Click Lock.
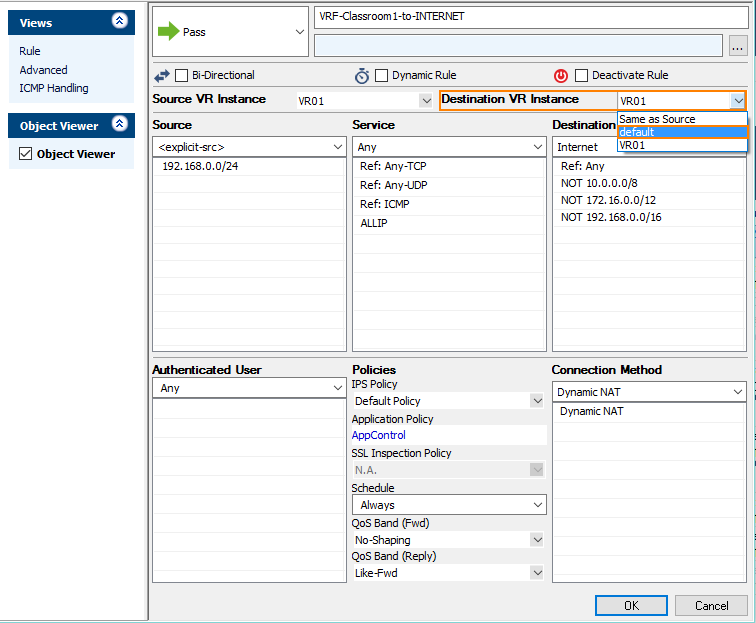
- Locate the access rule that handles the traffic flow from eth2 to eth3, e.g., VRF-Classroom1-to-INTERNET.
- Double-click the access rule to open it for modification.
- From the list Destination VR instance, select default.

- Click OK.
- Click Send Changes.
- Click Activate.
Step 2. Verify that Traffic from the Private Network is Redirected to the Default Router
Verify that the Internet is connected to the public interface that is handled by the default router, e.g., eth1. Also verify that your client PC is connected to the private network 192.168.0.0/24 and the default route points to 192.168.0.254 (eth2 on the firewall).
- Go to FIREWALL > Live.
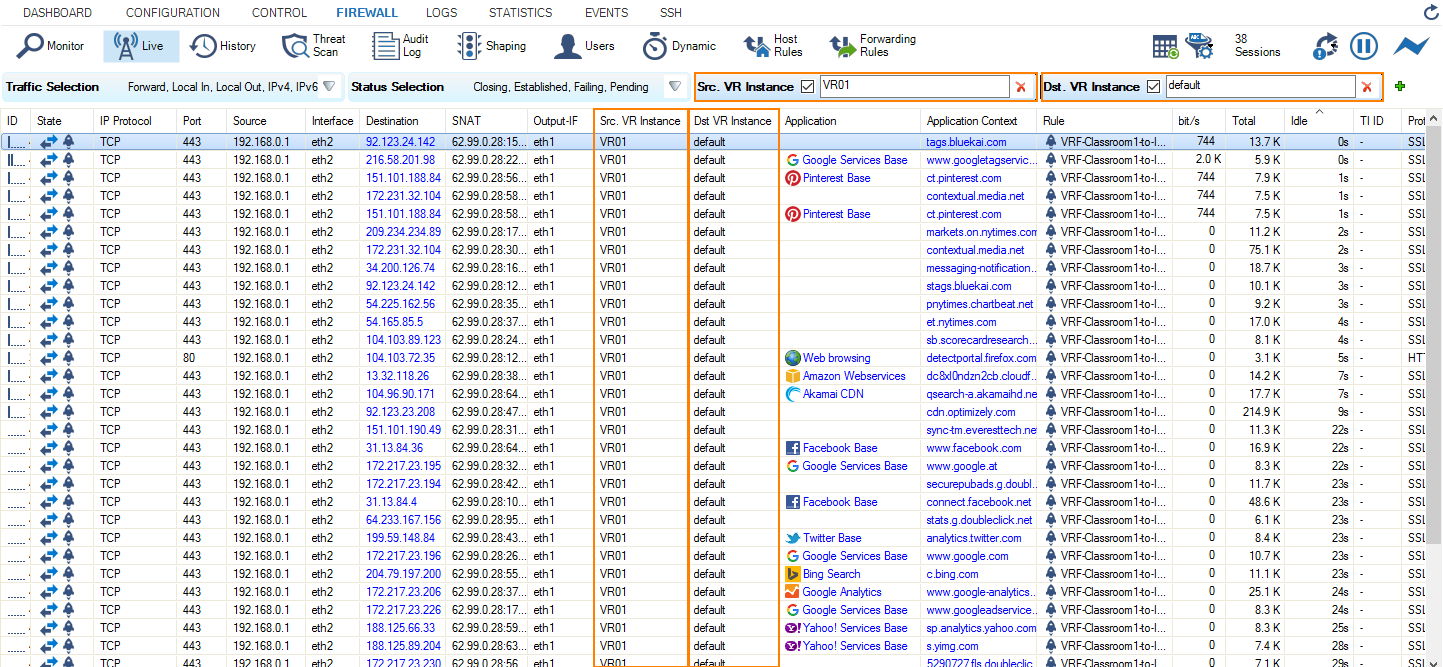
- The Live view will display a mixture of traffic flowing both through the default router and the virtual router you configured earlier, e.g., VR01.
- Click +.
- From the list, select Src. VR Instance.
- For the filter Src. VR Instance, enter VR01.
- From the list, select Dst. VR Instance.
- For the filter Dst. VR Instance, enter default.

- Create traffic on your client by requesting a website, e.g., www.nytimes.com
- Check traffic flowing between your private network (eth2, 192.168.0.1) and the Internet (eth1).

You firewall is now redirecting traffic from virtual router VR01 to the default router.
