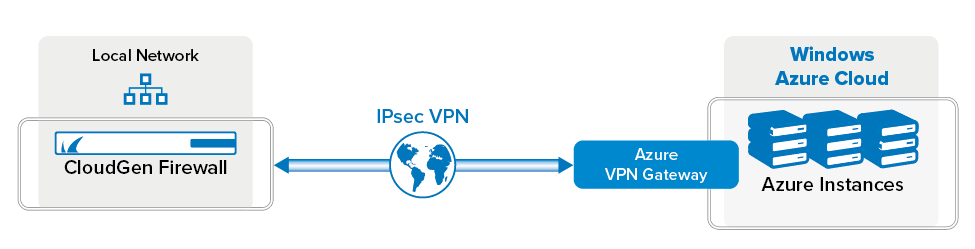
You can configure your local Barracuda CloudGen Firewall to connect to the static IPsec VPN gateway service in the Windows Azure cloud using an IKEv1 IPsec VPN tunnel.
Before You Begin
- Create and configure a Windows Azure static VPN gateway for your virtual network.
- You will need the following information:
- VPN gateway
- External IP address for the Barracuda CloudGen Firewall
- Remote and local networks
Step 1. Create a Network in the Windows Azure Cloud
Create a virtual network in the Windows Azure cloud. Choose subnets that are not present in your local networks to avoid IP address conflicts.
- Log into your Windows Azure Management Portal (https://portal.azure.com).
- Search for Virtual networks.
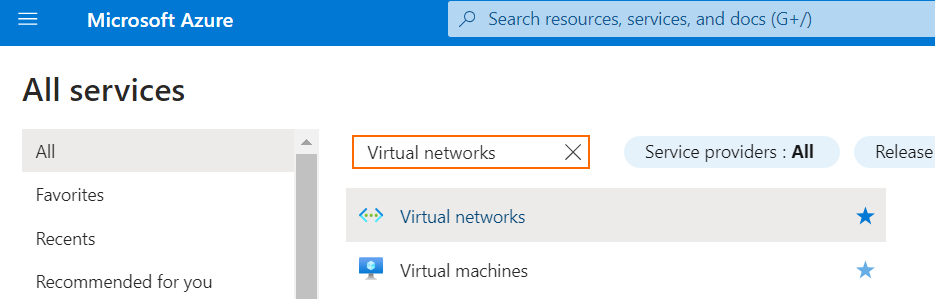
- Next to the Virtual networks entry, click + / Create to create a new network.

The Virtual network windows opens. - Select Virtual network and click Create.
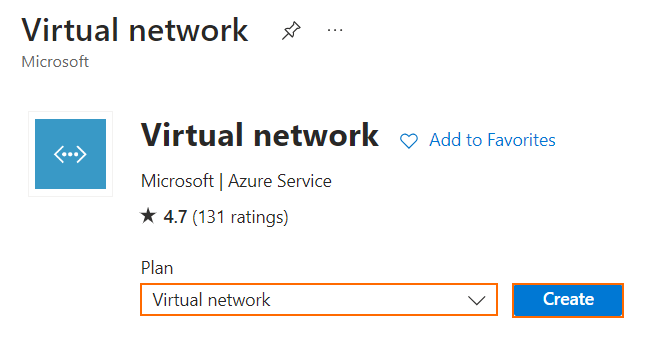
- Select Virtual network and click Create.
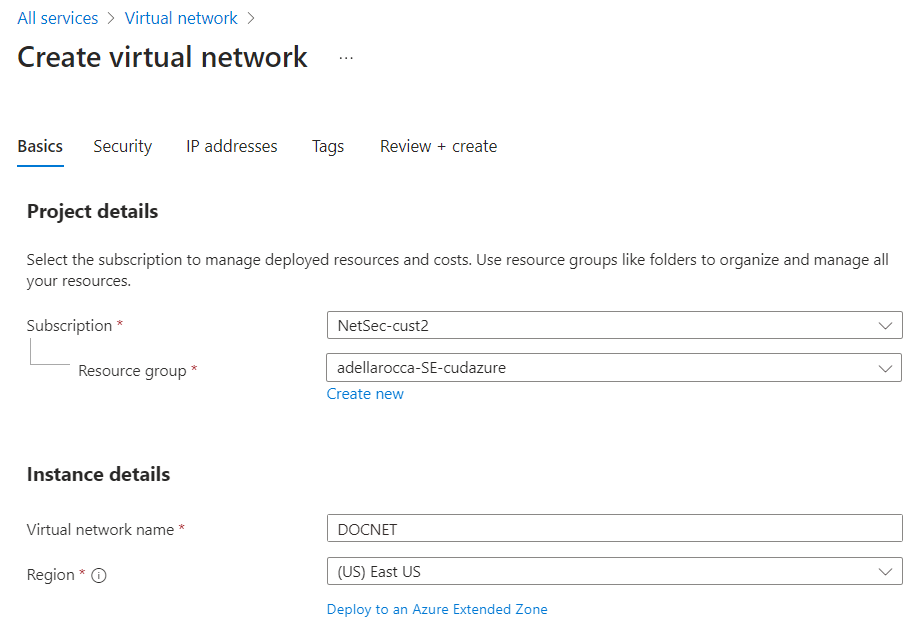
- The Create virtual network windows opens. In the Basics window, select your Subscription.
- Select the Resource group for the virtual network, or create a new resource group.
- Enter a descriptive Name for the virtual network.
- Select the Region your network resides in.
- Click NEXT
 .
. - Click the IP addresses tab.
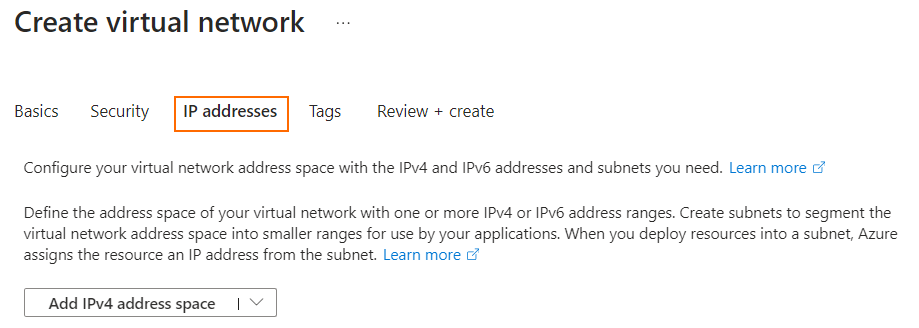
- Define the address space of your virtual network. (By default, an address space is automatically created.)
Click Add subnet:
Name – Enter a name for the subnet.
Starting address – Enter the first IP address of the IP range for the subnet. E.g.,
10.10.201.0Size – Select the subnet mask from the list. E.g.,
/24for 256 IP addresses.
- Click Add.
Review the IP addresses page and remove address spaces and subnets that you don't need.
Select Review + create to validate the virtual network settings.
Select Create to create the virtual network.
Step 2. Create a Gateway Subnet
The gateway subnet resides in the IP address range of the virtual network and contains the IP addresses used by the virtual network gateway resources and services.
- Go to your virtual network.
- In the left menu, select Subnets.
- The Subnets window opens. Click + Gateway subnet.

- In the Add subnet window, adjust the IP address range value:
- Starting IP – Enter the first IP for the gateway subnet. E.g.,
10.10.201.0 - Size – Select the subnet mask from the list. E.g.,
/29for 8 IP addresses.
- Starting IP – Enter the first IP for the gateway subnet. E.g.,
- Click Add.
- Click Save to save the subnet.
The Azure Virtual Network you have just created is now listed in the network menu in the Azure management interface.
Step 3. Create a VPN Gateway
Create the Azure virtual network gateway.
- Log into your Windows Azure Management Portal (https://portal.azure.com).
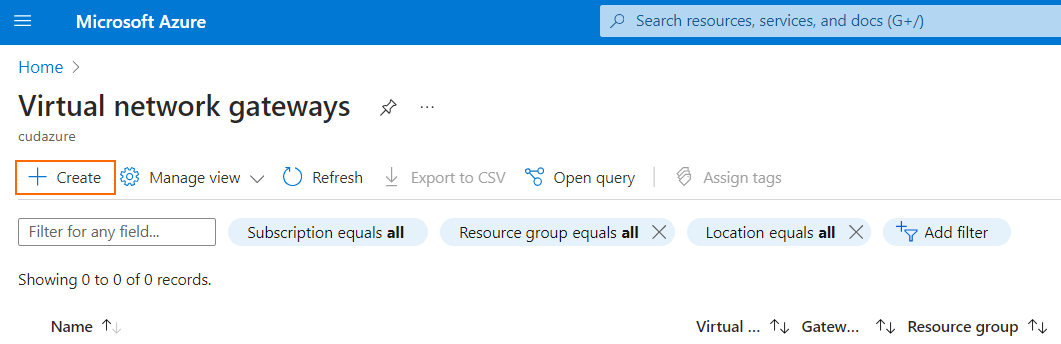
- Search for Virtual network gateways.
- Click + Create to create a new VPN gateway.
The Create virtual network gateway window opens. - In the Basics tab, configure the following settings:
- Name – Enter a descriptive name for the VPN gateway.
- Region – Select the region your network resides in.
- Gateway type – Select VPN.
- SKU – VpnGw2
Generation – Generation 2
- Virtual network – Select the virtual network created in step 1.
- Gateway subnet address range – Select the address range of the gateway subnet.
- Public IP address – Select the external IP address of the Barracuda CloudGen Firewall running the VPN service.
Select Review + create to validate the settings.
Select Create to create the virtual network gateway.
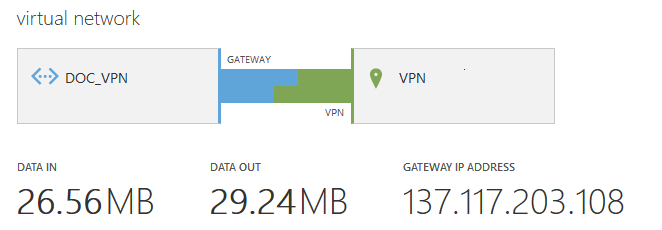
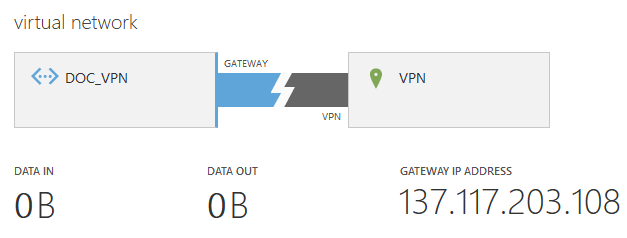
When the color of the gateway turns blue, the gateway has been successfully created. The Gateway IP is now displayed below the VPN Gateway image.
Step 4. Configure IPsec Site-to-Site VPN on the CloudGen Firewall
Create an active IPsec VPN connection on the local firewall.
- Go to CONFIGURATION > Configuration Tree > Box > Assigned Services > VPN-Service > Site to Site.
- Click the IPSEC IKEv1 Tunnels tab.
- Click Lock.
- Right-click the table, and select New IPsec IKEv1 tunnel. The IPsec Tunnel window opens.
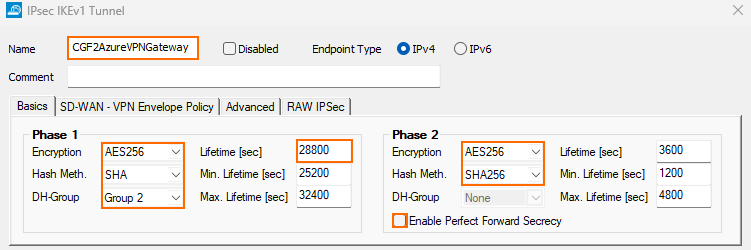
- In the Name field, enter your tunnel name. E.g.,
CGF2AzureVPNGateway - In the Basics tab, enter the Phase1 and Phase2 encryption settings:
- Phase 1
- Encryption – Select AES-256.
- Hash Meth. – Select SHA.
- DH Group – Select Group 2.
- Lifetime – Enter
28800.
- Phase 2
- Encryption – Select AES-256.
- Hash Meth. – Select SHA256.
- Perfect Forward Secrecy – Disable.
- Lifetime – Enter
3600.
- Phase 1
- Configure the local network settings. Click the Local Networks tab and specify the following settings:
- Local IKE Gateway – Enter the external IP address of the firewall. E.g.,
62.99.0.40 - Network Address – Enter your local on-premises network and click Add. E.g.,
10.10.200.0/24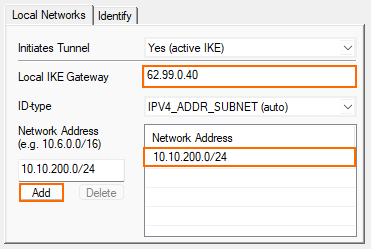
- Local IKE Gateway – Enter the external IP address of the firewall. E.g.,
- Configure the remote network settings. Click the Remote Networks tab and specify the following settings:
- Remote IKE Gateway – Enter the Gateway IP Address of the Azure VPN Gateway created in Step 2. E.g.,
137.117.205.83 - Network Address – Enter the Azure subnet(s) configured in the Azure Virtual Network and click Add. E.g.,
10.10.201.0/24.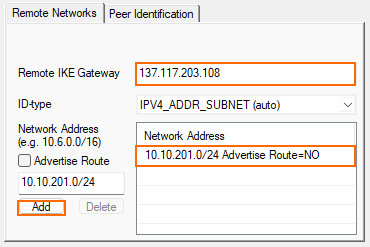
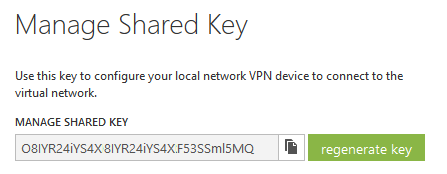
Click on the Peer Identification tab, and enter the Azure MANAGE KEY passphrase.

- Remote IKE Gateway – Enter the Gateway IP Address of the Azure VPN Gateway created in Step 2. E.g.,
- Click OK.
Click Send Changes and Activate.
Step 5. Create an Access Rule
Create a pass access rule to allow traffic from the local network to the remote network.
- Go to CONFIGURATION > Configuration Tree > Box > Assigned Services > Firewall > Firewall Rules.
- Create a PASS access rule:
- Bi-Directional – Enable.
- Source – Select the local on-premises network(s).
- Service – Select the service you want to have access to the remote network or Any for complete access.
- Destination – Select the network object containing the remote Azure Virtual Network subnet(s).
- Policies – Select None.
- Connection Method – Select Original Source IP.
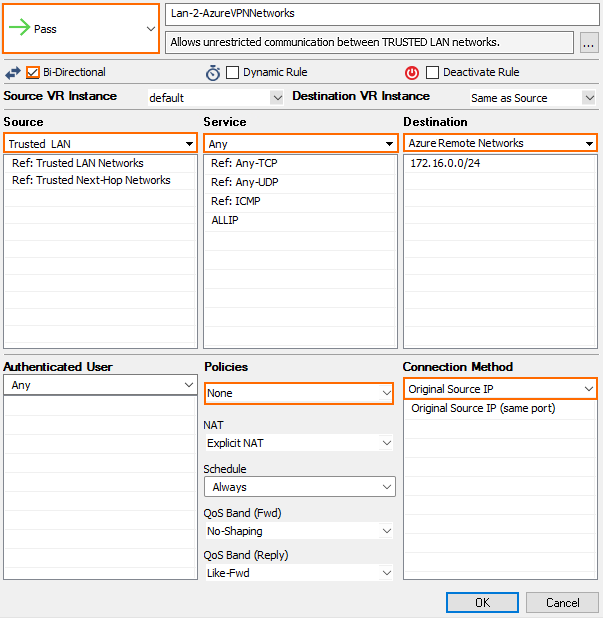
- Click OK.
- Move the access rule up in the rule list, so that it is the first rule to match this traffic.
- Click Send Changes and Activate.
Your Barracuda CloudGen Firewall will now automatically connect to the Azure VPN Gateway.