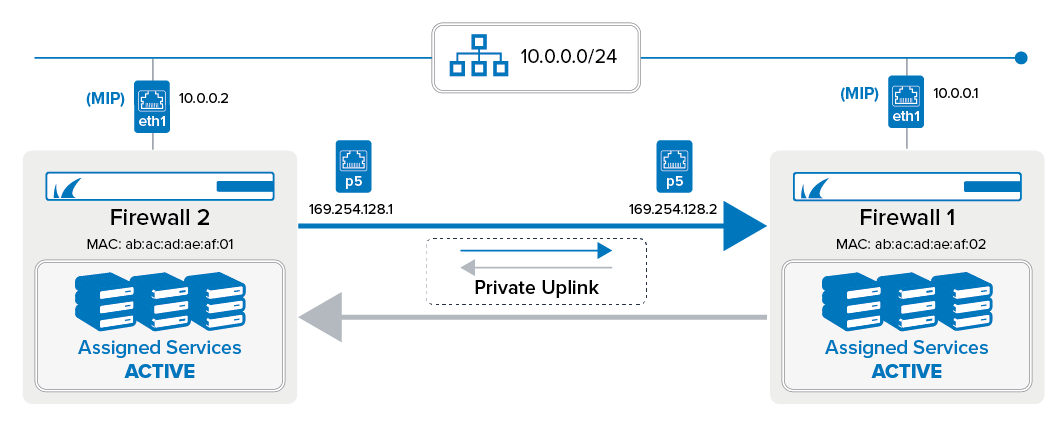
This article describes the steps to enable HA auto-pairing for two stand-alone firewalls or for two Control Centers.
Before You Begin
- The following instructions assume that you have two new identical hardware firewall models.
- These two firewalls must be pre-installed from the factory with firmware release 8.2.1.
- The LAN where these two boxes are attached has the network address 10.0.0.0/24.
- Both firewalls have a management IP that is accessible from Firewall Admin on your LAN, e.g., Firewall 1 = 10.0.0.2/32, Firewall 2 = 10.0.0.1/32. Replace these management IP addresses to match your individual requirements.
- Ensure that you have a network cable to connect the two firewalls when instructed.

How to Enable HA Auto-Pairing for Two Stand-Alone Firewalls or for Two Control Centers
Step 1. (if not done already): Deploy Both Firewalls
- For more information, see Get Started.
- After finishing the deployment, go to CONFIGURATION > Configuration Tree.
Step 2. Connect the Two Firewalls with an Uplink Cable
- Take the network cable and plug it into port
p5on each firewall. - Because HA auto-pairing is already activated on new 8.2.1 appliances, the firewalls will immediately try to establish a connection through port
p5. - Log into the firewall that you want to be the future primary HA firewall. In this example, we assume that the firewall with MIP 10.0.0.2 (Firewall 1) will be the primary one.
- Locate the serial number of your secondary firewall (Firewall 2, MIP 10.0.0.1).
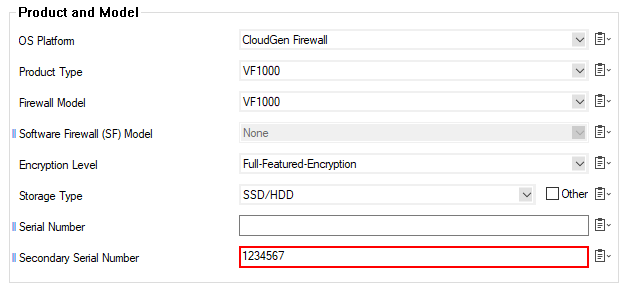
- On your primary firewall, go to CONFIGURATION > Configuration Tree > Box > Properties > Identification.
- Enter the serial number from your secondary firewall in the edit field Secondary Serial Number of section Product and Model.

- Click Send Changes/Activate.
- The firewalls will now exchange the remaining information to complete the pairing.
- On your primary firewall, go to CONFIGURATION > Configuration Tree.
- After about 5 minutes, reload the Configuration Tree.
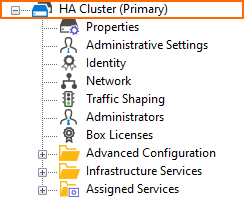
- If the configuration tree displays HA Cluster (Primary), this will indicate that your firewalls have completed HA auto-pairing.

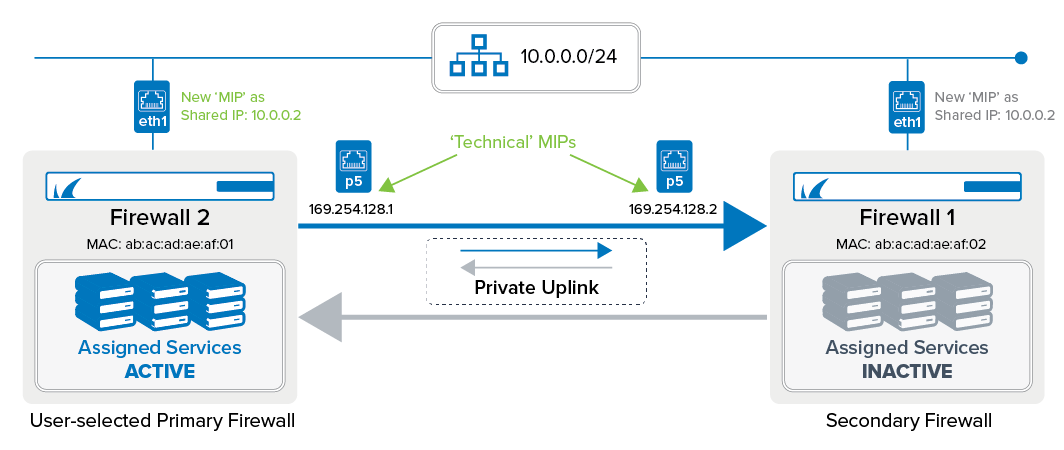
- When you inspect the configuration of interfaces and IP addresses, the related list in CONTROL > Network > Interfaces/IPs will display the "new" common MIP of the HA pair, which is now a shared IP address (here: 10.0.0.2/32, CSC), and the two IP addresses of the HA uplink (in the screenshot below, the entry 'eth3' or 'p5' depending on the firewall type), where one is the new technical MIP (169.254.128.1, mip0):

The following screenshot shows the HA pair after the pairing process. The assigned services on firewall 1 are now paused and will be activated during the next failover:

