If you are managing a larger number of firewalls in your Control Center, you might have to exclude certain firewalls from receiving configuration changes by the Control Center. Usually, you must disable forwarding configuration changes for each firewall individually. Now, however, you can select multiple firewalls from a list and apply the option Disable/Enable to all the firewalls at once.
Bulk Enable/Disable Selected Firewalls
- Log into your Control Center.
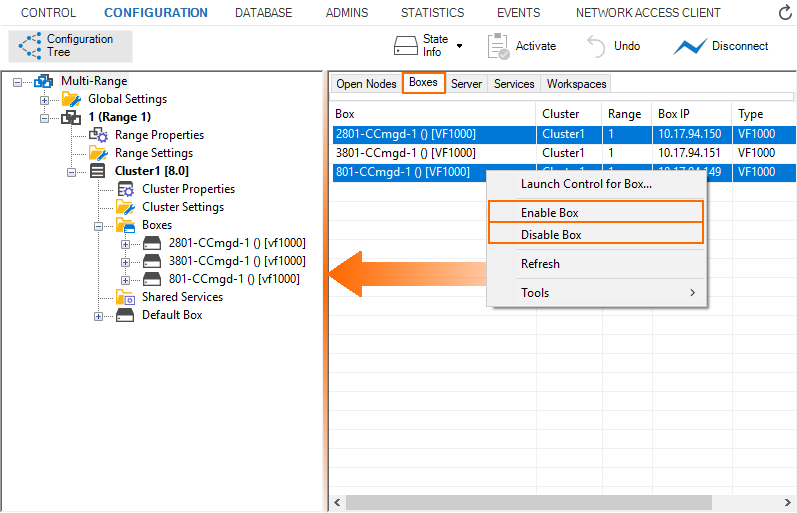
- Go to CONFIGURATION > Configuration Tree.
- If the vertical separation bar in the window is now visible, drag it towards the left until you can see the Quick File Access table.
- At the top of the Quick File Access area, click the Boxes tab.

- To select multiple firewalls, hold the
Strg-keyon your keyboard while clicking each necessary line in the table. - To Enable or Disable multiple boxes at once, right-click one of the selected lines.
- The window with the list of possible commands is displayed.
- Select Enable Box or Disable Box from the list.
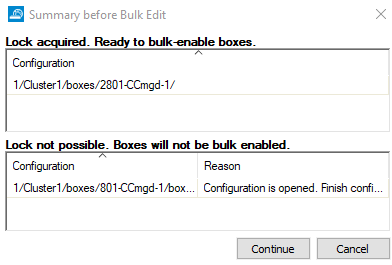
- In case there are conflicts that prevent Firewall Admin from proceeding, a window will be displayed that lists all existent causes.

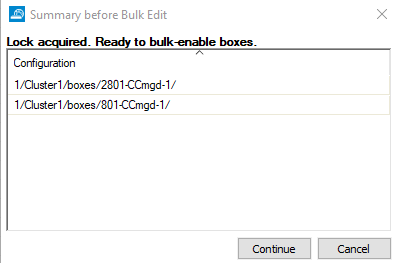
- If there are no conflicts, Firewall Admin informs you in a window that it is safe to proceed.

- Click Continue.
(Optional) To verify that a selected firewall has been enabled/disabled:
- On a selected firewall from the list above, go to CONFIGURATION > Configuration Tree > your range > your cluster > Boxes > your selected box > Box Properties.
- In the left navigation bar, select Operational.
In the section Operational Setting, check the setting for Disable Box:
Bulk edit selectionSetting for Disable BoxEnable no Disable yes
