In the Barracuda Firewall Control Center, administrators can create and customize workspaces to include often used configuration nodes from the config tree. Each workspace can either be shared with all administrators or assigned to specific administrators. To edit a workspace, create directories and labels to organize its configuration nodes. You can also edit and move the configuration nodes. To back up and restore a workspace, save it to a configuration file.
Before You Begin
Before administrators can create, view, and customize their workspaces, they must be given permissions to do so. In the Administrative Roles configuration, assign the parameter CC Configuration Module to the user and select the Create/Remove Workspaces and/or Change Workspaces check box in the CC Config Permissions settings. For more information, see How to Configure Administrative Roles .
Create a Workspace
- Open the CONFIGURATION tab.
- Right-click Multi-Range and select Create Workspace.
In the Workspace Settings window, enter the following settings:
- Short Name – The internal name of the workspace.
- Label – The visible name of the workspace.
- Admins to use the workspace – A comma- or space-delimited list of administrators who are permitted to use the workspace. You can use wildcard characters such as "*" (asterisk) and "?" (question mark) to define ranges of matching administrator names.
Admins to change the workspace – A comma- or space-delimited list of administrators who are permitted to change the workspace. You can use wildcard characters such as "*" (asterisk) and "?" (question mark) to define ranges of matching administrator names.
When left blank, the workspace is only editable by its creator.
- IP addresses/networks to use the workspace – IP addresses and network ranges from which administrators can use the workspace. When left blank, the workspace can be accessed from anywhere.
Click OK .
View a Workspace
To view a workspace, click the Workspaces tab in the right pane of the CONFIGURATION page and select the workspace. If you can not find this section, move your mouse to the right of the screen and click/drag the line towards the middle.

If you are already viewing a workspace but want to switch to another workspace view, right-click the active workspace's root node, select Show Workspaces, and then select the new workspace view.
Lock a Workspace
To edit a workspace, you must first lock it.
- Switch to the workspace view.
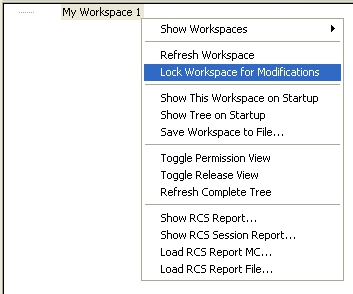
- Right-click the workspace’s root node and select Lock Workspace for Modifications.

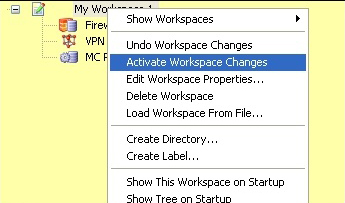
While the workspace is locked, the background changes to yellow. To unlock the workspace, right-click its root node and select Unlock Workspace.
Add a Configuration Node
Open the CONFIGURATION tab. If you are already in the workspace, navigate back to the config tree by clicking Configuration Tree from the Workspaces tab in the right menu of the Configuration Tree page.
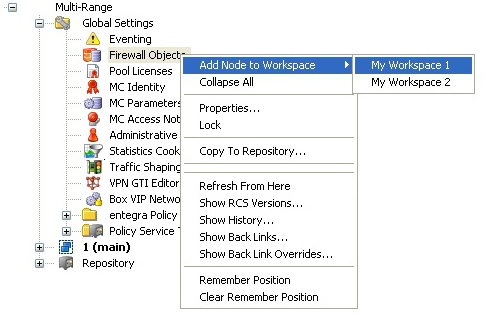
In the config tree, right-click the required node, select Add Node to Workspace, and then select the workspace where you want to add the node.

- In the Enter Name window, enter a display name for the node and then choose to either remain in the configuration tree view or switch to the workspace view.
- After adding all of the required nodes to the workspace, switch to the workspace view.
Right-click the workspace’s root node and select Activate Workspace Changes.

Edit a Workspace
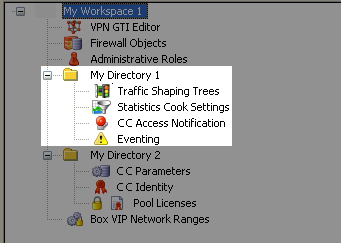
After creating a workspace, you can edit its settings. You can also create directories and labels to organize its configuration nodes.
- Lock the workspace in the workspace view.
- Right-click the workspace’s root node and select one of the following options to edit the workspace:
- Create Directory – Creates a directory. In the Enter Name window, enter the name for the directory and click OK.

- Create Label – Creates a label to partition the workspace into different sections. You can move nodes before or after the label.
- Edit Workspace Properties – Reopens the Workspace Settings window so you can edit the workspace properties.
- Refresh Workspace – Reloads the workspace.
- Delete Workspace – Deletes the workspace.
- Show this Workspace on Startup – Loads the workspace view instead of the configuration tree when you log into the Barracuda Firewall Control Center and click the CONFIGURATION tab.
- Show Tree on Startup – Loads the configuration tree when you log into the Barracuda Firewall Control Center and click the CONFIGURATION tab.
- Create Directory – Creates a directory. In the Enter Name window, enter the name for the directory and click OK.
- Right-click the workspace’s root node and select Activate Workspace Changes.
Modify a Node
You can modify workspace nodes by removing, renaming, and moving them.
- Lock the workspace in the workspace view.
- Right-click the node and select one of the following options:
- Remove Node – Removes the node.
- Rename Node – Renames the node. In the Enter Name window, enter the new name for the node and then click OK.
Mark Node for Move – Moves the node. The node is then marked by a red icon. Then right-click a label or another node and choose to move the marked node before or after it. You can also right-click a directory and move the node into it.
Right-click the workspace’s root node and select Activate Workspace Changes.
Back up and Restore a Workspace
You can create a configuration file to back up and restore your workspace.
- Lock the workspace in the workspace view.
- Right-click the workspace’s root node and select one of the following options:
- Save Workspace to File – Saves the workspace into a configuration file.
- Load Workspace from File – Restores a workspace from a saved configuration file.
Loading a workspace overwrites the currently active workspace.
