In case your Barracuda CloudGen F-Series Firewall is replaced (RMA or cold spare) with the same firewall model of the same or a newer revision, you must re-image or update the new firewall to the same firmware version and restore the configuration from a configuration backup (PAR file).
Before You Begin
- You must have a working PAR file of the previous configuration. For information on how to back up and restore configurations, see Backups and Recovery.
- The new hardware firewall or Control Center appliance must be running the same firmware version. Either update or reimage the firewall. For more information, see How to Recover a CloudGen F-Series Firewall or Control Center Appliance with a USB Flash Drive.
Step 1. Restore the Configuration on the New Firewall
- Go to CONFIGURATION > Configuration Tree.
- Right-click Box and select Restore from PAR file.
Step 2. (Barracuda Firewall Control Center C400 / C610 only) Configure the Fallback Module
Verify that a fallback interface is specified. If not, enable a fallback interface and select the fallback module name.
- Go to CONFIGURATION > Configuration Tree > Box > Network.
In the left menu, select Interfaces.
- Expand the Configuration Mode menu and select Switch to Advanced View.
- Click Lock.
- In the Network Interface Cards section, edit the interface.
- Make sure that Fallback Enabled is set to Yes.
- If the fallback module name is not specified:
- Select the fallback interface from the Fallback Module Name list:
- Barracuda Firewall Control Center C400 – Select Intel PRO/1000 PCI-Express (82575/6).

- Barracuda Firewall Control Center C610 – Select Intel PRO/1000 PCI-Express (82571/2/3/4 or 82566/7) .

- Barracuda Firewall Control Center C400 – Select Intel PRO/1000 PCI-Express (82575/6).
Click OK.
- ClickSend Changes and Activate.
- Select the fallback interface from the Fallback Module Name list:
Step 3. Select the Hardware Model
If the appliance revision of the new firewall differs from the previously installed version, you must adjust the Hardware Model . This is necessary because different hardware models typically come with newer network interfaces and thus require appropriate drivers.
- Go to CONFIGURATION > Configuration Tree > Box > Box Properties > Identification.
- Click Lock.
- From the Hardware Model list, select the appropriate model revision.
- Click Send Changes.
- Go to CONFIGURATION > Configuration Tree > Box > Network > Interfaces. A pop-up window opens indicating that the hardware model must be changed.

- Click OK to close the window.
- Click Lock. The Appliance Model will now be automatically adjusted.
- Click Send Changes and Activate.
Step 4. Activate the Network Configuration
- Go to CONTROL > Box.
- In the left menu, expand Network and click Activate new network configuration.
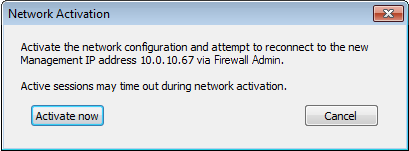
- Click Activate now. The Activation Succeeded message is displayed after the network configuration has been activated.

During activation, the firewall displays a 'Reconnecting' message:

Barracuda Firewall Admin now automatically reconnects to the new management IP address. The new firewall is now running with the same configuration.
