If the size of the virtual machine meets the requirements of Azure Accelerated Networking, you can enable it on existing devices. To deploy a CloudGen Firewall with Accelerated Networking initially enabled, see How to Deploy a CloudGen Firewall from the Microsoft Azure Marketplace. The following steps are necessary only on CloudGen Firewall firmware 8.0.0 and 8.0.1.
- Verify that your virtual machine size matches the requirements for Azure Accelerated Networking.
Step 1. (Optional) Enable Azure Accelerated Networking
This step is necessary only if you did not deploy a CloudGen Firewall from the marketplace with initially enabled Azure Accelerated Networking.
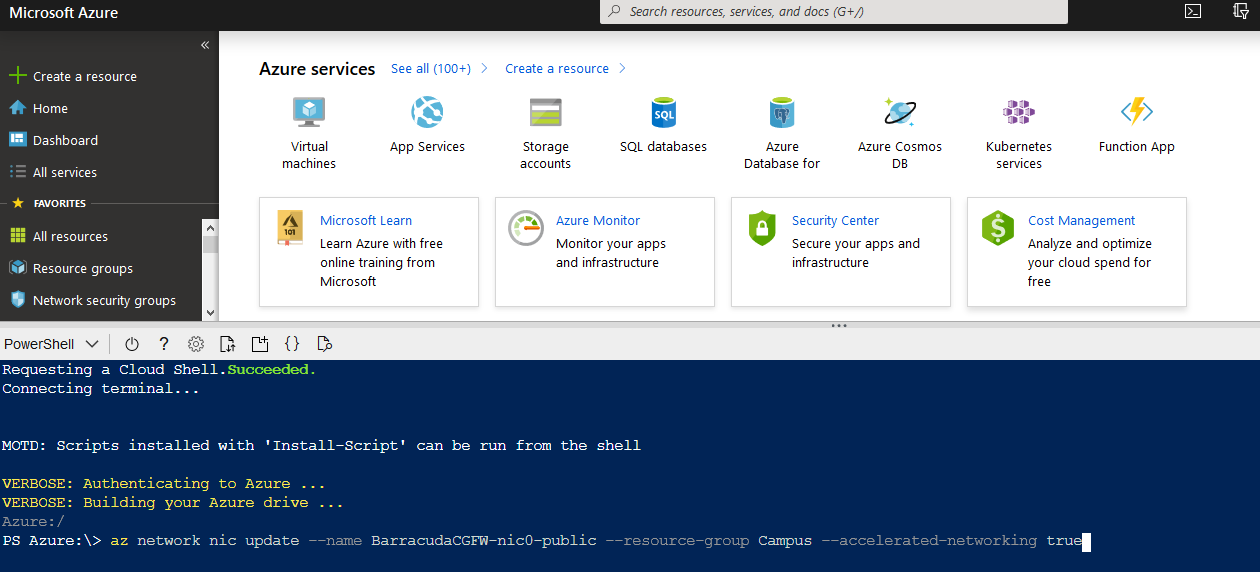
On existing devices, Azure Accelerated Networking can be enabled only through the CLI.
- Go to the Azure portal: https://portal.azure.com.
- Shut down the CloudGen Firewall virtual machine. If the machine was created in an a vailability set, all machines in this set must be shut down.
- Open Azure CloudShell.

- In the CloudShell, select PowerShell from the drop-down menu.

Enter the following commands. Replace your network interface card and resource group name:
az network nic update --name <name_of_NIC> --resource-group <resource_group_name> --accelerated-networking true
- Press Enter to run the command.
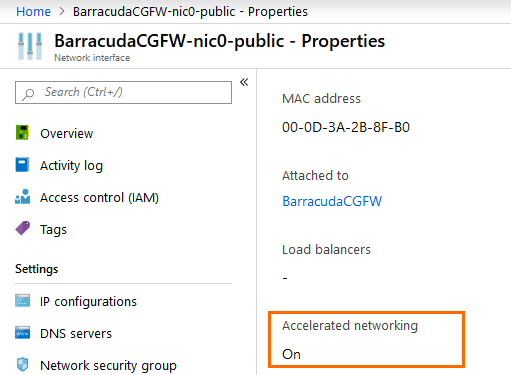
- Open the network interface Properties to verify that it operates with Accelerated Networking.

Step 2. Modify the Interfaces
For every NIC added in Azure, the boxnet dynnet driver must be configured to create 2 interfaces.
- Go to the Azure portal: https://portal.azure.com .
- Start the CloudGen Firewall virtual machine.
- Open Barracuda Firewall Admin and log into the CloudGen Firewall.
- Go to CONFIGURATION > Configuration Tree > Box > Network.
- Click Lock.
- In the left menu, select Interfaces.
- In the Network Interface Cards list, double-click the 10dynmod card.
Set the Number of Interfaces to 2.
Click OK.
- Click Send Changes and Activate.
- Go to CONTROL > Box > Network.
Click Activate new network configuration and click Failsafe.
