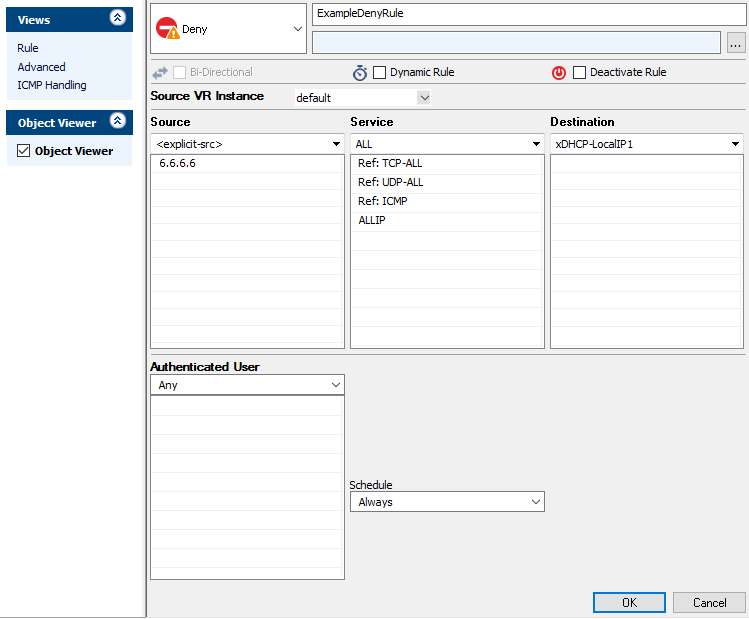
A Deny access rule terminates matching network sessions by replying TCP-RST for TCP requests, ICMP Port Unreachable for UDP requests, or ICMP Denied by Filter for other IP protocols. Because the remote host receives a reply, it knows that your system is up and running and protected by a firewall.

Create a Deny Access Rule
- Go to CONFIGURATION > Configuration Tree > Box > Assigned Services > Firewall > Forwarding Rules.
- Click Lock.
- Either click the plus icon ( + ) in the top right of the rule set, or right-click the rule set and select New > Rule.

- Select Deny as the action.
- Enter a Name for the rule. For example,
ExampleDenyRule. - Specify the following settings that must be matched by the traffic to be handled by the access rule:
- Source – The source addresses.
- Destination – The destination addresses of the traffic.
- Service – Select a service object, or select Any for this rule to match for all services.
- Click OK.
- Drag and drop the access rule so that it is the first rule that matches the traffic that you want it to deny. Ensure that the rule is located above the BLOCKALL rule; rules located below the BLOCKALL rule are never executed.
- Click Send Changes and Activate.
Additional Matching Criteria
- Authenticated User – For more information, see User Objects.
Additional Policy
- Schedule Objects – For more information, see Time Objects.
Returning a Block Page for HTTP Traffic
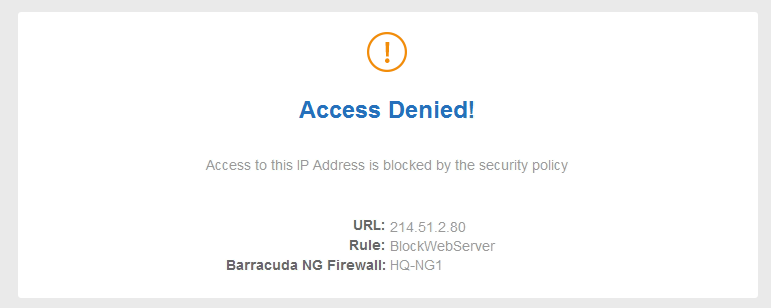
BLOCK and DENY access rules can return a block page if the user was blocked using the HTTP protocol on port 80. All other protocols and ports covered by the access rule will be blocked at TCP SYN level.
- Go to CONFIGURATION > Configuration Tree > Box > Assigned Services > Firewall > Forwarding Rules.
- Click Lock.
- Edit a Block access rule. The Edit Rule window opens.
- In the left menu click Advanced.
- In the Miscellaneous section, set Block Page for TCP 80 to Access Block Page or Quarantine Block Page.

- Click OK.
- Click Send Changes and Activate.
When a user is blocked by this access rule while using HTTP on port 80, the customizable Access Block Page is displayed. For more information, see How to Configure Custom Block Pages and Texts.

