The Barracuda SecureEdge Access Agent can be installed on Chromebooks to enforce security policies provided by Barracuda SecureEdge Access. With the SecureEdge Access Agent, users gain secure access to internal and external enterprise resources, whether they are on-premises or in the cloud. Chromebooks are configured with the Android SecureEdge Access Agent.
Before You Begin
Ensure that you have updated Chrome OS with latest version.
Create a Google account.
Step 1. Install the SecureEdge Access Agent
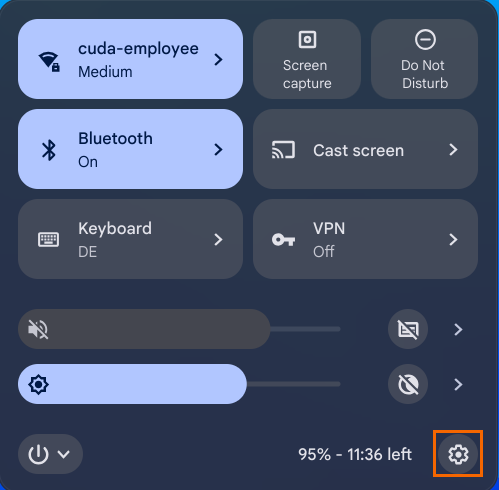
In the bottom-right corner of your screen, on the system tray, click the cogwheel icon. The Settings page opens.
In the left menu, click Apps.
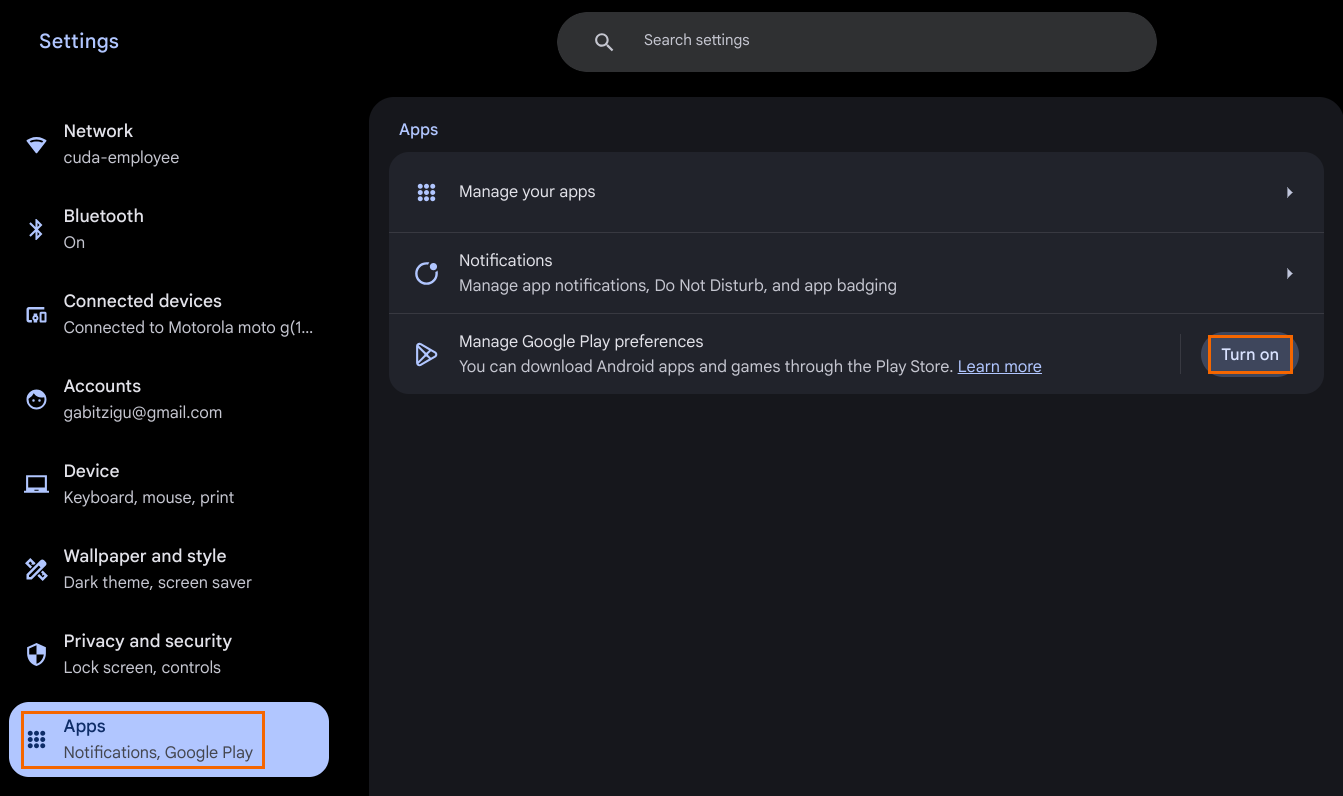
In the Manage Google Play preferences section, click Turn On.
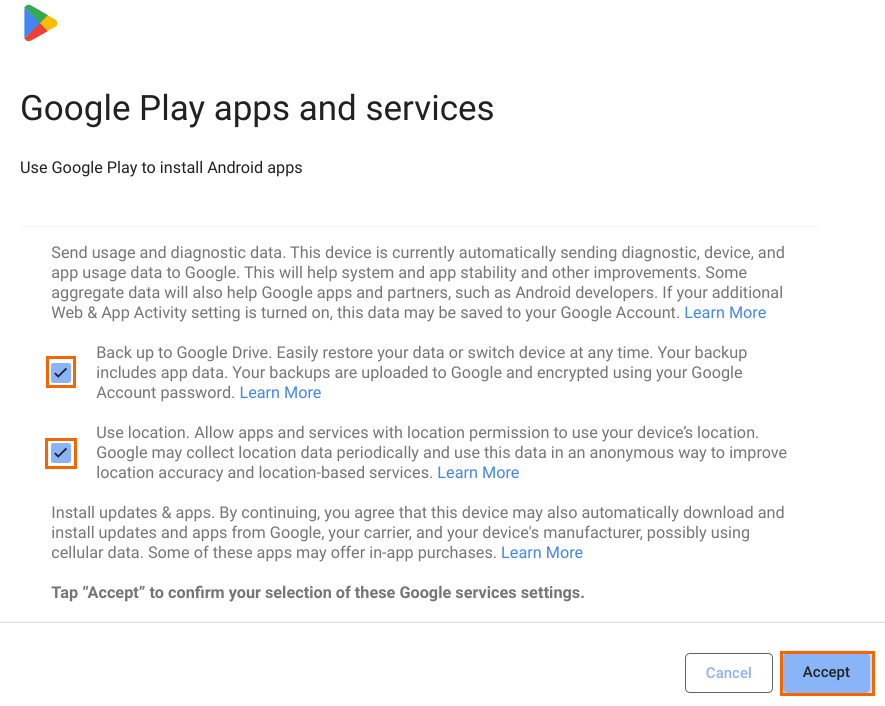
To continue, click ACCEPT to accept the Google Terms of Service.
You must log in with your Google account.
At the bottom right or in your ChromeOS launcher, click the Google Play Store icon.
In the search bar of the Google Play Store, enter
Barracuda SecureEdge Agent.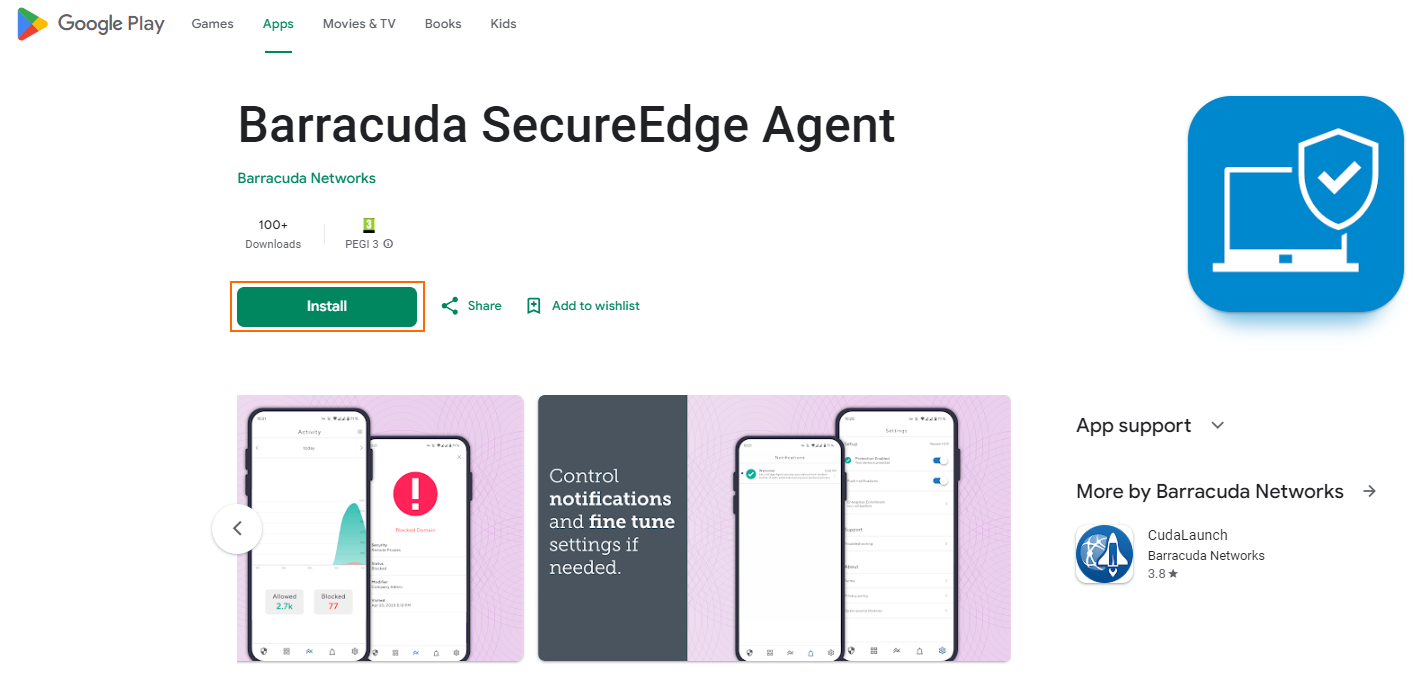
Click Install and allow the installation to complete.
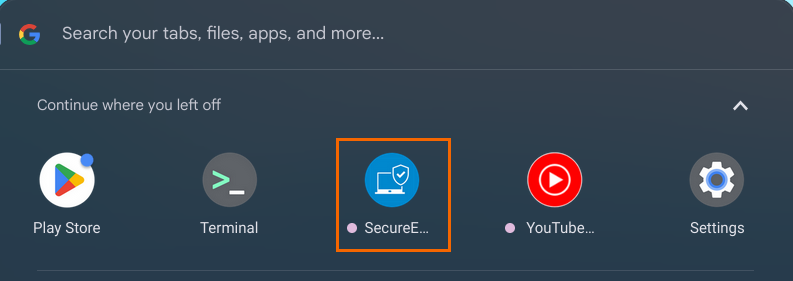
After the installation finishes, you can see the SecureEdge Access Agent app available on the ChromeOS launcher.
Step 2. Connect a Barracuda SecureEdge Access Agent
Open the ChromeOS launcher and click the SecureEdge Access Agent icon.
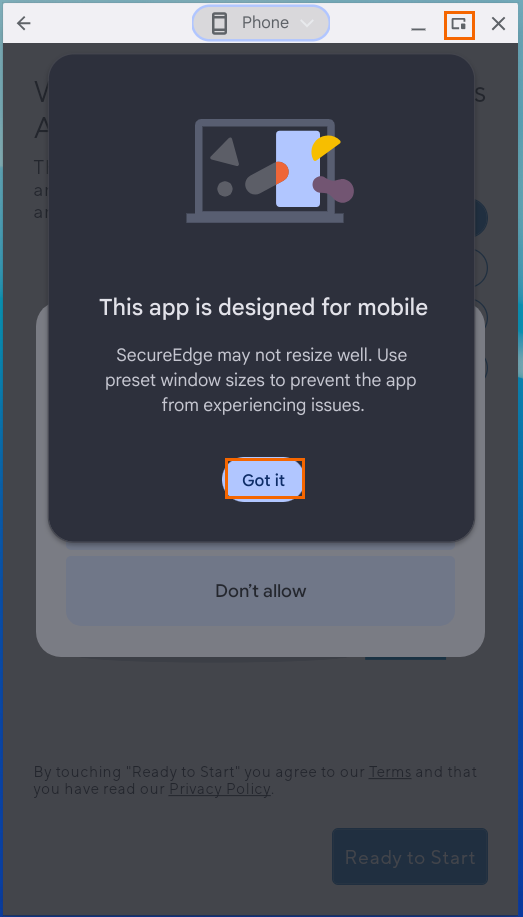
The Barracuda SecureEdge Access Agent displays for mobile. Click Got it. Note: To maximize the current window, click the maximize window icon.
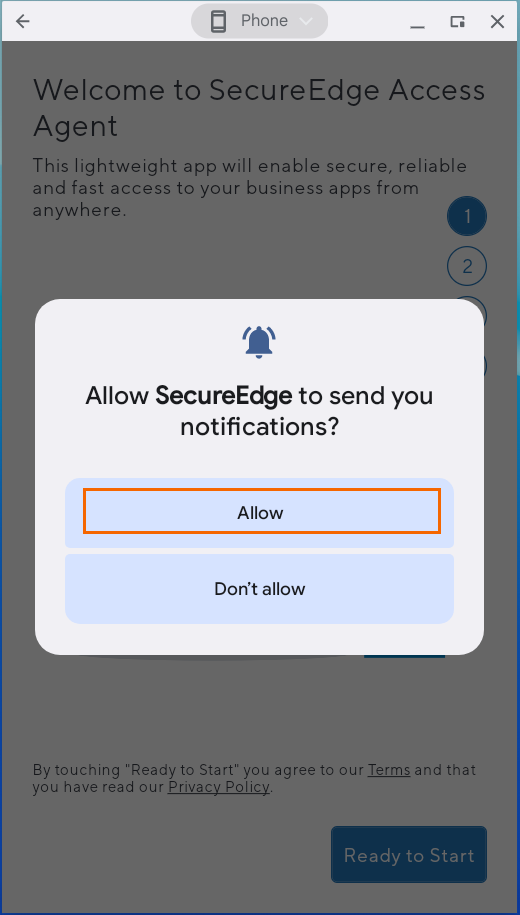
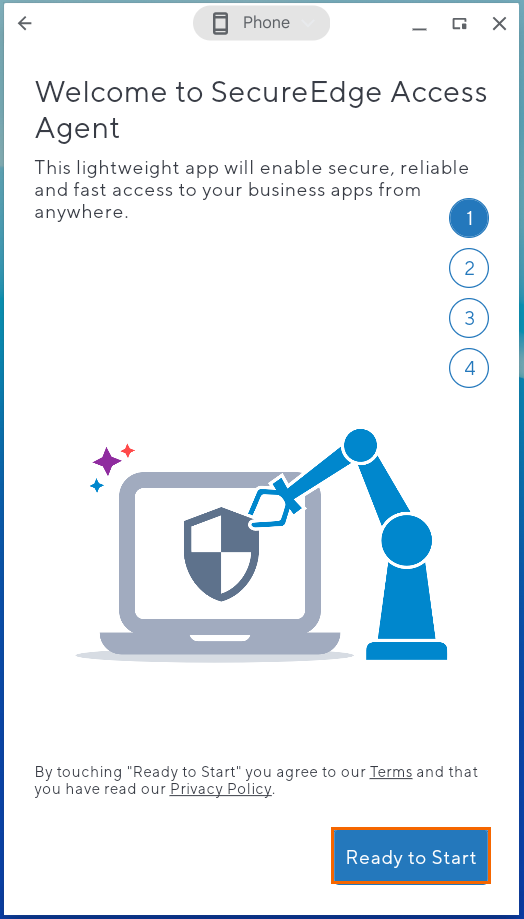
The Welcome to SecureEdge Access Agent page opens. Click Allow.
Click Ready to Start.
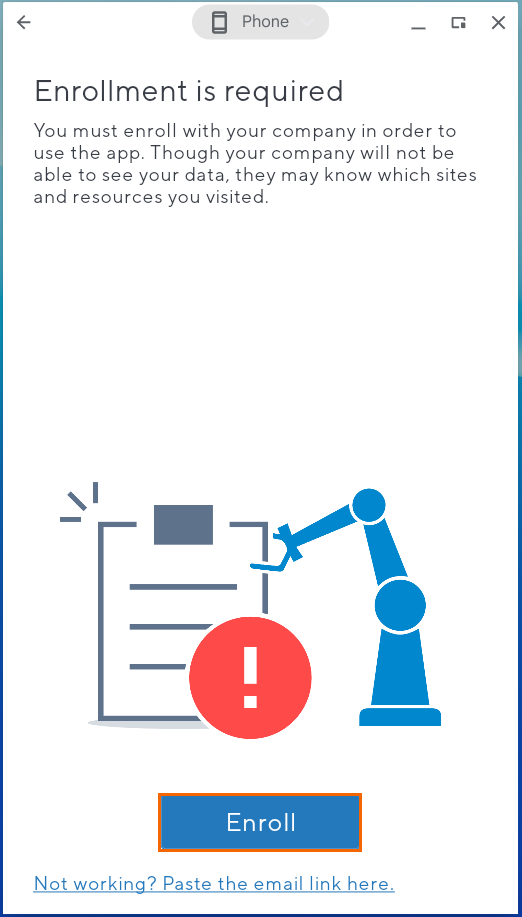
The Enrollment is required page opens. Click Enroll. Note: You can also enroll the user by using the email enrollment link. For more information, see How to Enroll Users in Barracuda SecureEdge.
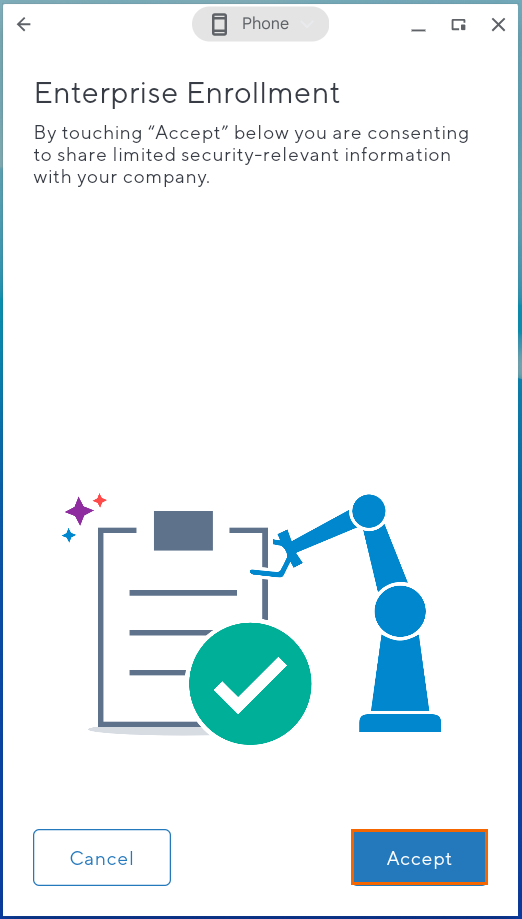
The Enterprise Enrollment page opens. Click Accept.
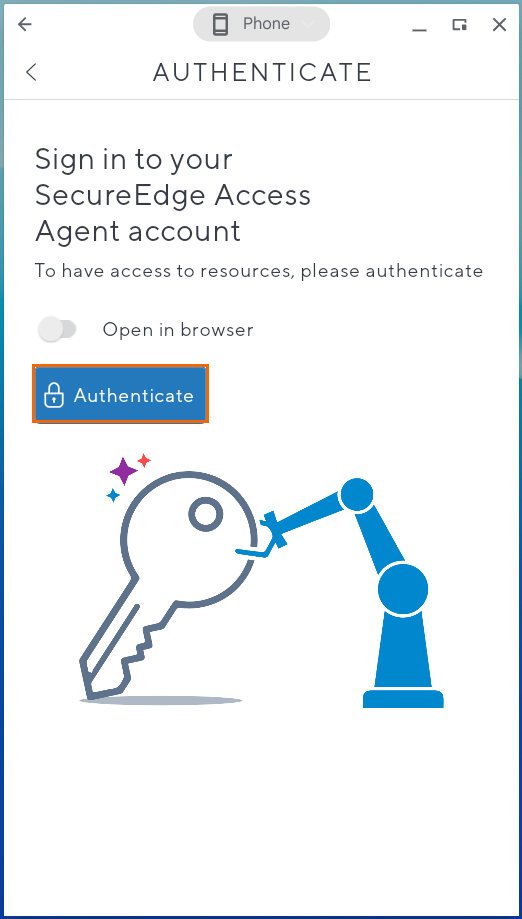
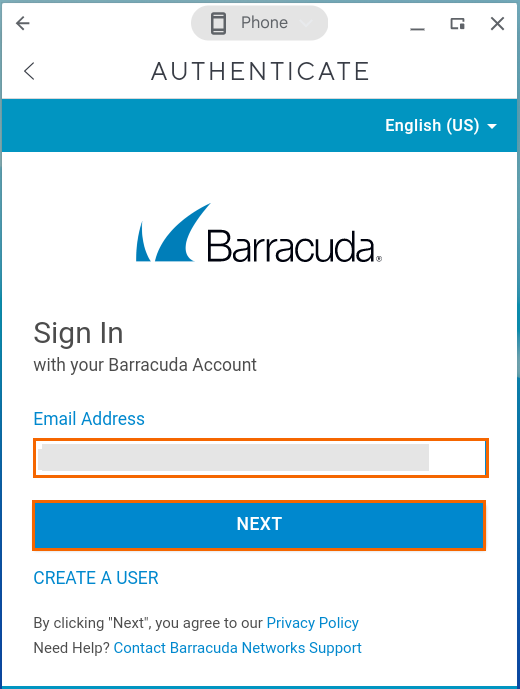
The AUTHENTICATE page opens. Click Authenticate to verify your user identity.
The Sign In with your Barracuda Account page opens. Enter your credentials.
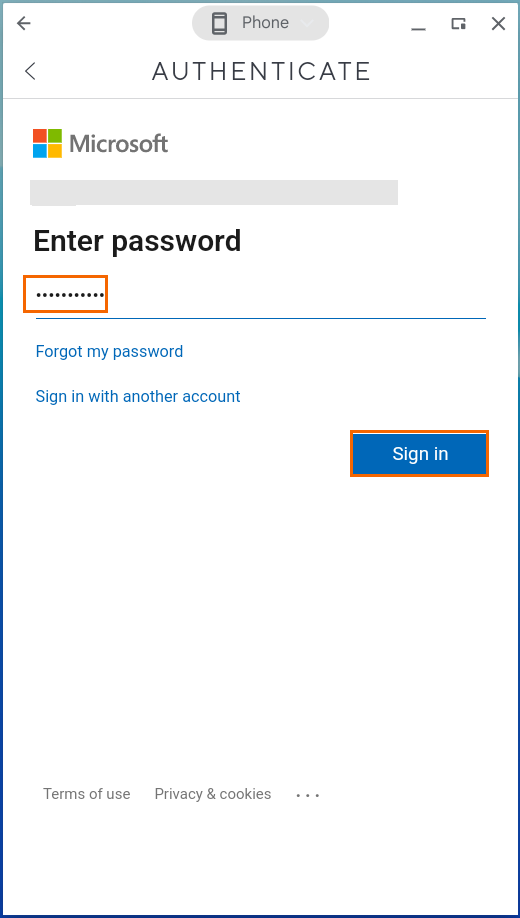
Authenticate with your identity provider. Enter the password and click Sign in.
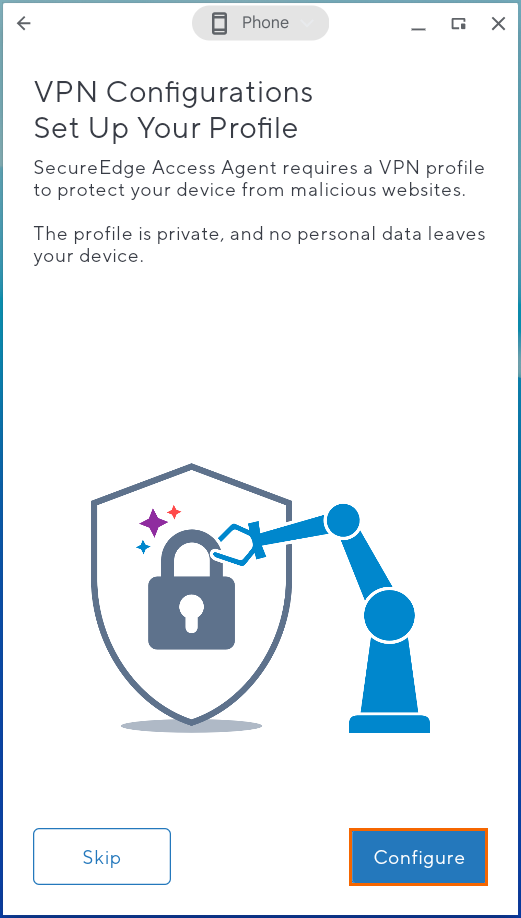
The VPN Configurations Set Up Your Profile page opens. Click Configure.
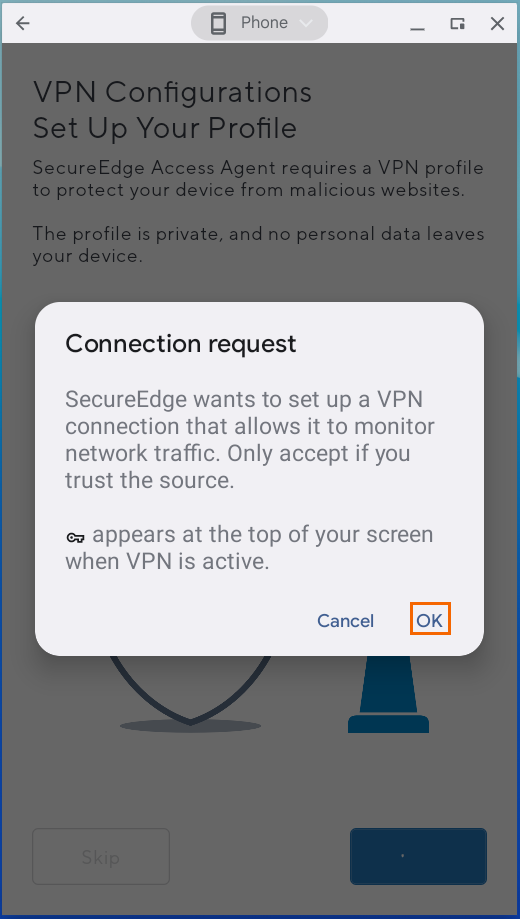
The Connection request page opens. Click OK.
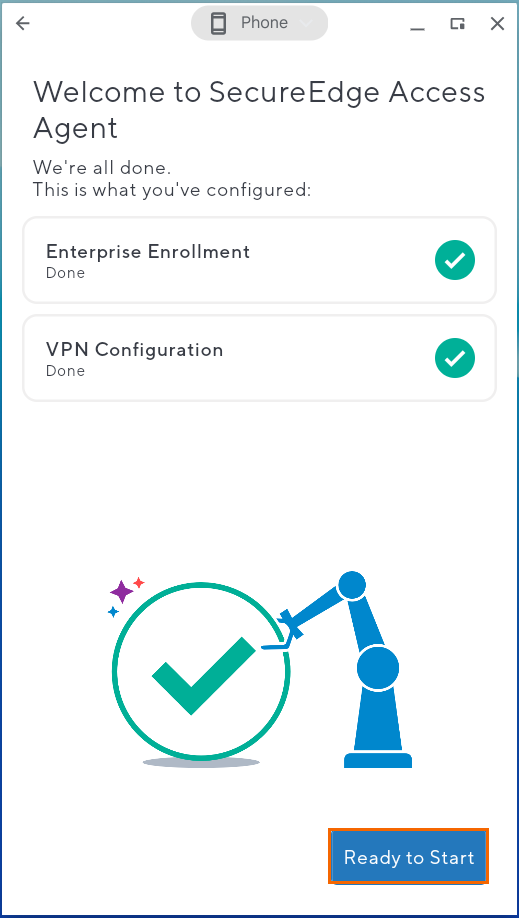
The Welcome to SecureEdge Accent Agent page opens. Verify the status of Enterprise Enrollment and VPN Configuration. Click Ready to Start.
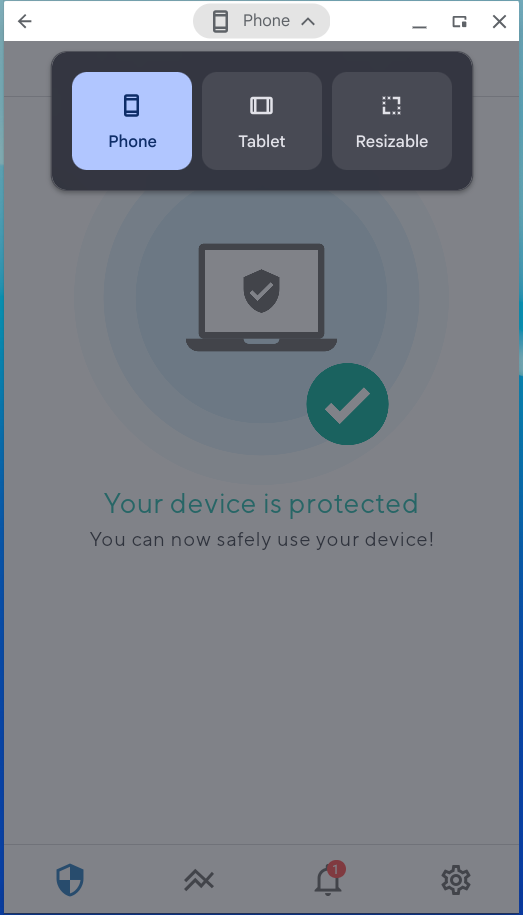
The device protection is enabled automatically.

( Optional) The Overview page opens. The SecureEdge Access Agent app is available in three different modes: Phone, Tablet, and Resizable. You can select the appropriate mode according to your requirements.
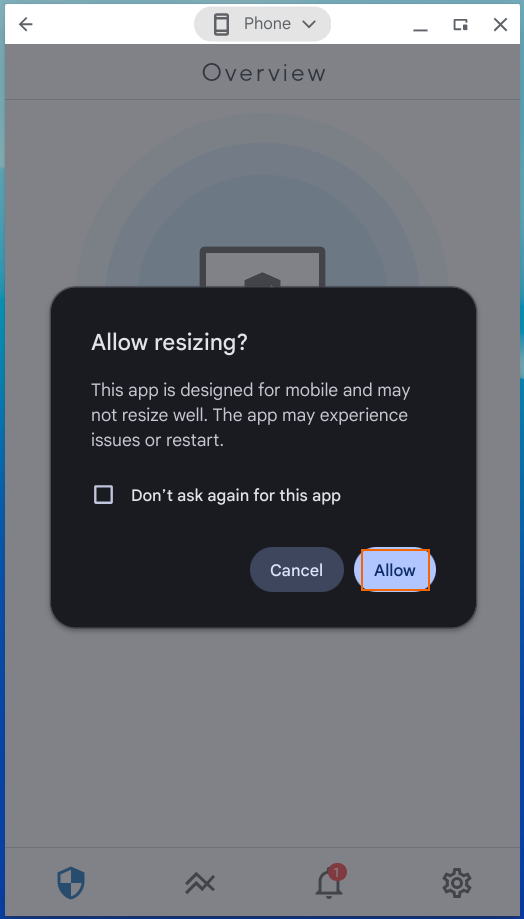
The Allow resizing page opens. Click Allow.
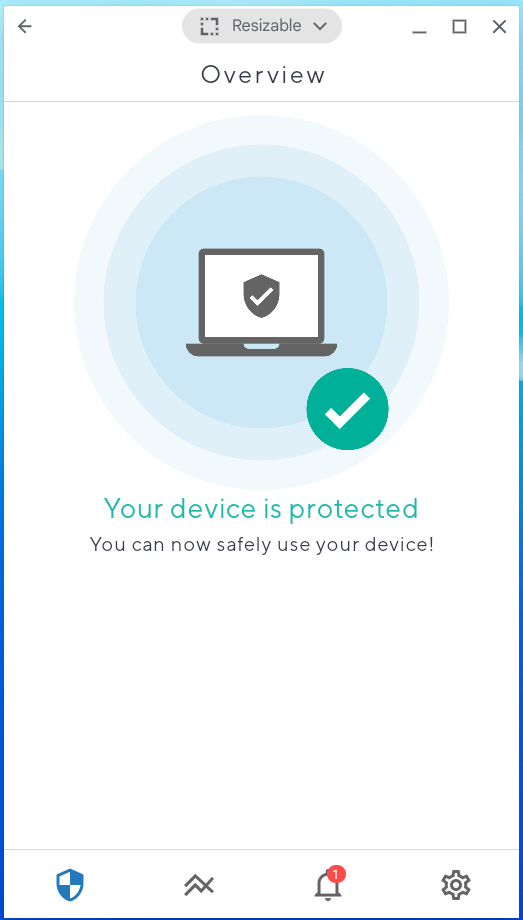
The Overview page opens and shows the status of your device.
After completing the installation and enrollment process, you can verify Application Catalog, Activity, and Notifications. For more information on the overview of the SecureEdge Access Agent, see Barracuda SecureEdge Access Agent.
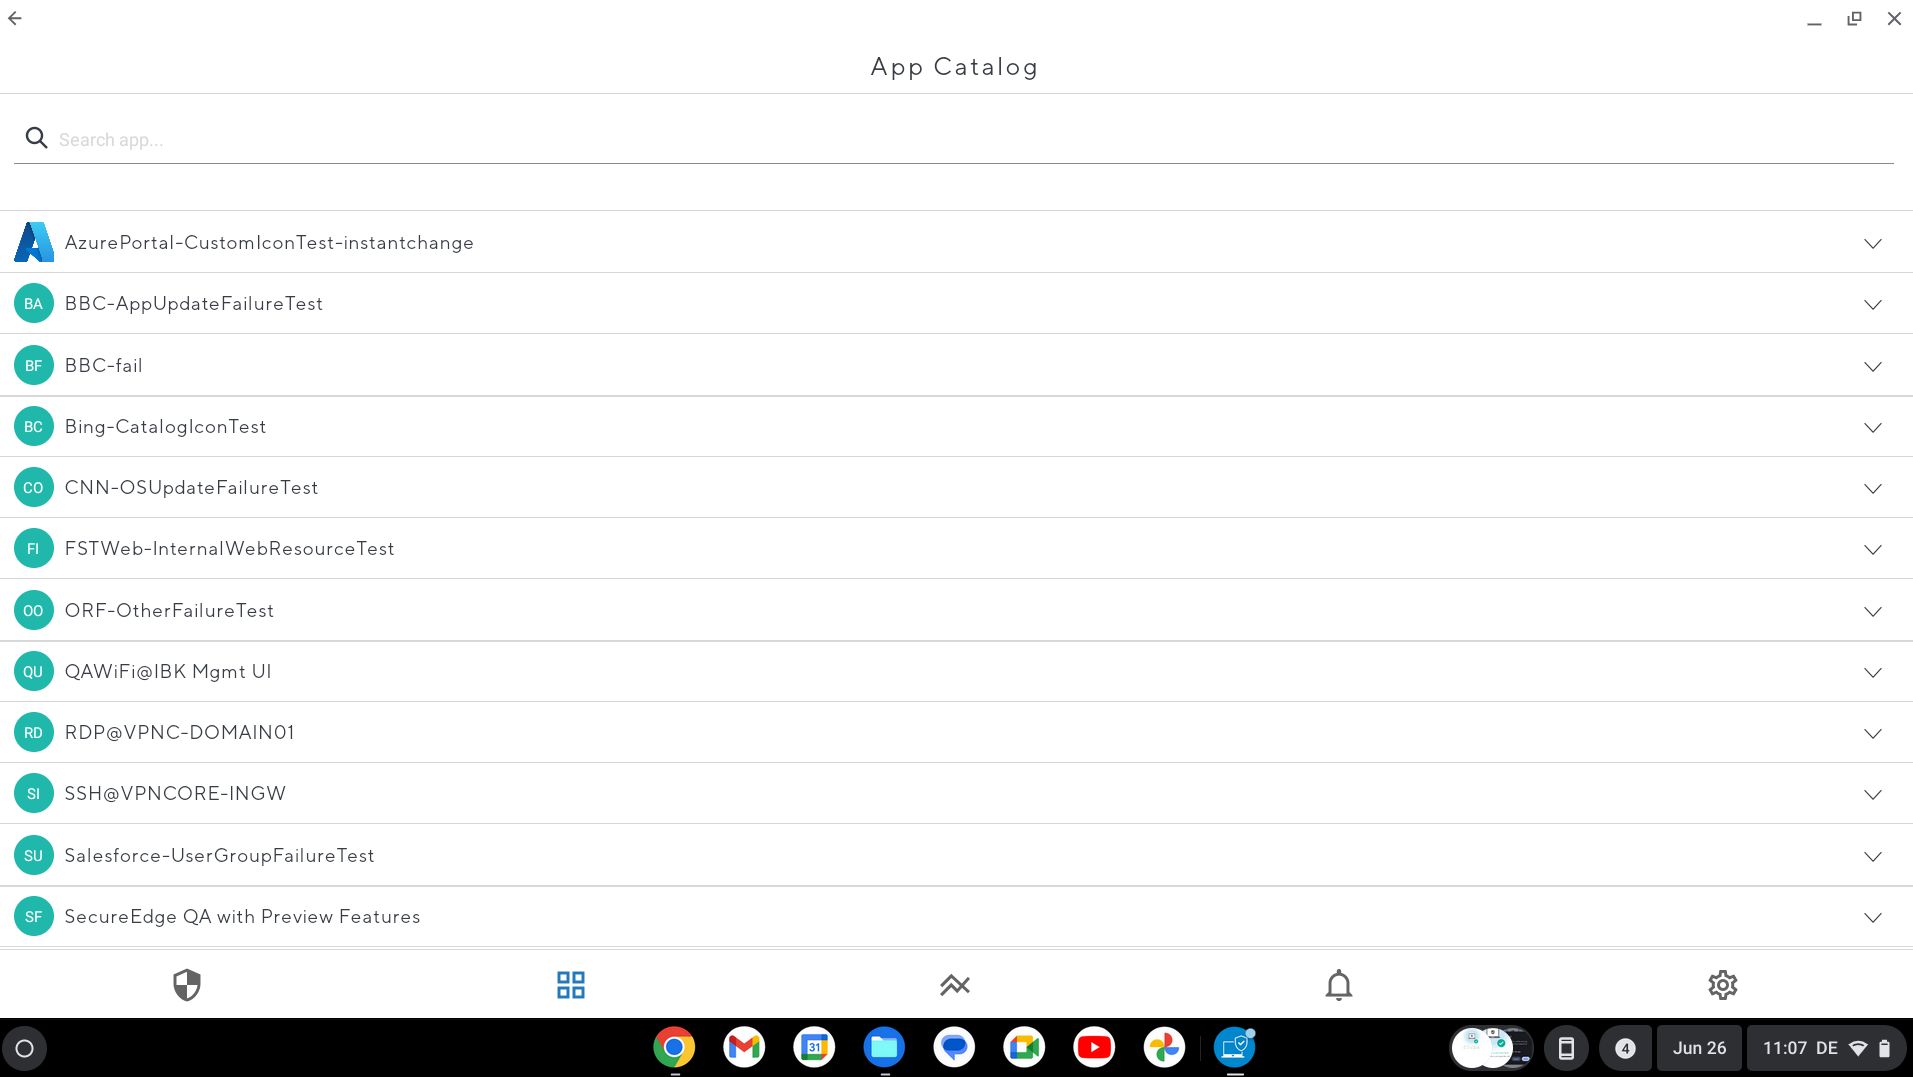
Application Catalog – The Application Catalog page displays various applications available for quick access. You can also search for a specific application of your choice.
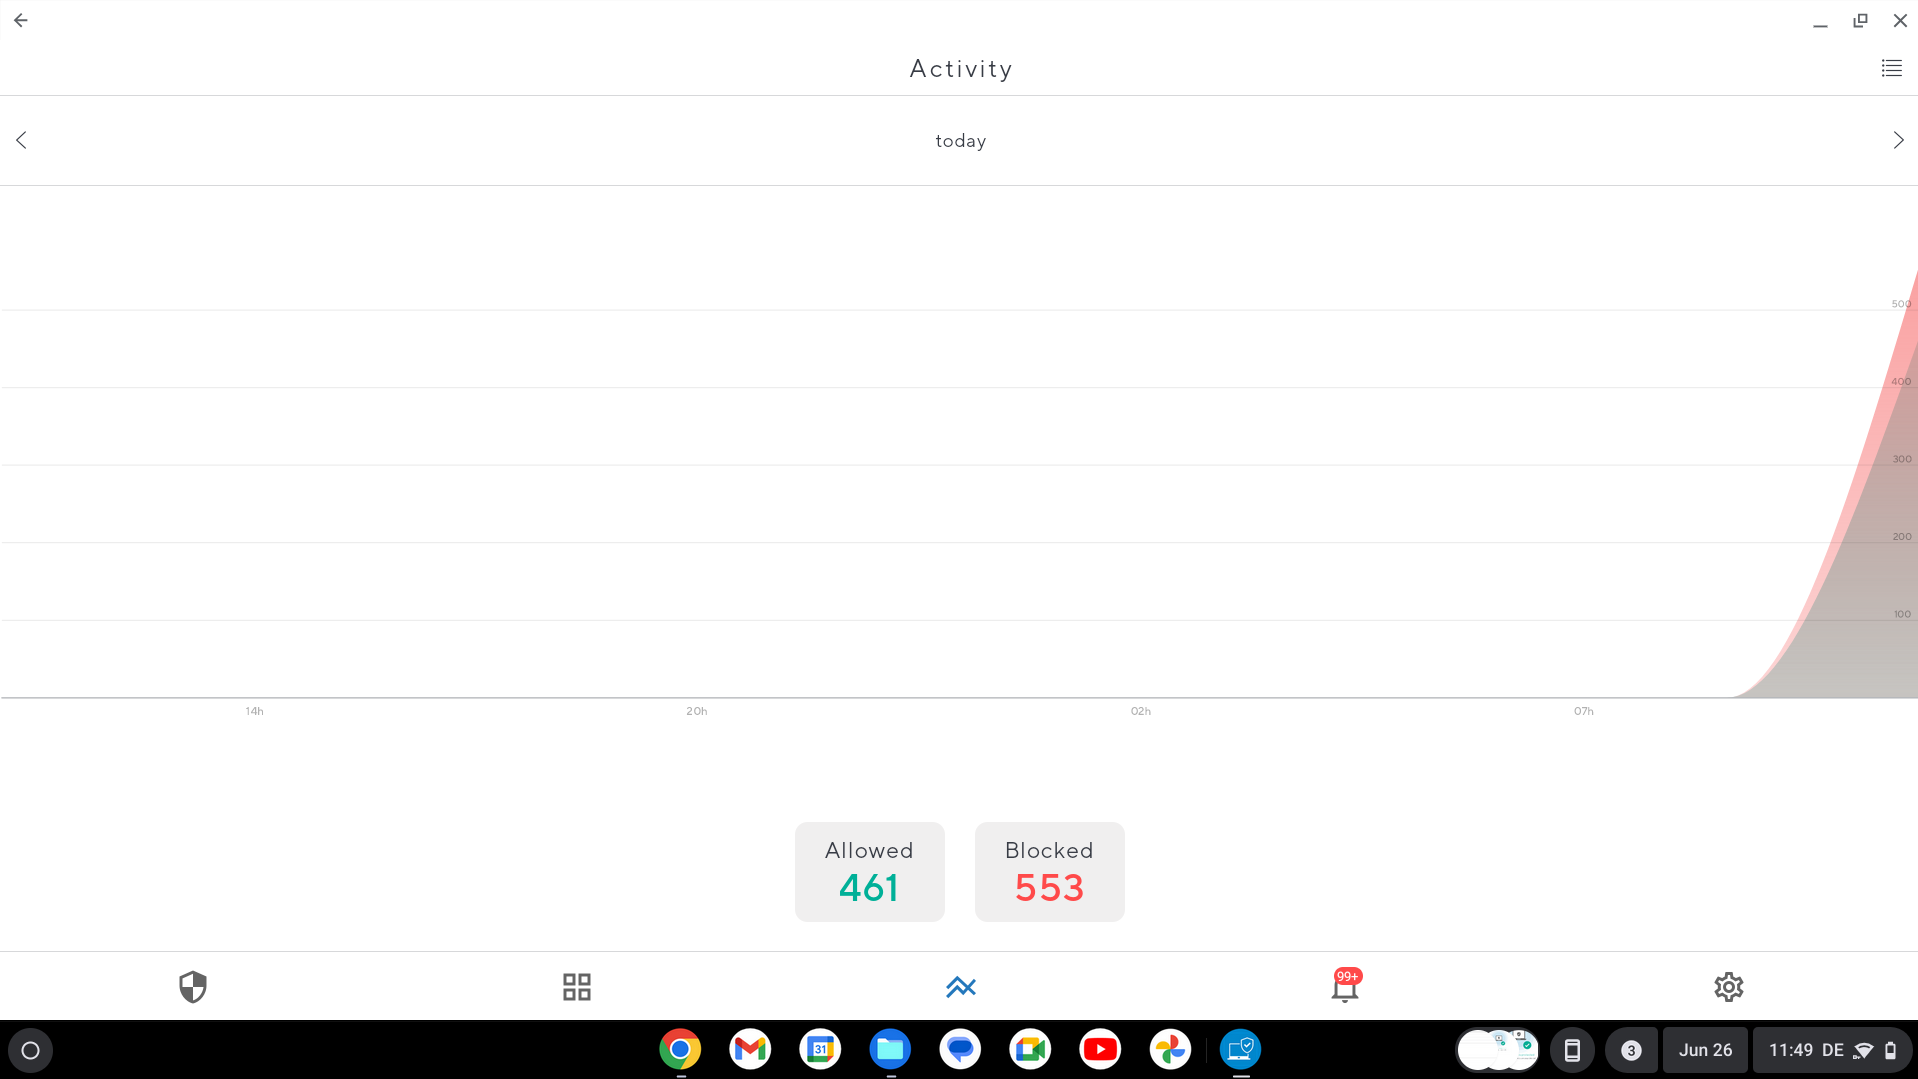
Activity – The Activity page displays DNS-based allowed or blocked traffic. You can see a graphical representation of your system's activity with respect to date and time.
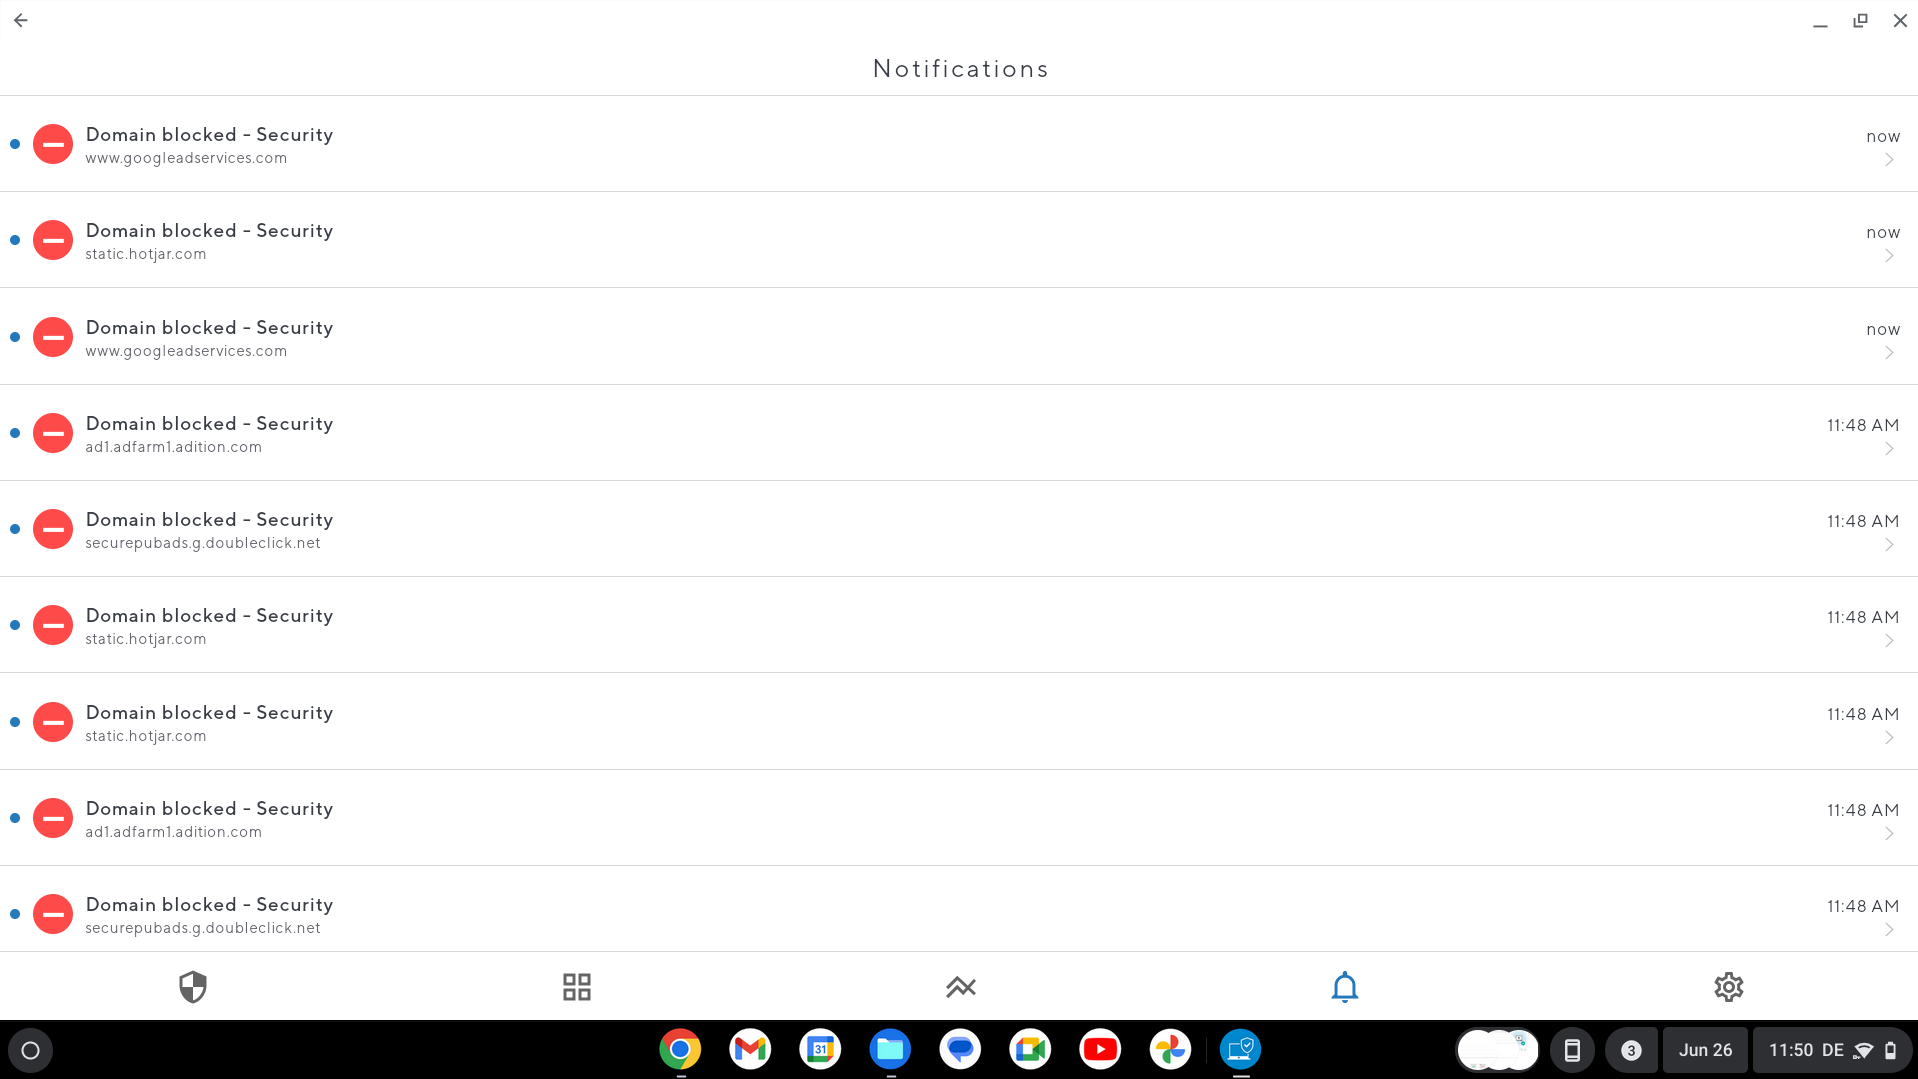
Notifications – The Notifications page displays DNS-based blocked websites.
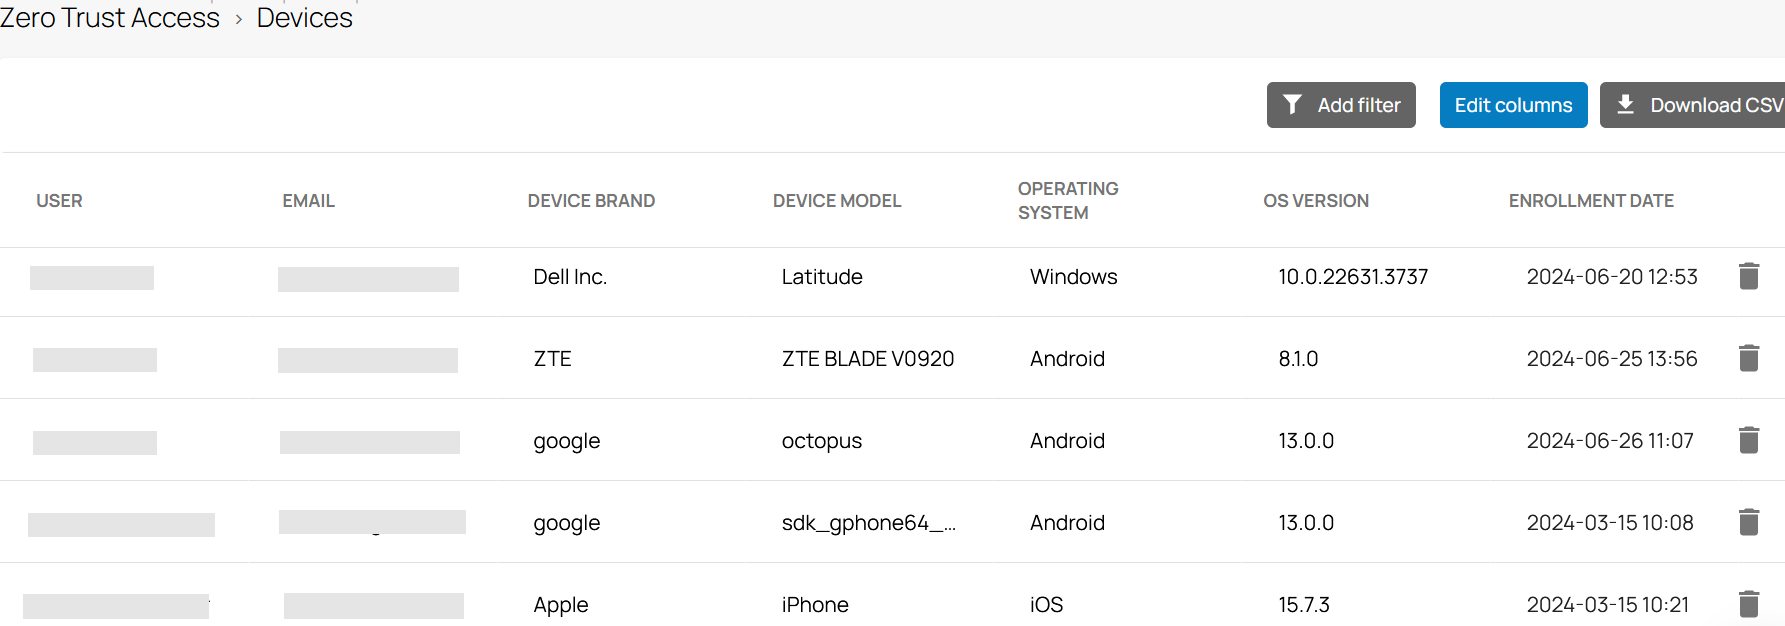
After completing the enrollment procedure, your device is protected. On the Users page of the SecureEdge Manager, you can see the status of the field names, e.g., DEVICE COUNT =1 and ENROLLMENT COMPLETED. On the Devices page of the SecureEdge Manager, you can also verify enrolled devices and users. All enrolled devices deployed in the selected workspace are displayed. You can see that your device is enrolled.