

To prepare servers running Microsoft Windows Server 2003 or Windows Server 2008 for Direct Server Return (DSR), complete the following steps for each server.
Step 1. Disable the Loopback Adapter
By default, the Windows firewall blocks all connections to the loopback adapter. To enable traffic to the loopback adapter, disable the built-in firewall or manually change the rules to enable traffic to and from the loopback adapter.
Step 2. Install the Loopback Adapter
Windows Server 2003
For instructions on installing the Microsoft Loopback Adapter for Windows Server 2003, see How to install the Microsoft Loopback Adapter in Microsoft Windows Server 2003.
Windows Server 2008
For instructions on installing the Microsoft KM-TEST Loopback Adapter for Windows Server 2003, see Installing the Microsoft Loopback Adapter in Windows 8 and Windows Server 2012.
Windows Server 2008 or Windows Server 2008 R2
To install the Microsoft loopback adapter for Windows Server 2008:
- Open Device Manager. On the Start menu, click Run and type
devmgmt*.mscat the prompt. - Right-click the server name and select Add legacy hardware.
- When you are prompted by the wizard, select Install the hardware that I manually select from a list (Advanced).
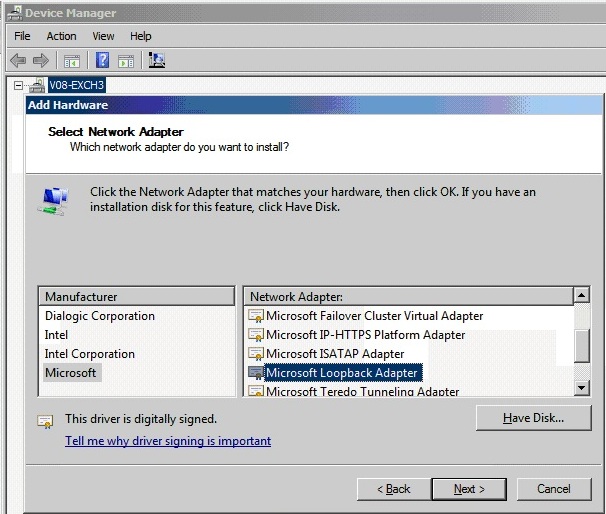
- Find Network Adapter in the list, and click Next.
- From the list of manufacturers, select Microsoft and Microsoft Loopback Adapter. A new network interface is added to your server.
Step 3. (Windows Server 2008 or Windows Server 2008 R2 Only) Implement the Weak Host Model
If you are using Windows Server 2003, you can skip to Step 4 Add the Loopback Adapter to your Site Bindings.
If you are using Windows Server 2008 or Windows Server 2008 R2, implement the Windows networking stack with the weak host model (which is the same model used in Windows Server 2003).
- Open a command prompt with elevated permissions. To determine the interface ID for both the loopback adapter and the main NIC on the server, type:
netsh interface ipv4 show interface - Note the IDX for both the main network interface and the loopback adapter that you created. If you have not changed the interface names for this server then usually the main NIC displays as Local Area Connection, and the loopback adapter is named Local Area Connection 2.
An entry appears with the IDX numbers for both your loopback adapter and your Internet facing NIC. For each of these adapters enter the following commands:
netsh interface ipv4 set interface <idx> weakhostreceive=enabled
netsh interface ipv4 set interface  weakhostsend=enabled
netsh interface ipv4 set interface  <idx>  weakhostreceive=enabled
For example:
netsh interface ipv4 set interface 23 weakhostreceive=enabled
netsh interface ipv4 set interface 24 weakhostsend=enabled
netsh interface ipv4 set interface 24 weakhostreceive=enabled
Step 4. Add the Loopback Adapter to your Site Bindings (IIS only)
To bind the loopback adapter:
- Open the Internet Information Services (IIS) Manager.
- In the Connections pane, expand the Sites node in the tree.
- Click Default Web Site or the name of the site that you are modifying.
- In the Actions pane, click Bindings.
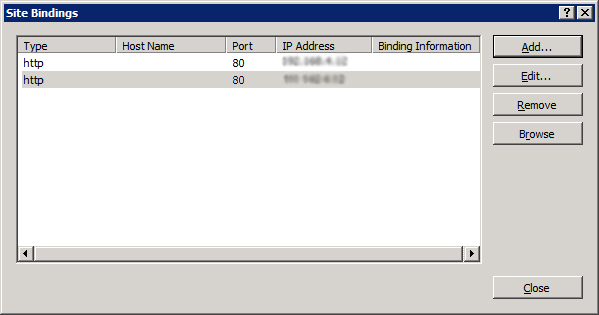
- In the Site Bindings window, click Add.
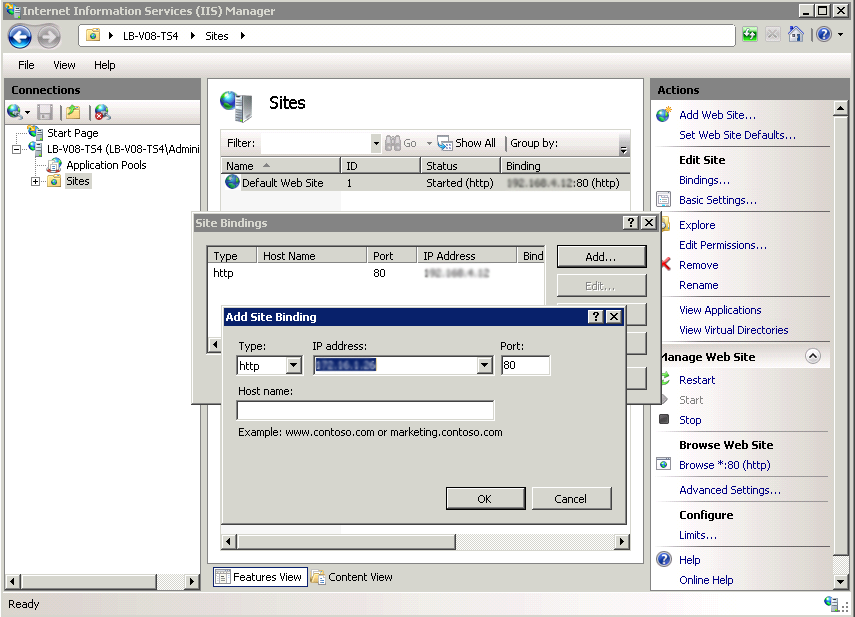
- In the Add Site Binding window, select the type of site and then enter the IP address and port of your loopback adapter.
- Click OK to add the site binding.
- In the Actions pane, click Restart under Manage Web Site to ensure that the new binding takes effect.
Step 5. Verify Direct Server Return Deployment
Ping the real servers and the VIP address, and telnet to the real servers. If the ping does not work or the connection is refused, then the loopback adapter has not been configured correctly.
Verify that the loopback adapters are non-ARPing. On either Linux or Windows systems, use the arp -a command. Also, view the systems event logs to check for IP address conflicts.
If the client cannot access the application after the service is set up, then the IIS (Windows) or application has not been associated with the real IP address and the VIP address.