

You can configure an Okta user directory for the workspace with the unified, cloud-based Barracuda SecureEdge Manager. To synchronize with an Okta tenant, you must authorize Barracuda SecureEdge to access your data. This requires obtaining the domain name and an authentication token from Okta by using an administrative account.
Configure Okta
The user directory retrieves users and groups from multiple sources and syncs them into a selected Okta user directory. To add an Okta user directory:
Go to https://se.barracudanetworks.com and log in with your existing Barracuda Cloud Control account.
In the left menu, click the Tenants/Workspaces icon and select the workspace you want to configure the Okta user directory for.
Go to Identity > Settings.
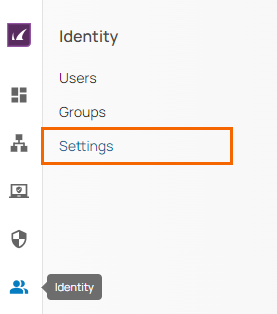
The Settings page opens.
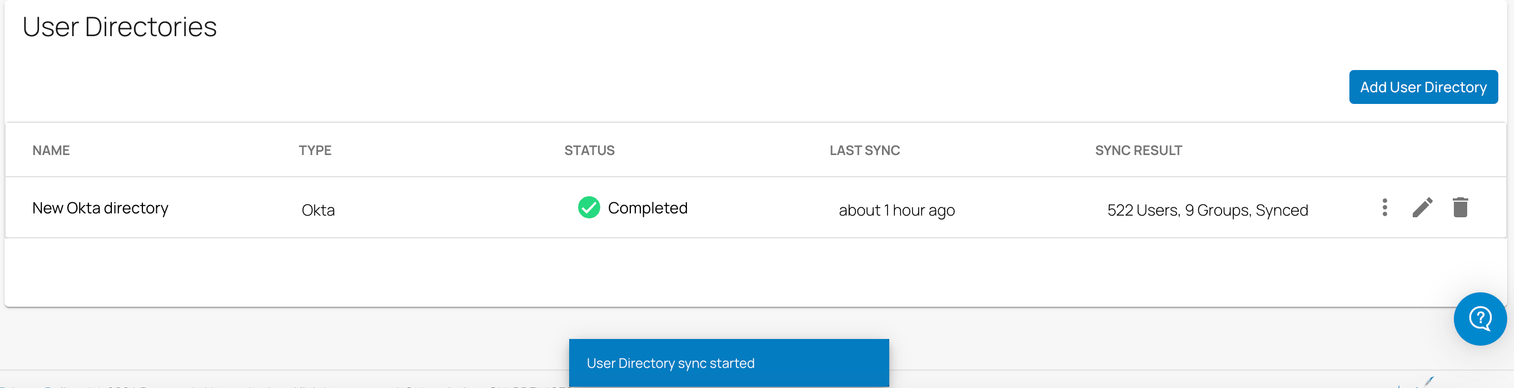
In the User Directories section, click Add User Directory.
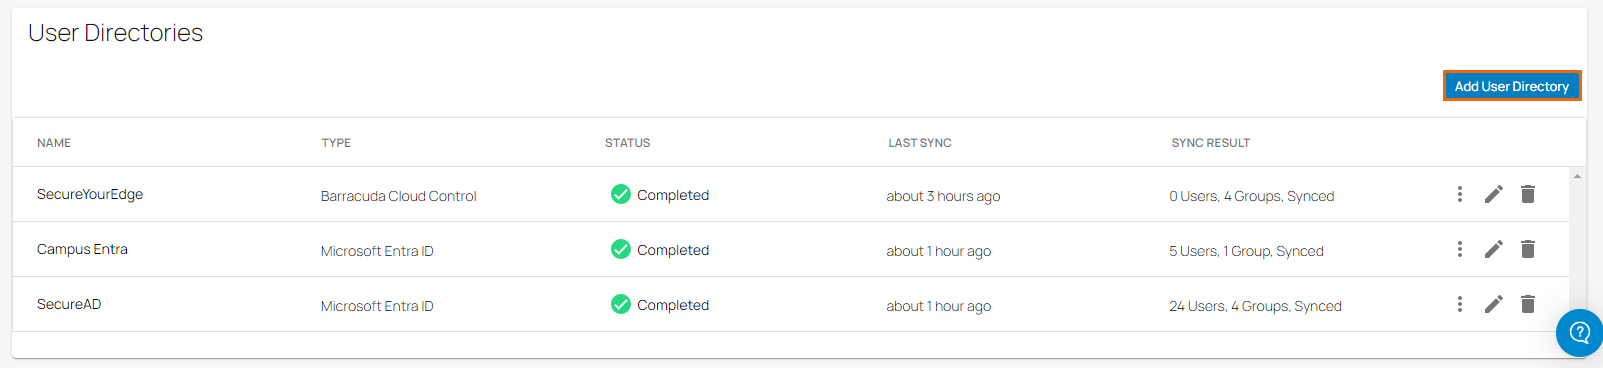
From the user directory drop-down menu, select Okta.
The Add User Directory page opens. Specify the values for the following:
Display Name – Create a display name to represent the user directory.
Okta Domain Name – Enter the Okta domain name. This is the domain assigned to your organization inside Okta.
Okta Auth Token – Enter the Okta auth token. This is an Okta authentication token, and it is required to sync with Okta directories.
Groups Included – Enter the group to be included. To add more groups, click +. Note: For the group filter to work, you must provide the exact group name.
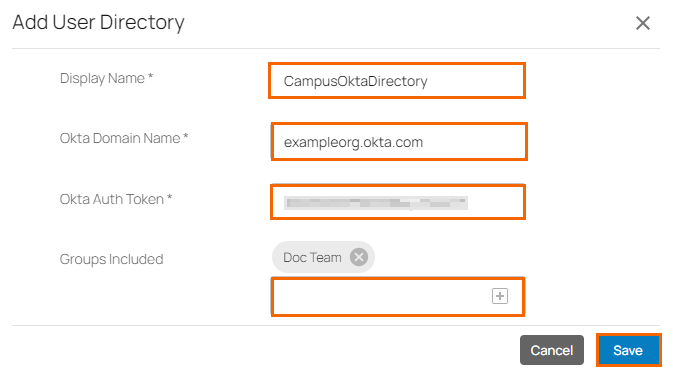
Click Save.
In the User Directories section, a new Okta user directory has been added and the STATUS is shown as Pending. The directory sync may take a few minutes.
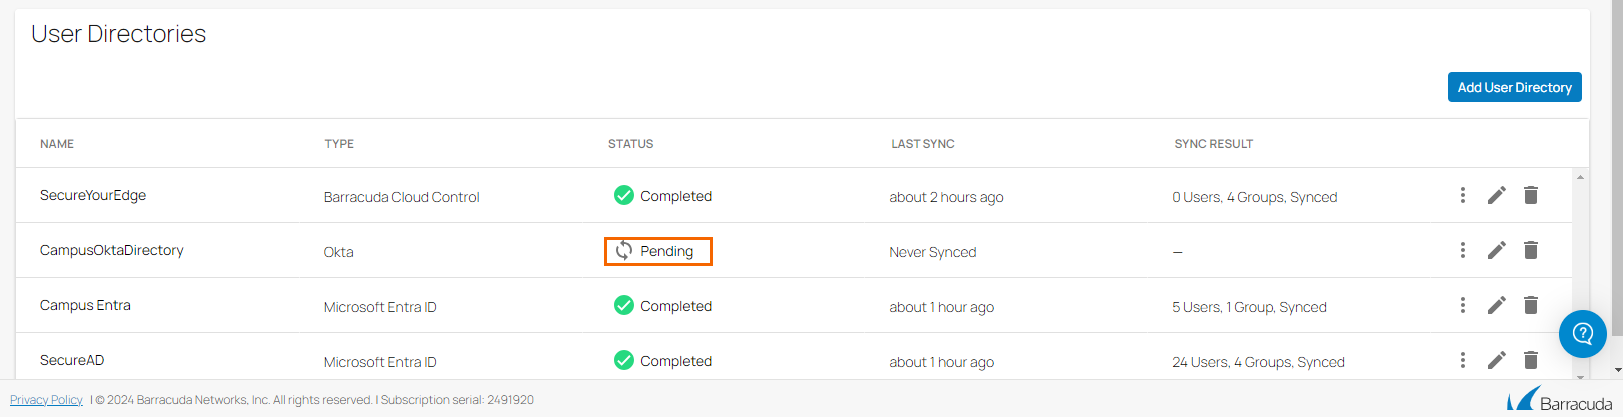
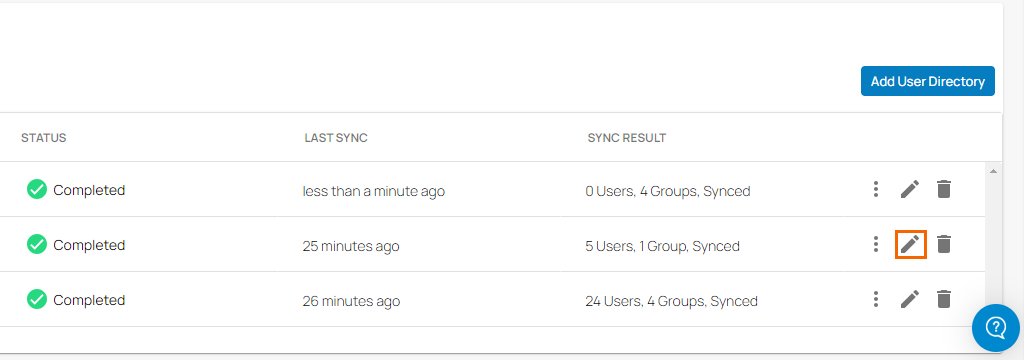
After directory sync is completed, verify that in the User Directories table, under the fieldname STATUS, the text has changed to Completed with a green check mark.

In addition, information under the fieldname LAST SYNC displays the time the last sync occurred. The field name SYNC RESULT displays the number of users or groups already synced. Verify that you see all Okta directory users and groups on the respective Identity > Users and Identity > Groups pages.
Edit Okta
To edit the Okta user directory:
In the left menu, click the Tenants/Workspaces icon and select the workspace you want to edit the Okta user directory for.
Go to Identity > Settings.
The Settings page opens. In the User Directories section, you can see that Okta is displayed as your user directory.
To edit your Okta account, click on the pencil icon.
The Edit User Directory page opens. Edit the value you are interested in. For example, you can modify values for the field names such as Display name, Okta Auth Token, and Groups Included. Note: You cannot change the value for the Okta domain name because the option Okta Domain Name is disabled.
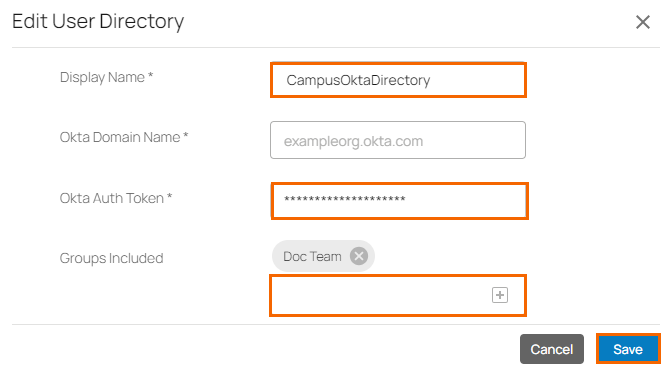
Click Save.
Remove Okta Directory
To remove the Okta directory associated with the selected workspace:
In the left menu, click the Tenants/Workspaces icon and select the workspace you want to remove the Okta user directory for.
Go to Identity > Settings. The Settings page opens.
In the User Directories section, you can see your Okta user directory is displayed.
To remove an existing Okta user directory, click on the trash can icon.

The Delete User Directory <Name of Your User Directory> page opens.
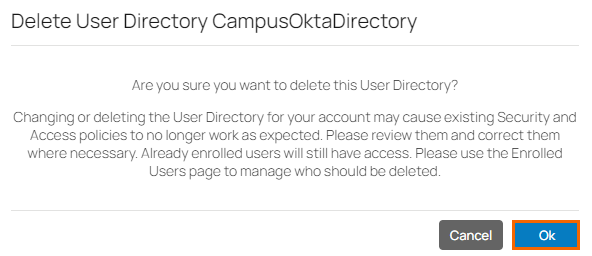
Click Ok to confirm.
You can verify the following:
You can verify that the previous users/groups from the Okta user directory are not shown on the Identity > Users and Identity > Groups pages.
For your selected workspace, you can now configure a new user directory of your choice. You can verify that the users/groups from this new user directory are available in the security policies drop-down menu and are shown on the respective Identity > Users and Identity > Groups pages.
(Optional) Sync with Okta Directory
If you must sync the Okta user directory quickly, proceed with the following steps:
On the Settings page, go to the User Directories section, and click the icon of three vertical dots to sync the user directory.
Click Sync.
The User Directory sync started pop-up window opens.
You will soon see that the sync has fetched and updated the users and groups in the identity management associated with the Okta user directory. Verify that you see all Okta directory users and groups on the Identity > Users and Identity > Groups pages after the successful sync.