

The Barracuda SecureEdge Manager allows administrators to configure the System for Cross-domain Identity Management (SCIM) user directory for your selected workspace. SCIM can be used to automate the flow of identity information between an identity provider and cloud-based services. In order to configure Microsoft Entra ID for the SCIM directory, you must first create the SCIM User Directory. The SecureEdge Identity Management will make a request to the SCIM service internal endpoint to generate tokens and the SCIM external URL to the user. The user need to copy these values and use them in the provider SCIM setup.
Step 1 Configure SCIM
The configuration steps required depend on the user directory you use. To add a SCIM user directory:
Go to https://se.barracudanetworks.com and log in with your existing Barracuda Cloud Control account.
In the left menu, click the Tenants/Workspaces icon and select the workspace you want to configure the Microsoft Entra ID user directory for.
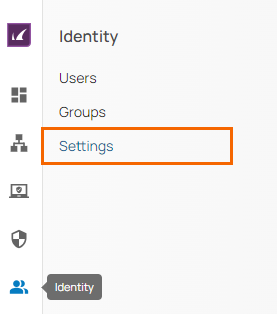
In the left menu, click Identity > Settings.
The Settings page opens.
In the User Directories section, click Add User Directory and select SCIM from the user directory drop-down menu.
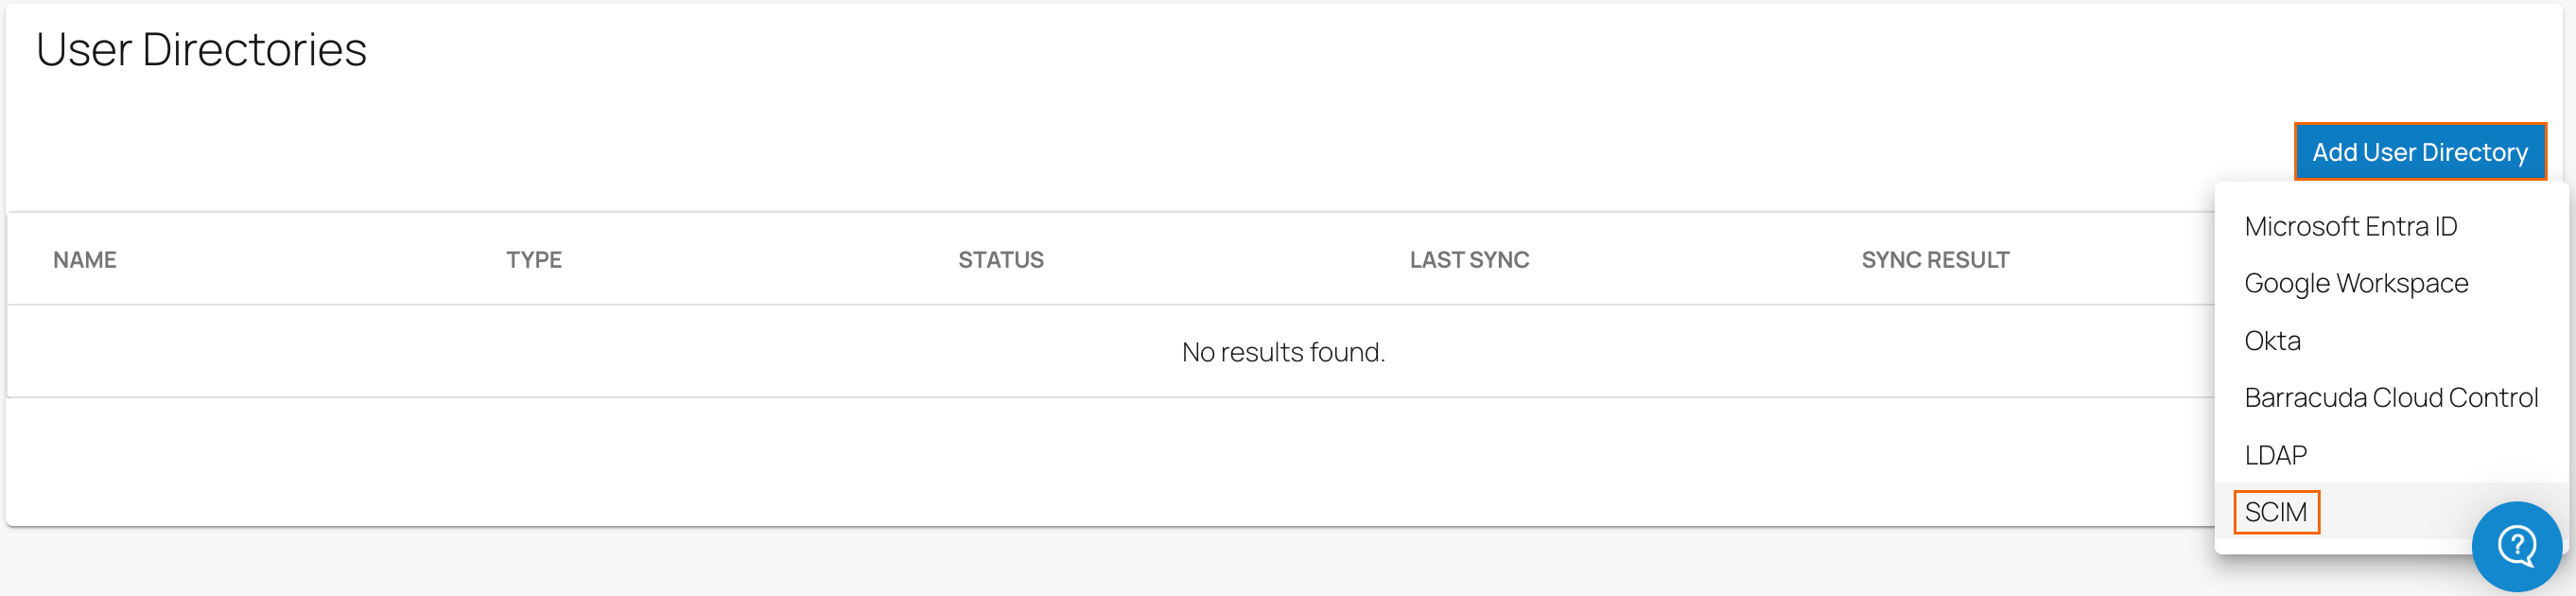
The Add User Directory page opens.
Under User Directory Info tab, specify the values for the following:
Display Name – Enter display name.
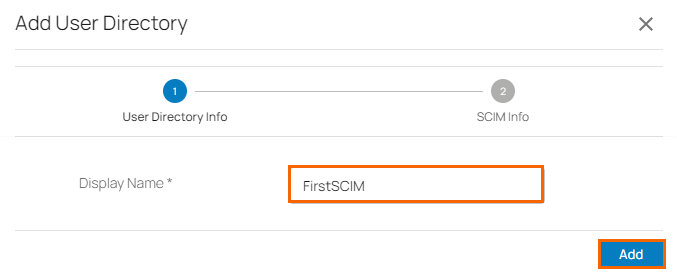
Click Add.
You can see the SCIM user directory endpoint and Primary / Secondary tokens are displayed. You can use these values in the provider SCIM setup.
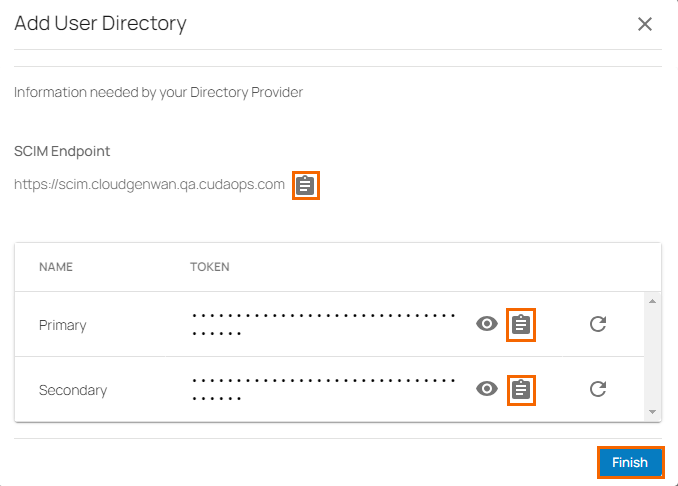
Click on the clipboard icon to copy and paste the token to a text file. Note: You can regenerate these tokens by clicking on the rotate icon.
Click Finish.
In the User Directories table, a new SCIM user directory has been added. Under the fieldname STATUS, you can see that the STATUS is shown as pending. The directory sync may take a few minutes.

To configure Microsoft Entra ID for the SCIM User Directory, go to Step 2.
After the directory sync is completed, verify that in the User Directories table, under the fieldname STATUS, the text has changed to Completed with a green check mark.

In addition, information under the fieldname LAST SYNC displays the time the last sync occurred. The fieldname SYNC RESULT displays the number of users or groups already synced. Verify that you see all SCIM directory users and groups on the respective Identity > Users and Identity > Groups pages.
Edit SCIM
To edit the SCIM user directory:
In the left menu, click the Tenants/Workspaces icon and select the workspace you want to edit the Barracuda Cloud Control user directory for.
Go to Identity > Settings.
The Settings page opens. In the User Directories section, you can see that Microsoft Entra ID is displayed as your user directory.
To edit your SCIM account, click on the pencil icon.

The Edit User Directory page opens. Edit the value you are interested in. Note: Only display names of SCIM user directory are editable.
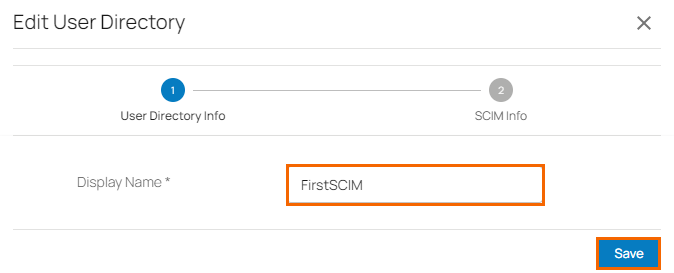
Click Save.
Remove SCIM
To remove the SCIM directory associated with the selected workspace:
In the left menu, click the Tenants/Workspaces icon and select the workspace you want to remove the SCIM user directory for.
Go to Identity > Settings. The Settings page opens.
In the User Directories section, you can see your SCIM user directory is displayed.
To remove an existing SCIM user directory, click on the trash can icon.

The Delete User Directory <Name of Your SCIM User Directory> page opens.
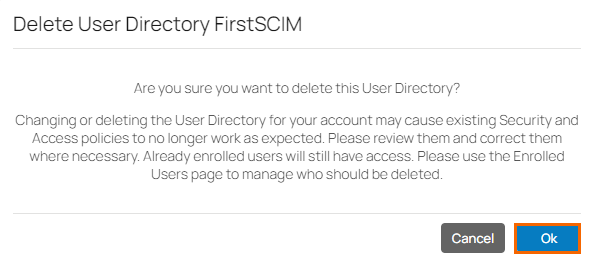
Click Ok to confirm.
(Optional) Set Up SCIM
On the Settings page in the User Directories section, click the icon of three vertical dots.
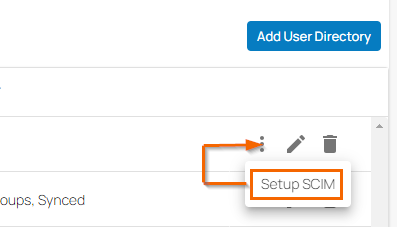
Click Setup SCIM.
The Setup SCIM page open.
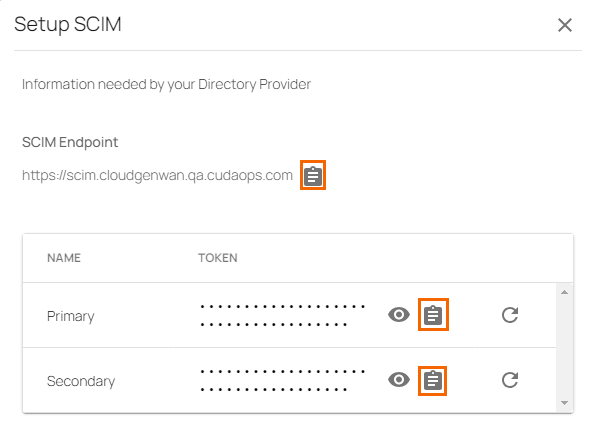
You can use the SCIM Endpoint, Primary / Secondary Tokens to update an existing SCIM configuration.
Step 2 Create Enterprise Application in Microsoft Entra ID without Using Provision on Demand
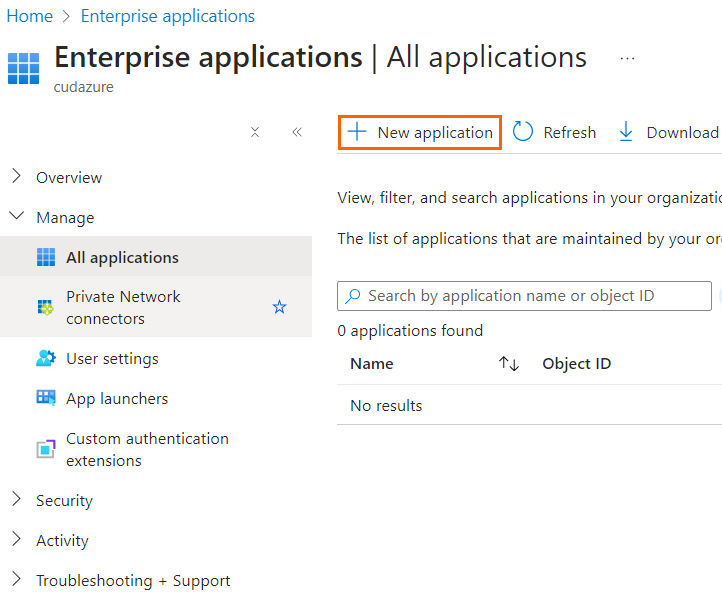
Log into your Azure Management Portal (https://portal.azure.com).
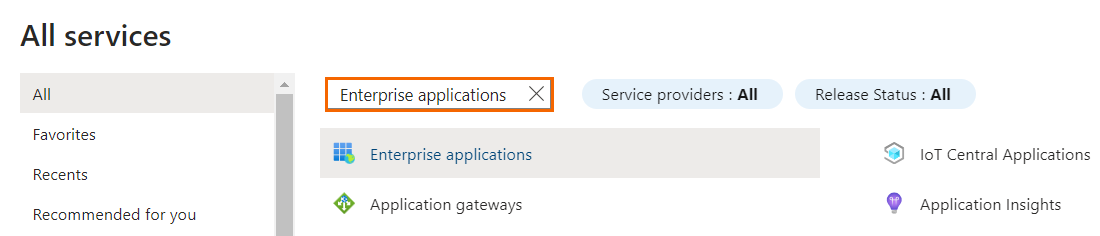
Search for Enterprise applications.
Click New application.
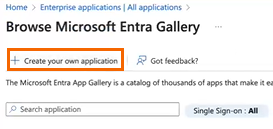
On the Browse Microsoft Entra Gallery page, click Create your own application.
The Create your own application window opens. Specify values for the following:
Enter the name of your application
Ensure that the Integrate any other application you don't find in the gallery (Non Gallery) is selected.
The <Name of your application> Overview page opens. Click Provisioning.
In the Provisioning page, click Get Started and specify the values for the following:
Provisioning Mode – Select Automatic.
In the Admin Credentials section, specify values for the following:
Tenant URL – Enter the SCIM Endpoint you retrieved in Step 1.
Secret Token – Enter the token. You can enter either the Primary or Secondary token you retrieved in Step 1.
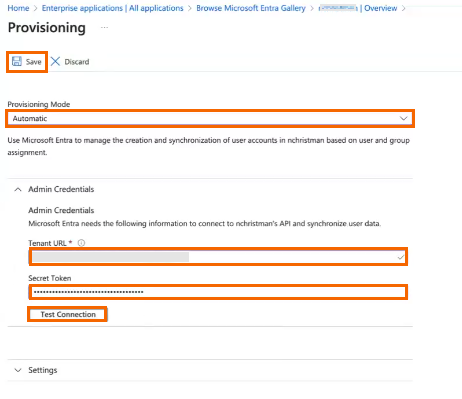
To check the connection, click Test Connection.
Click Save.
Go to the <Name of your application> Overview page. You can see no users are added to your application. On the top of the Overview page, click Start Provisioning.
In the left menu of the Overview page, select Users and groups and click + Add user/group.
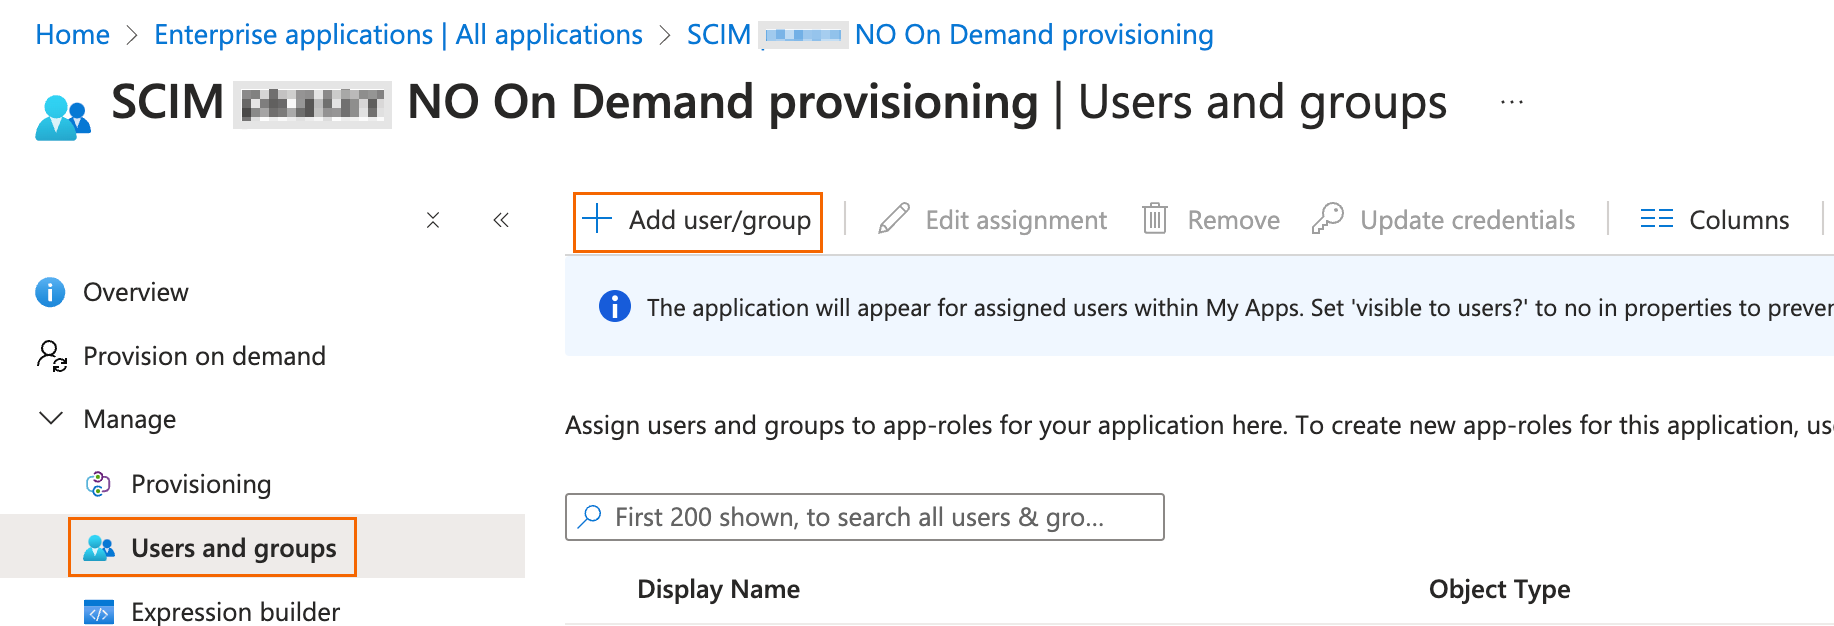
The Add Assignment page opens. Click Users.
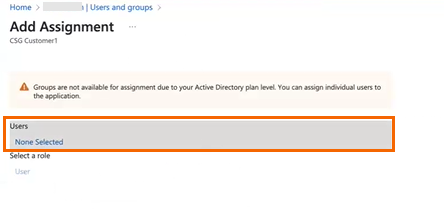
On the right side of the Add Assignment page, the Users window opens. To add users, click Select.
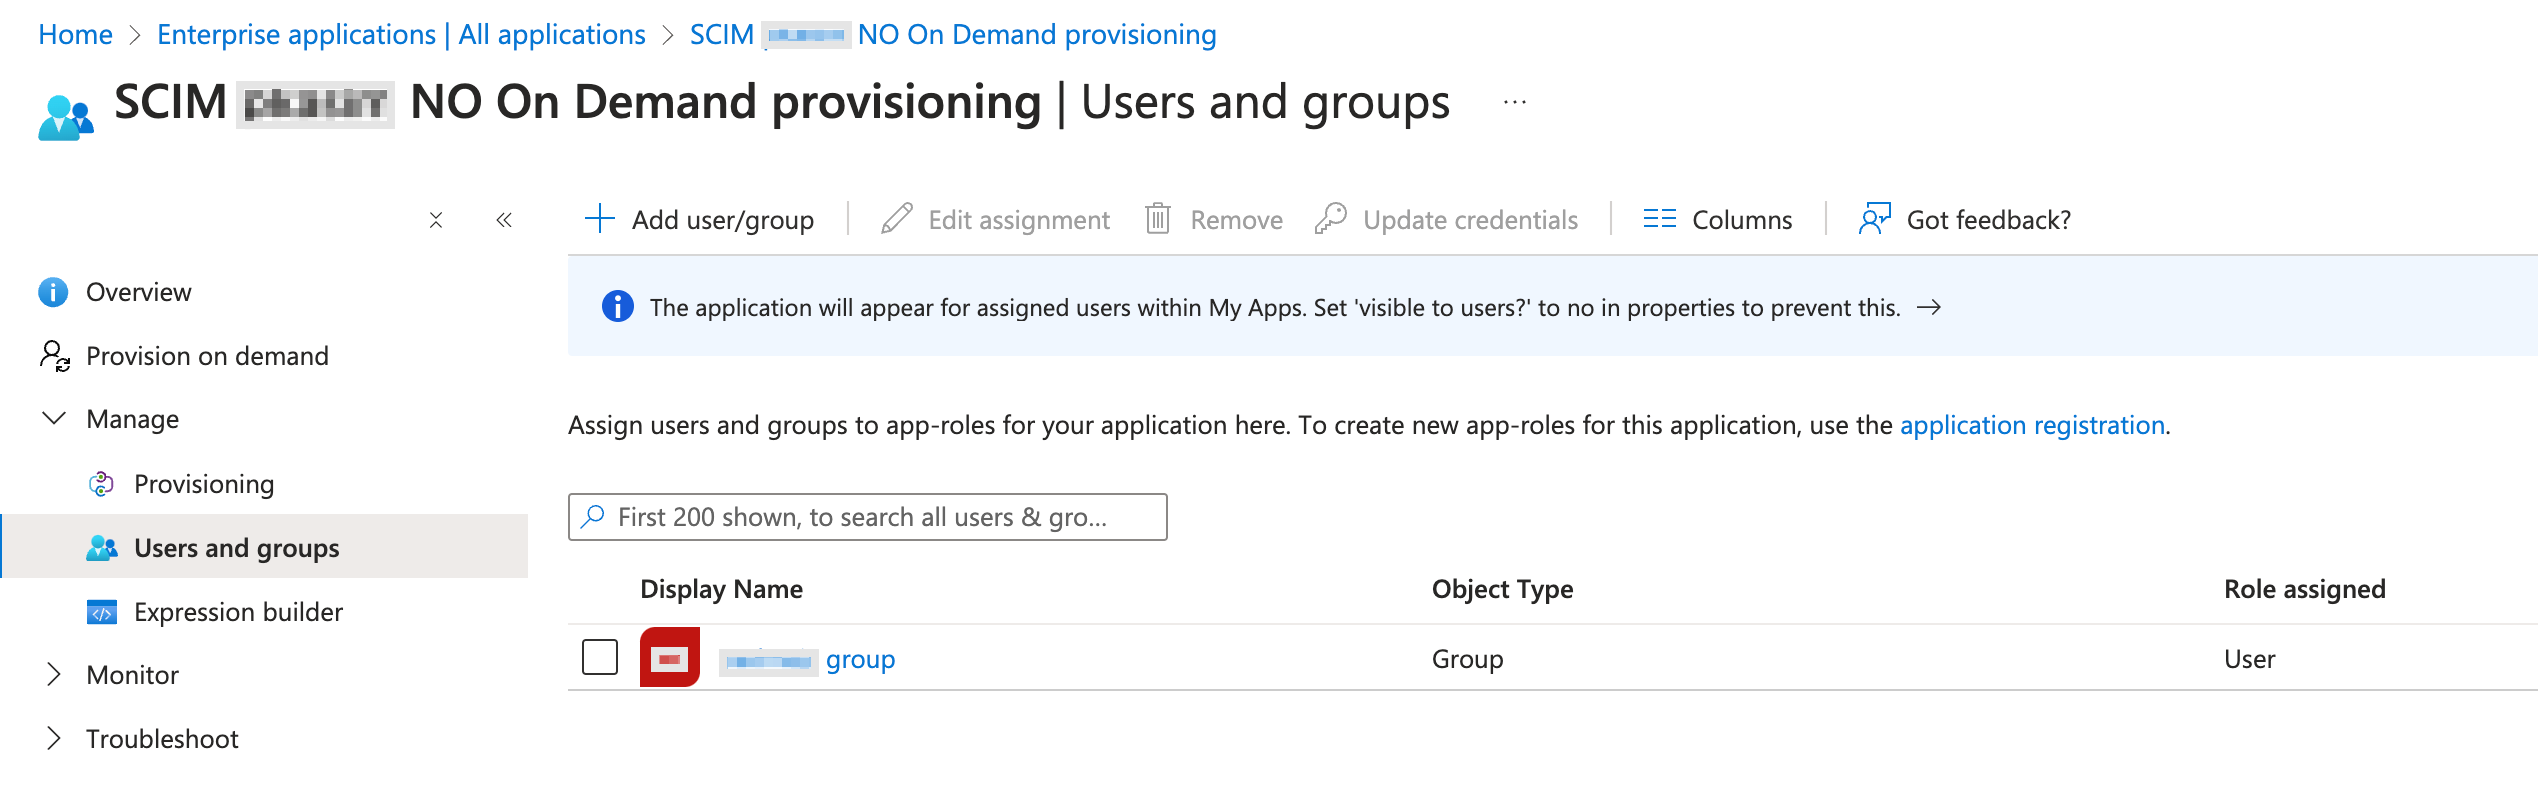
In the Users and groups section, you can see the users that have been added.
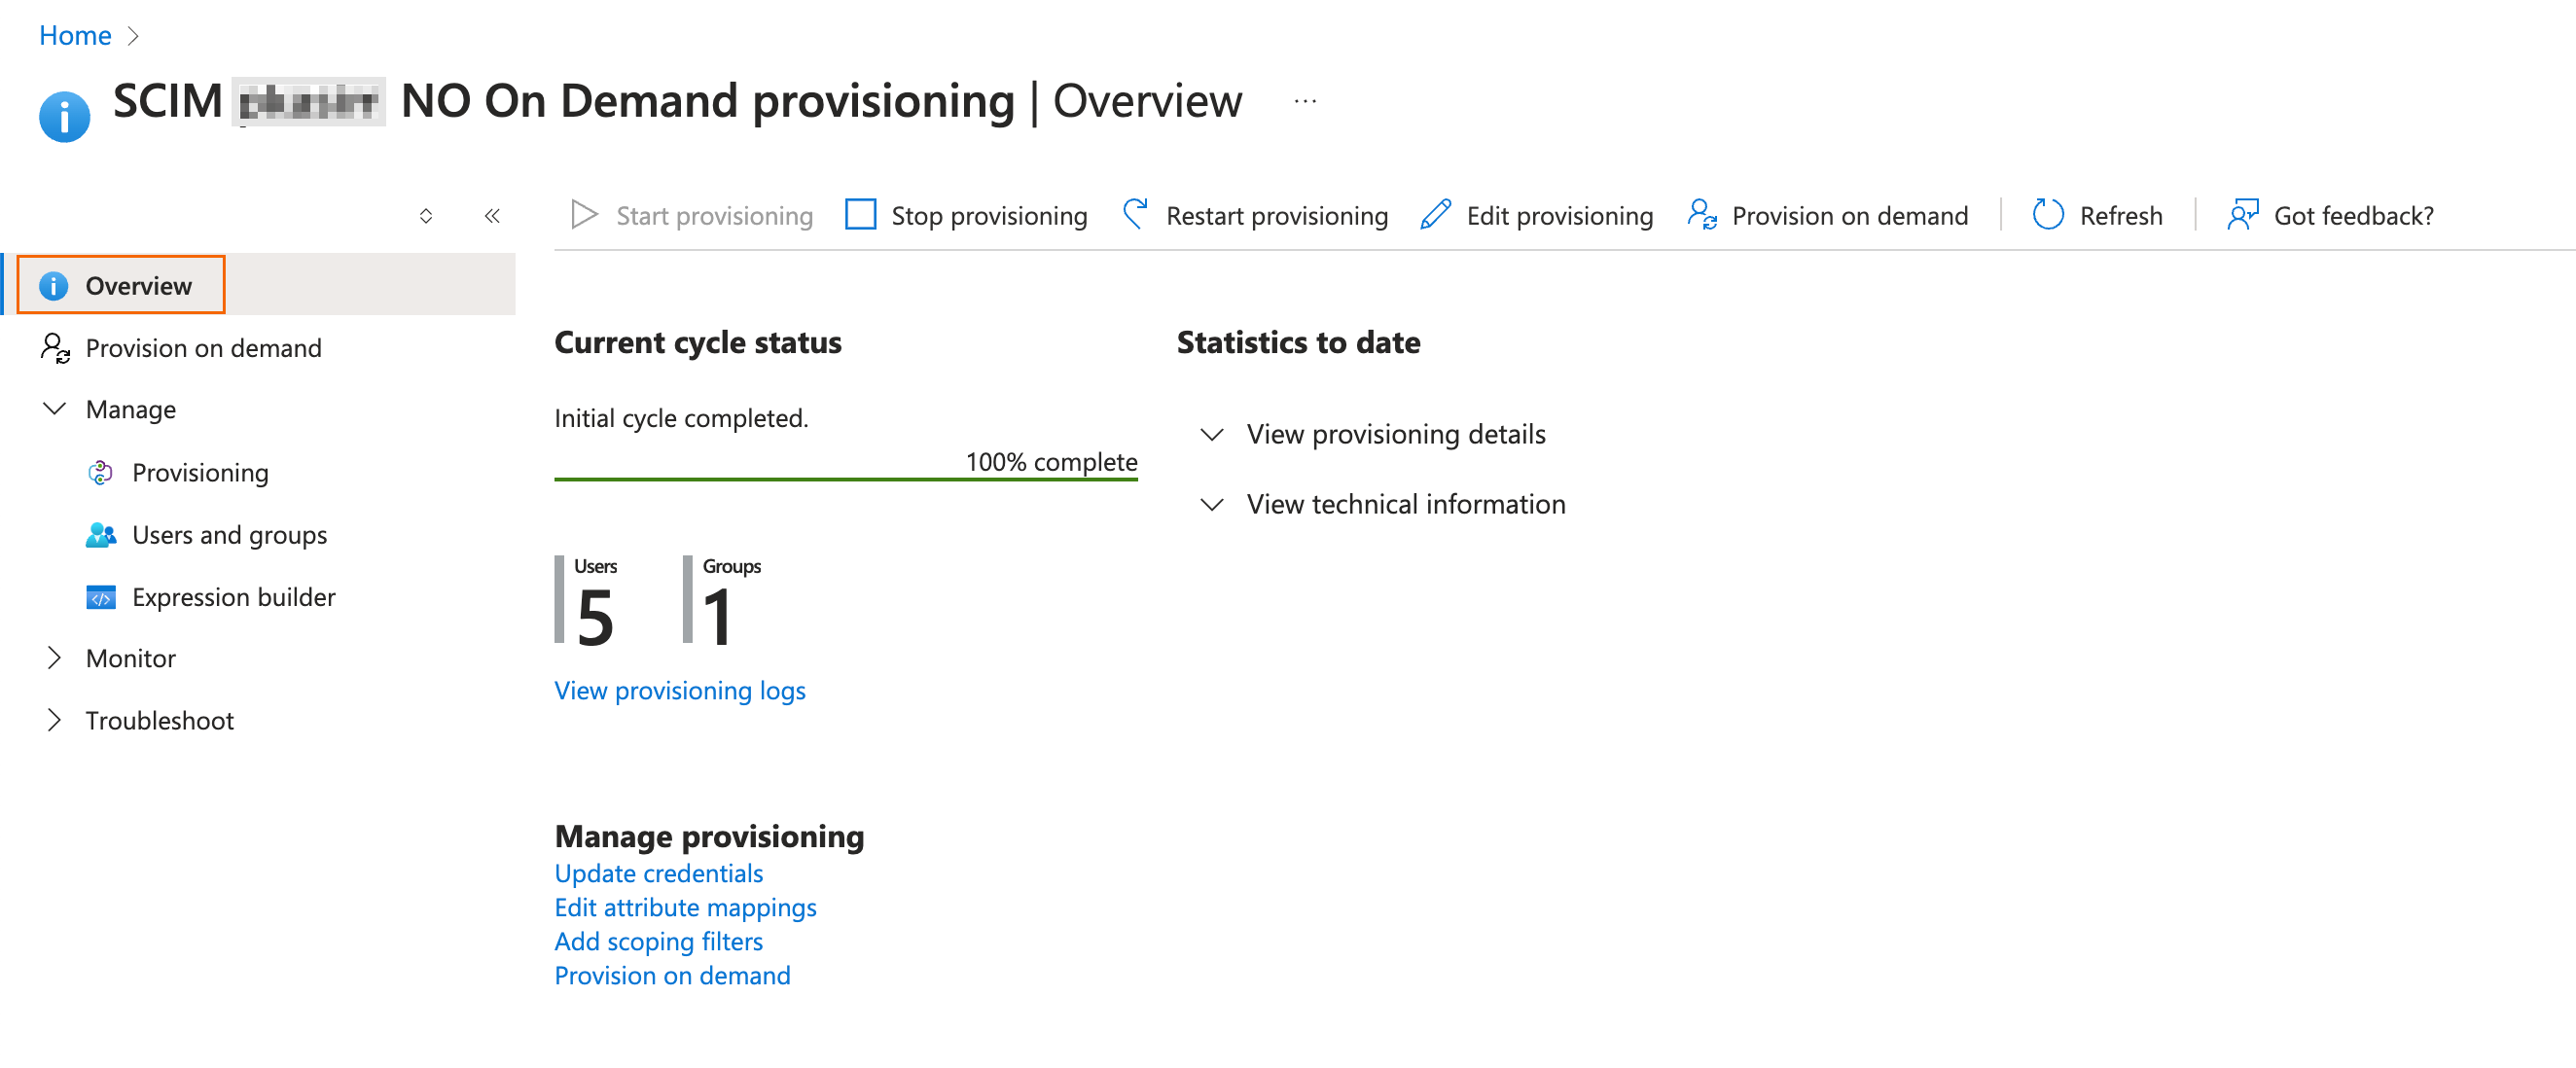
On the Overview page, you can verify that the Current cycle status has no provisioning on demand.
Verify the status of the SCIM user directory in SecureEdge.
In the User Directories table, you can see that the STATUS of the SCIM user directory , e.g., SCIM for group No on demand provisioning, is shown as pending before synchronization.

After the sync is completed, you can see the SCIM user directory has been updated in SecureEdge. Under the fieldname STATUS, the text has changed to Completed with a green check mark, and the fieldname SYNC RESULT column shows the total number of users and groups synced.

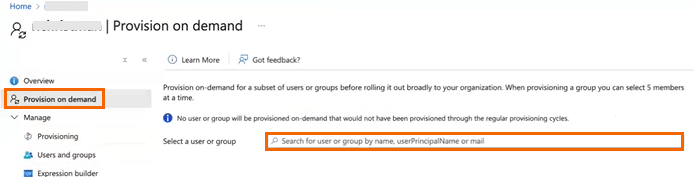
(Optional) Create Enterprise Application in Microsoft Entra ID with Provision on Demand
If you must sync users/groups instantly, proceed with the following steps:
Go to the <Name of your application> Overview page.
In the left menu, click Provision on demand and select a user or group.
You can see that a new user or group has been added to your application and automatically updated and synchronised in SecureEdge. You can verify this under the fieldname SYNC RESULT, which shows the total users and groups to be the same as the source directory.
