

The Barracuda Web Application Firewall provides a predefined set of HTML pages that are used by the relevant modules as responses. The response pages are used in the following modules:
- SECURITY POLICIES > Global ACLs - if Deny Response is set to Response Page.
- SECURITY POLICIES > Action Policy - if Deny Response is set to Send Response.
- WEBSITES > Allow/Deny > URL : Allow/Deny Rules - if Deny Response is set to Response Page.
- ACCESS CONTROL > Authentication Policies - To capture user login credentials, or to handle various error conditions.
These response pages can be customized according to your requirement, or you can create a response page with a custom message (i.e. error message, attack information, a unique ID, etc.) to display to users. A custom response page can be configured in the ADVANCED > Libraries > Response Pages section, and then associated with the appropriate module. A response page can include:
- An error message if a user violates a configured security policy.
- A login/challenge page to authenticate/authorize a user.
- A CAPTCHA and challenging the user to respond.
Steps to Create a Custom Response Page
- Go to the ADVANCED > Libraries page, Response Pages section and click Add Response Page.
- On the Add Response Page window, specify values for the following:
- Response Page Name – Enter a name for the response page.
- Type – Select the type of response page you want to create.
- Error Pages – Response pages displayed in relevant modules when the request is blocked due to violation of configured security policies.
- CAPTCHA Pages – Response pages displayed in relevant modules where the user needs to be challenged with a CAPTCHA.
- Access Control Pages – Response pages displayed when authentication and authorization is enabled for a service.
- Other Pages – Response pages to use in any module.
- Status Code – Enter an HTTP status code for the response page. Examples: 404 Not Found, 200 OK, 302 Found, etc.
- Headers – Enter the response headers for the response page. Examples:
- Allow - Request method (GET, POST, etc.) the server supports.
- Content-type - Content type of the resource (such as text/HTML).
- Connection - Options specified for a particular connection that must not be communicated by proxies over further connections.
- Location - Location for client to retrieve the document.
- Refresh - Refresh time in seconds the browser asks for an updated page.
X-Frame-Options - Set the header value to DENY or SAMEORIGIN to enable clickjacking protection for the response page.
X-Content-Type-Options - Set the header value to text or HTML or nosniff to enable clickjacking protection for the response page.
Body – Response body for the response page. This is the HTML source of the response page that will be displayed to the client.
The following macros are supported when you create an error response page. When the error response page displays, these macros are replaced by the following information:
- %action-id - attack ID of the violation which resulted in the response page displaying.
- %host - host header which sent the request.
- %s - URL of the request which caused the violation.
- %client-ip - Client IP of the request which caused the violation.
- %attack-time - time at which the violation occurred.
- %attack-name - attack name of the violation resulting in the response page displaying.
- %log-id - unique ID of the Web Firewall Log, generated due to a violation in the request. The client is presented with a response page including the unique ID.
- Click Save.
Additional Information
You can also embed an image in the response page. The image size to be embedded in the response page should not exceed 12 KB. To embed an image, do the following:
- Convert the image to base64 using openssl or any other utility
- For eg: openssl base64 -in barracuda.jpg -out barracuda-jpg.b64
- Embed the base64 encoded image into a html with the "img" tag.
- For eg: <html><img src="data:image/jpeg;base64,[BASE64 ENCODED IMAGE] alt="Test"/></html>
To use your trademark, copyright, or registered symbol in the response page, use the following HTML codes:
- ® - Registered
- ™ - Trademark
- © - Copyright
Example:
Scenario: You want to present a custom response page to the user if a cross site scripting error is detected by a service using the default security policy of the Barracuda Web Application Firewall.
In this example, we create a custom response page named custom-resp-page associated with the Cross-Site Scripting Parameter attack under the default policy on the SECURITY POLICIES > Action Policy page. In this example, the default policy is associated with the service (www.test.com). If a request injected with a client-side script is sent to the service (test.com), the Barracuda Web Application Firewall detects the attack and sends the response page associated with the violation.
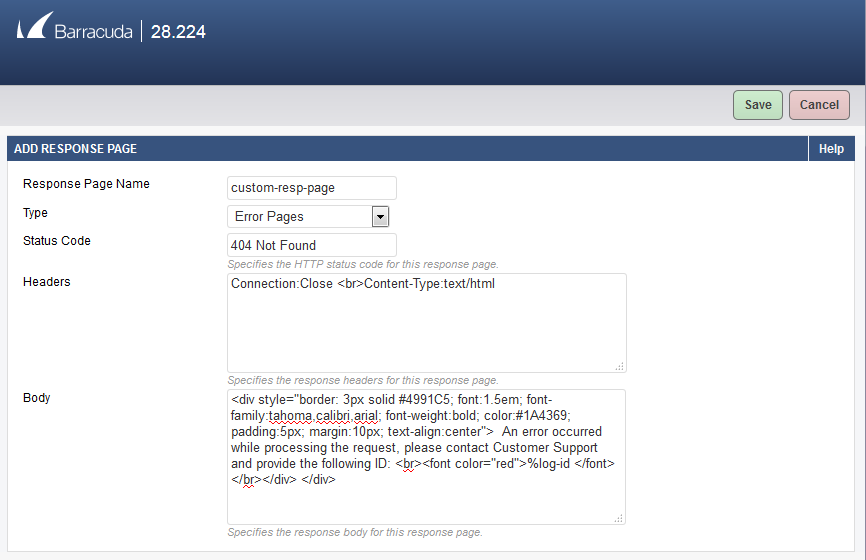
- Go to the ADVANCED > Libraries page, Response Pages section and click Add Response Page.
- On the Add Response Page window, specify values for the following fields:
- Response Page Name - custom-resp-page
- Type - Error Pages
- Status Code - 404 Not Found
- Headers - Connection:Close <br>Content-Type:text/html
- Body - <div style="border: 3px solid #4991C5; font:1.5em; font-family:tahoma,calibri,arial; font-weight:bold; color:#1A4369; padding:5px; margin:10px; text-align:center"> An error occurred while processing the request, please contact Customer Support and provide the following ID: <br><font color="red">%log-id </font></br></div> </div>
- Click Save.
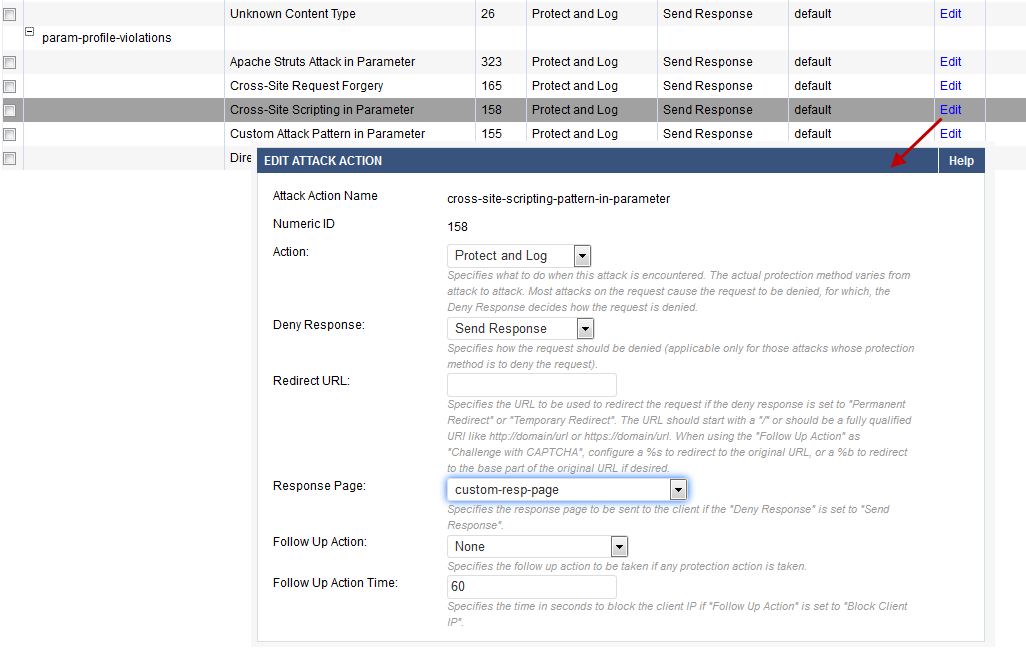
- Go to the SECURITY POLICIES > Action Policy page, and click Edit next to Cross-Site Scripting in Parameter.
- On the Edit Attack Action window:
- Action – Select Protect and Log.
- Deny Response – Select Send Response.
- Response Page – Select the response page (custom-resp-page) you created in step 2.
- Click Save.
- Repeat step 5 for other cross site scripting attacks (i.e. Cross-Site Scripting in Header, Cross-Site Scripting in URL and Cross Site Scripting in JSON Data) on the SECURITY POLICIES > Action Policy page.
- Now, open a web browser and type http://www.test.com:800/index.html?name=<script>
- You will see the configured response page.
