This article walks you through the steps to configure the Barracuda Load Balancer ADC for high availability in Amazon Web Services. It also describes how to configure the Barracuda Load Balancer ADC to manage AWS routes for the applications.
In the high availability setup, both primary and secondary instances must be configured with minimum of two elastic network interfaces (i.e. one default interface for management path traffic and the other for data path traffic). You can deploy the instances in the same availability zone or different availability zones.
- L2 networking is not exposed in AWS, so high availability pair makes use of AWS API's to failover services from the primary unit to the secondary unit in the event of a primary unit outage.
Pre-requisites
Before deploying the Barracuda Load Balancer ADC instances in Amazon Web Services, ensure that you have completed the following:
- Create a Virtual Private Cloud (VPC) - Refer to Step 1. Create the Amazon VPC Cloud in the Amazon Web Services article.
- Add a subnet to the VPC - Refer to Step 2. Add a Subnet to the VPC in the Amazon Web Services article. This step is required only when you want to use different networks for the interfaces you have created.
- Create a Security Group - Refer to Step 1. Create a Security Group in the Barracuda Load Balancer ADC Deployment and Quick Start Guide for Amazon Web Services article. If the instances are in a cluster, add port 8002 (TCP) and port ALL for VRRP as inbound rule in the security group to synchronize the configuration between them.
- Create a Network Interface - Refer to Step 2. Create a Network Interface in the Barracuda Load Balancer ADC Deployment and Quick Start Guide for Amazon Web Services article.
- Disable Source/Dest. Check - Refer to Step 3. Disable Source/Dest. Check in the Barracuda Load Balancer ADC Deployment and Quick Start Guide for Amazon Web Services article.
- Assign Multiple Private IP Address(es) to the Network Interface of the Instance - Refer to Step 4. (Optional) Assign Multiple Private IP Address(es) to the Network Interface of the Instance in the Barracuda Load Balancer ADC Deployment and Quick Start Guide for Amazon Web Services article.
- Create an IAM Role.
- (Optional) Get the Access Keys for Your AWS Account.
Create an IAM Role
AWS Identity and Access Management (IAM) is a web service on Amazon Web Services (AWS) that enables you to manage users and user permissions to AWS resources. Using IAM, you can create a policy with the permissions to AWS resources and associate the policy with a role. When the role is associated with the instance, applications running on that instance can use the role and make AWS API calls. You can select and associate the role with the instance when launching an EC2 instance. A role can be associated with multiple instances on Amazon Web Services.
To meet the needs of the Barracuda Load Balancer ADC HA functionality, create a policy/role with the following permissions for the same availability zone and different availability zones:
IAM Policy for the Same Availability Zone
- Ability to attach an Elastic Network Interface with an instance
- Ability to detach an Elastic Network Interface with an instance
- Read-only permissions to run Amazon EC2 describe* commands
- Ability to assign private IP addresses with an instance
IAM Policy for Different Availability Zones
- Ability to associate Elastic IP address
- Ability to disassociate Elastic IP address
- Ability to describe Elastic IP address
- Read-only permissions to run Amazon EC2 describe* commands
Perform the following steps to create an IAM role:
- Go to the AWS Management Console.
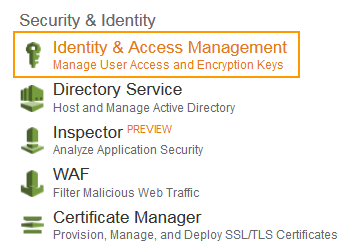
- Click Identity & Access Management under Security & Identity.
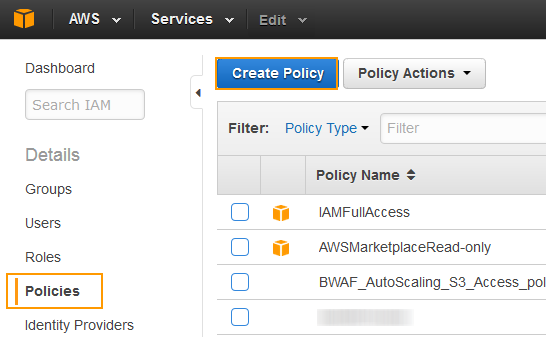
- On the IAM Management Console page, click Policies on the left panel.
- Click Create Policy.
- On the Step 1: Create Policy page, click Select next to Create Your Own Policy.

- On the Step 3: Review Policy page, do the following:
- Policy Name: Enter a name for the policy.
- Description: (Optional) Provide description for the policy.
Policy Document: Define the set of permissions for the policy in the JSON format.
Policy for the Same Availability Zone
{
"Version": "2012-10-17",
"Statement": [
{
"Sid": "Stmt1453446578000",
"Effect": "Allow",
"Action": [
"ec2:AssignPrivateIpAddresses",
"ec2:DescribeInstances",
"ec2:DetachNetworkInterface",
"ec2:AttachNetworkInterface"
],
"Resource": [
"*"
]
}
]
}
Policy for Different Availability Zones
{
"Version": "2012-10-17",
"Statement": [
{
"Action": [
"ec2:DescribeInstances",
"ec2:DescribeAddresses",
"ec2:AssociateAddress",
"ec2:DisassociateAddress",
"ec2:DescribeNetworkInterfaces",
"ec2:DescribeNetworkInterfaceAttributes"
],
"Resource": [
"*"
],
"Effect": "Allow"
}
]
}
- Click Validate Policy to verify that the policy is valid.
- After the policy is validated, a status message: “This policy is valid” gets displayed on the screen.

- Click Create Policy.
- The created policy appears in the policies table.
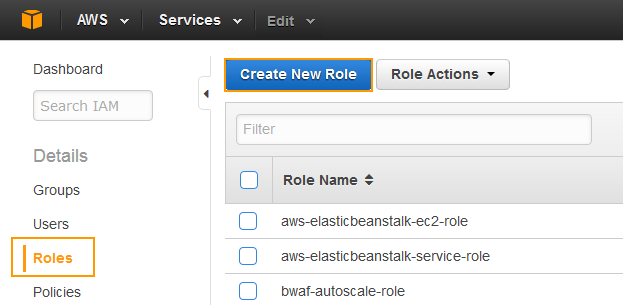
- On the IAM Management Console page, click Roles on the left panel.
- Click Create New Role.
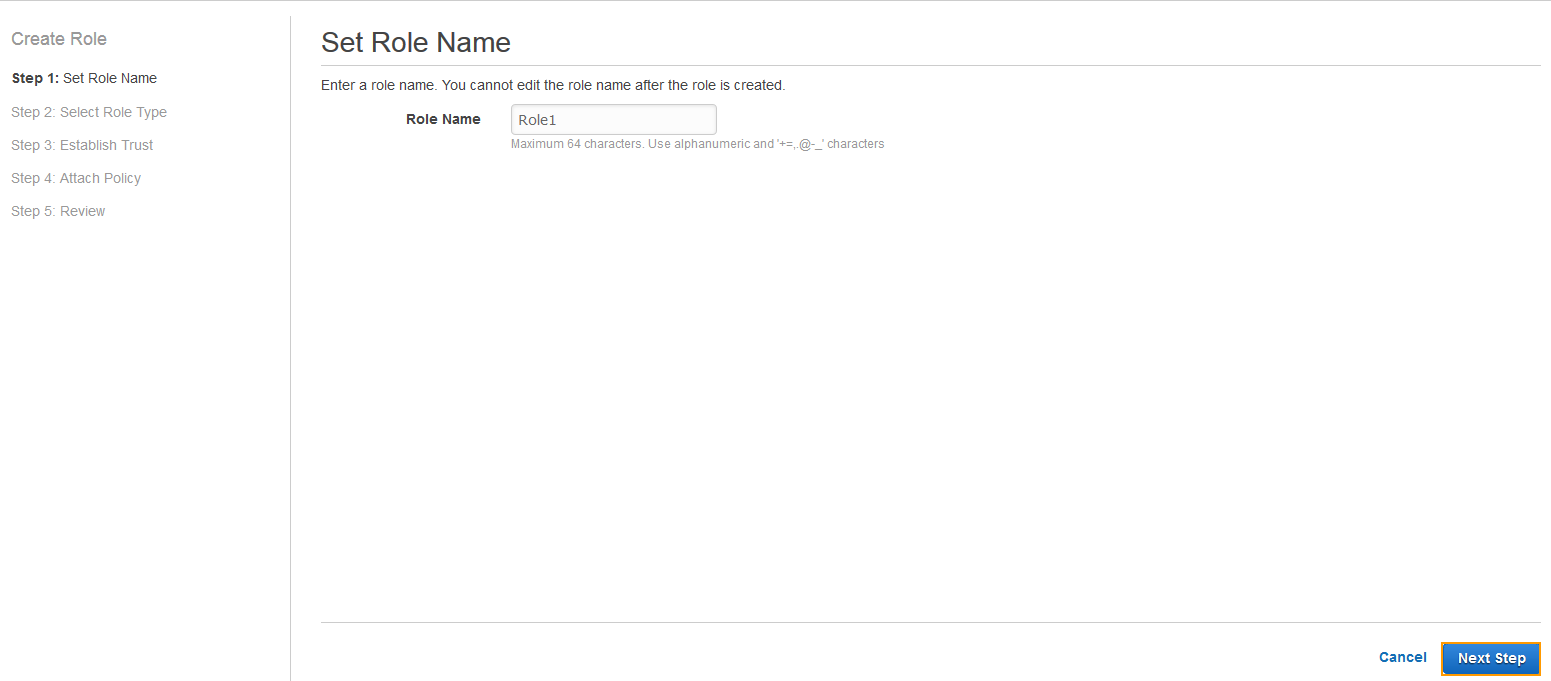
- On the Step 1: Set Role Name page, specify a name for the role in the Role Name field and click Next Step.
- On the Step 2: Select Role Type page, click Select next to Amazon EC2.

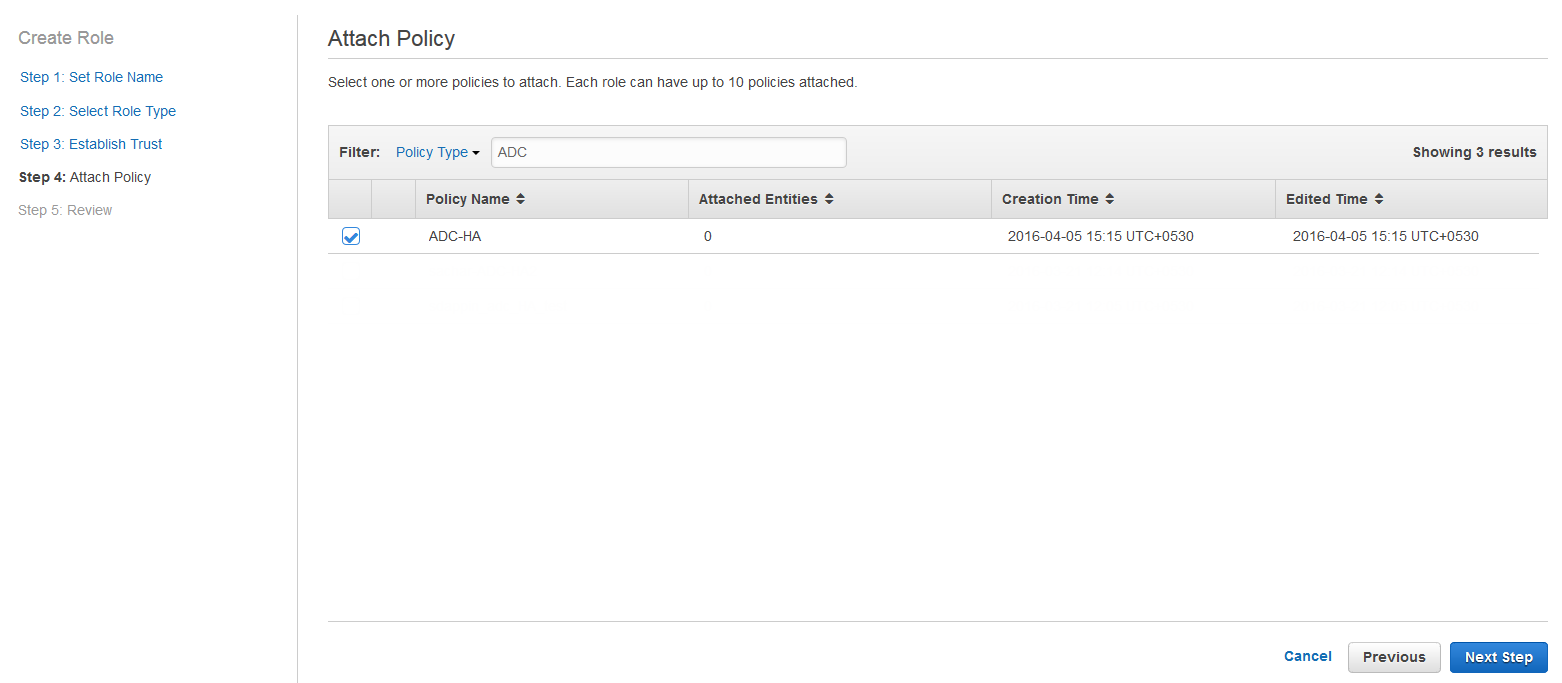
- On the Step 4: Attach Policy page, select the policy created in step 5 and 6 above and click Next Step.
- On the Step 5: Review page, review the role information and click Create Role.
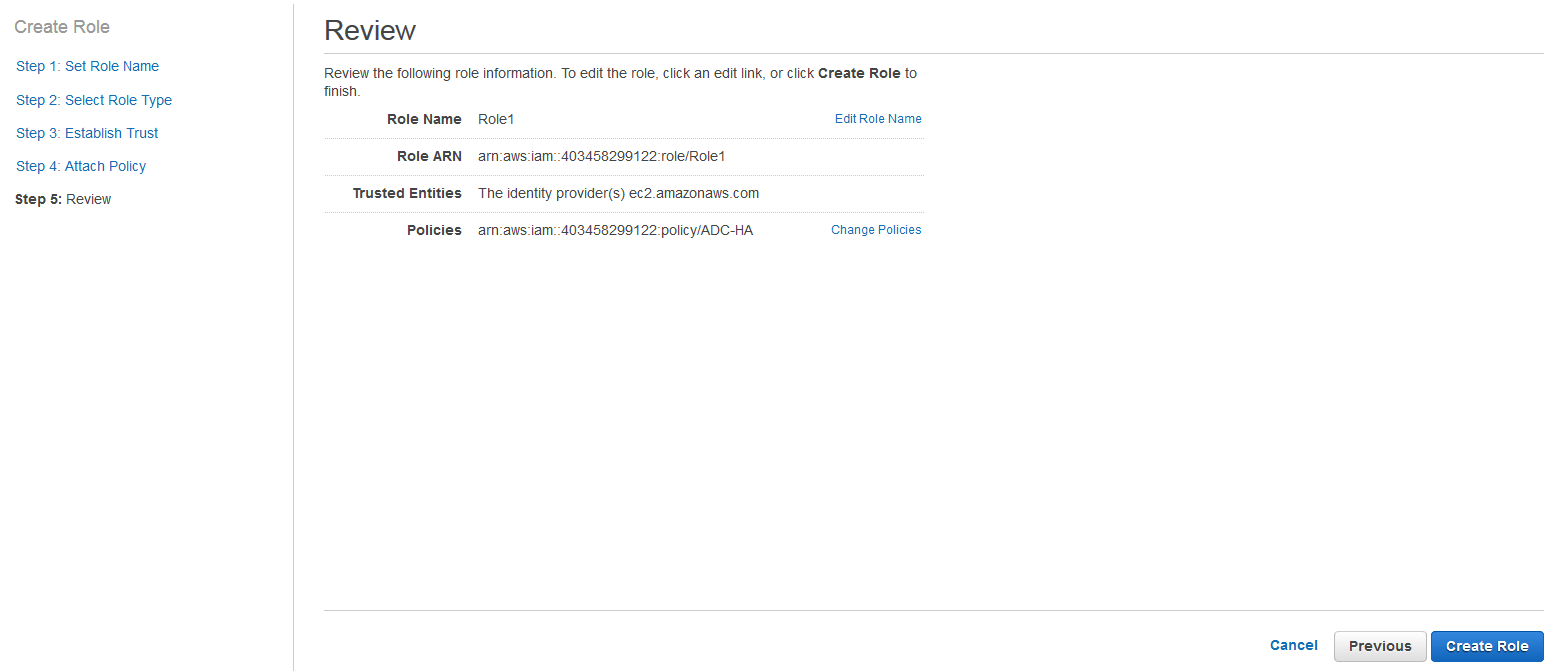
This completes the creation of an IAM role. You can associate the role when you are launching an EC2 instance on AWS.
(Optional) Get the Access Keys for Your AWS Account
Access keys (Access Key ID and Secret Access Key) are required to perform AWS API calls. Proceed with this step if an IAM role is not defined as mentioned in Step 1: Create an IAM Role. For more information on access keys, refer to the Getting Your Access Key ID and Secret Access Key article in Amazon Web Services documentation.
Perform the following steps to get your access key ID and secret access key:
- Go to the AWS Management Console.
- Click Identity & Access Management under Security & Identity.
- On the IAM Management Console page, click Users on the left panel.

- Click on the IAM user name to which you want to get an access key ID and secret access key.
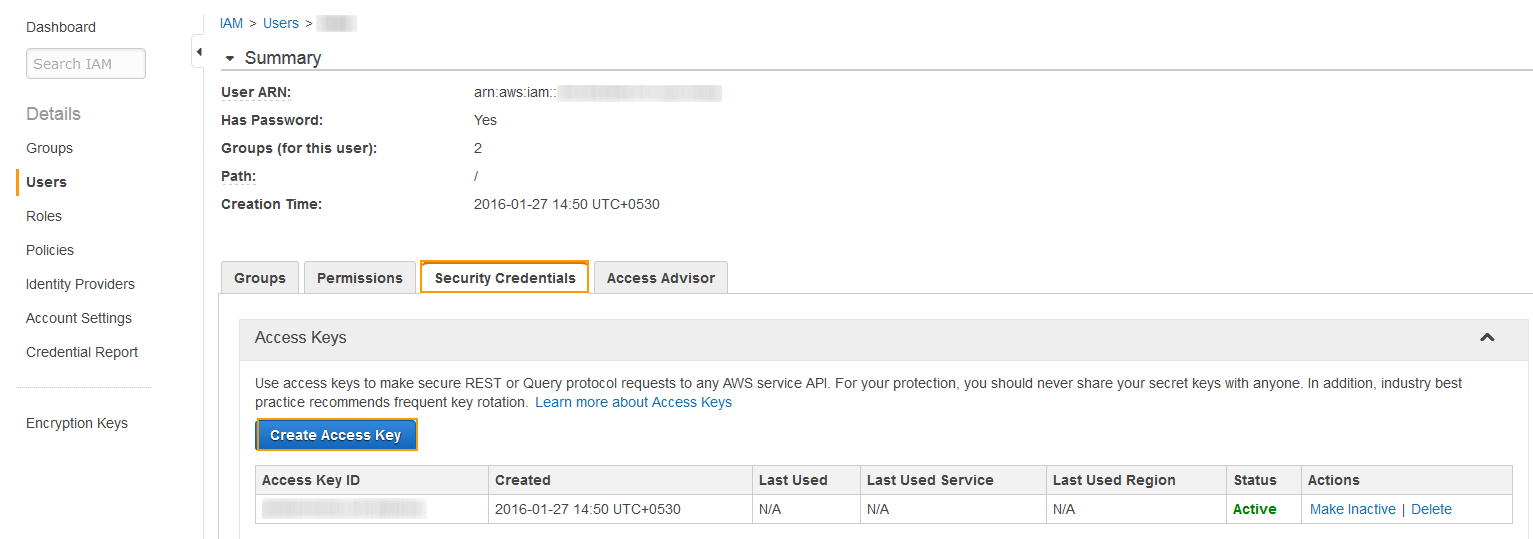
- Select Security Credentials under user summary, and click Create Access Key.
- The Create Access Key window appears with the security credentials. Click Show User Security Credentials to see the Access Key ID and Secret Access Key associated with the user.
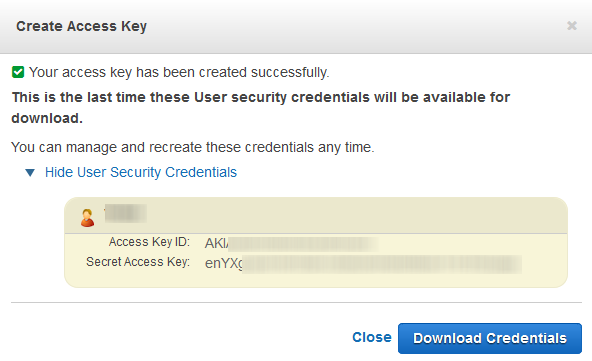
- Click Download Credentials and save the keys to a secure location.
The secret key will no longer be available through the AWS Management Console. Ensure that you secure your access keys to protect your account from unauthorized users. Do not email your access keys to anyone, and do not share it outside your organization even if an inquiry appears to come from AWS or Amazon.com. No one who legitimately represents Amazon will ever ask you for your secret key.
Next Step
Continue with Configuring Auto Scale Group as Back-end Servers.
