Conditional Access (CA) policies are essentially if-then statements that combine signals to make decisions and enforce organizational policies. You can configure Zero Trust Access to Microsoft 365 applications by integrating SecureEdge Access with the Microsoft Entra Conditional Access feature. With Conditional Access enabled, users will encounter an error from Microsoft when accessing M365 without routing traffic through SecureEdge Access. This measure ensures compliance with Zero Trust Access policies.
Requirements
This deployment option requires an Edge Service with a public IP address. You must deploy an Edge Service.
Step 1 Create a Named location.
Log into the Azure portal: https://portal.azure.com
Go to Conditional Access > Named locations.
Create a location with Edge Service IP addresses.

Create a policy.
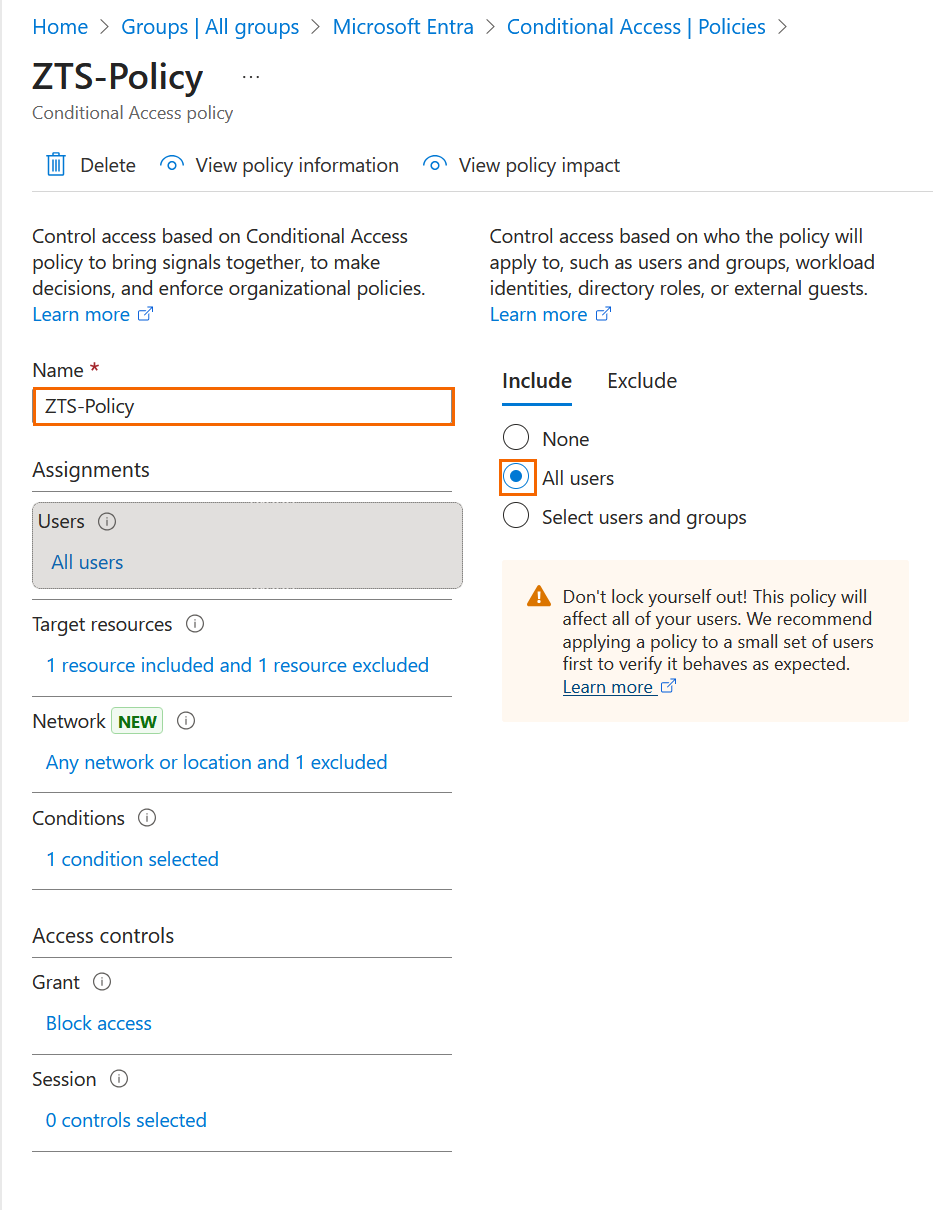
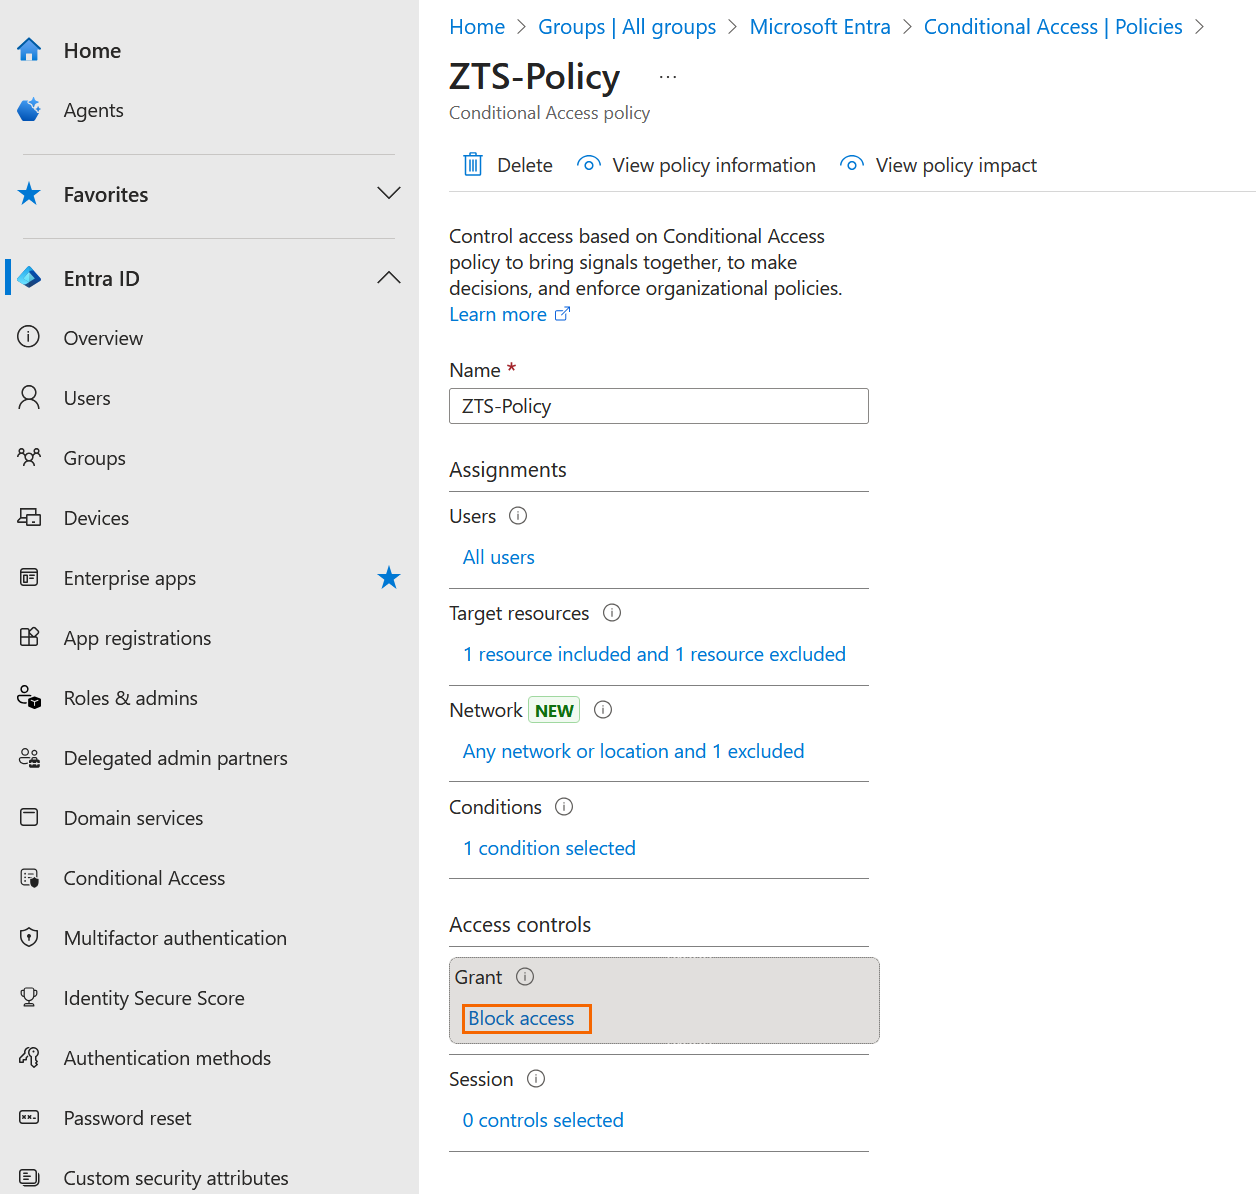
Example policy: This policy blocks access to Microsoft 365 applications from all locations, excluding the “named location (Edge Service IP)” either for all or selected users and groups.Select policy users.
Select the Office 365 application.
Note: If you are using Microsoft Entra ID as your Identity Provider for SecureEdge Access, the application that was automatically created during the Entra ID integration process should be excluded from the target resources.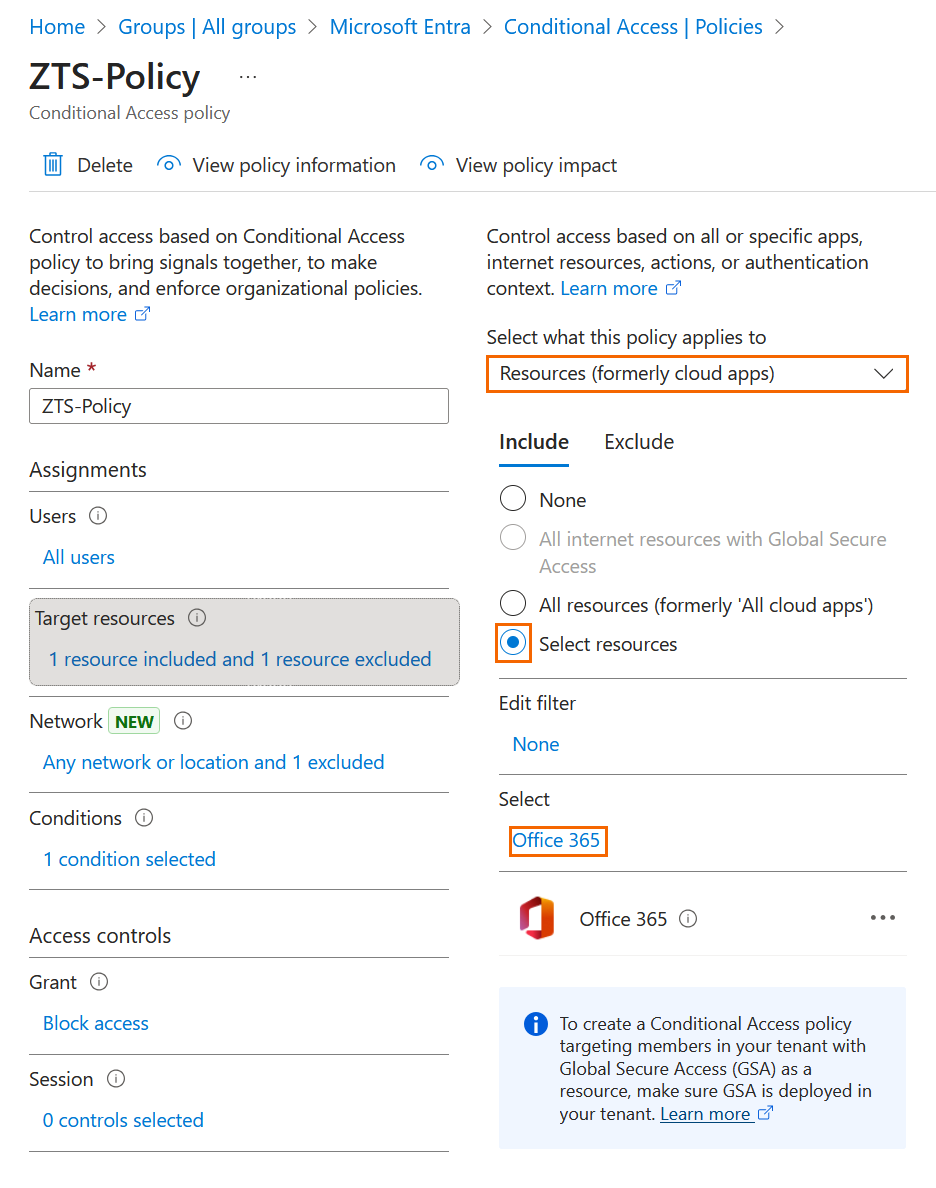
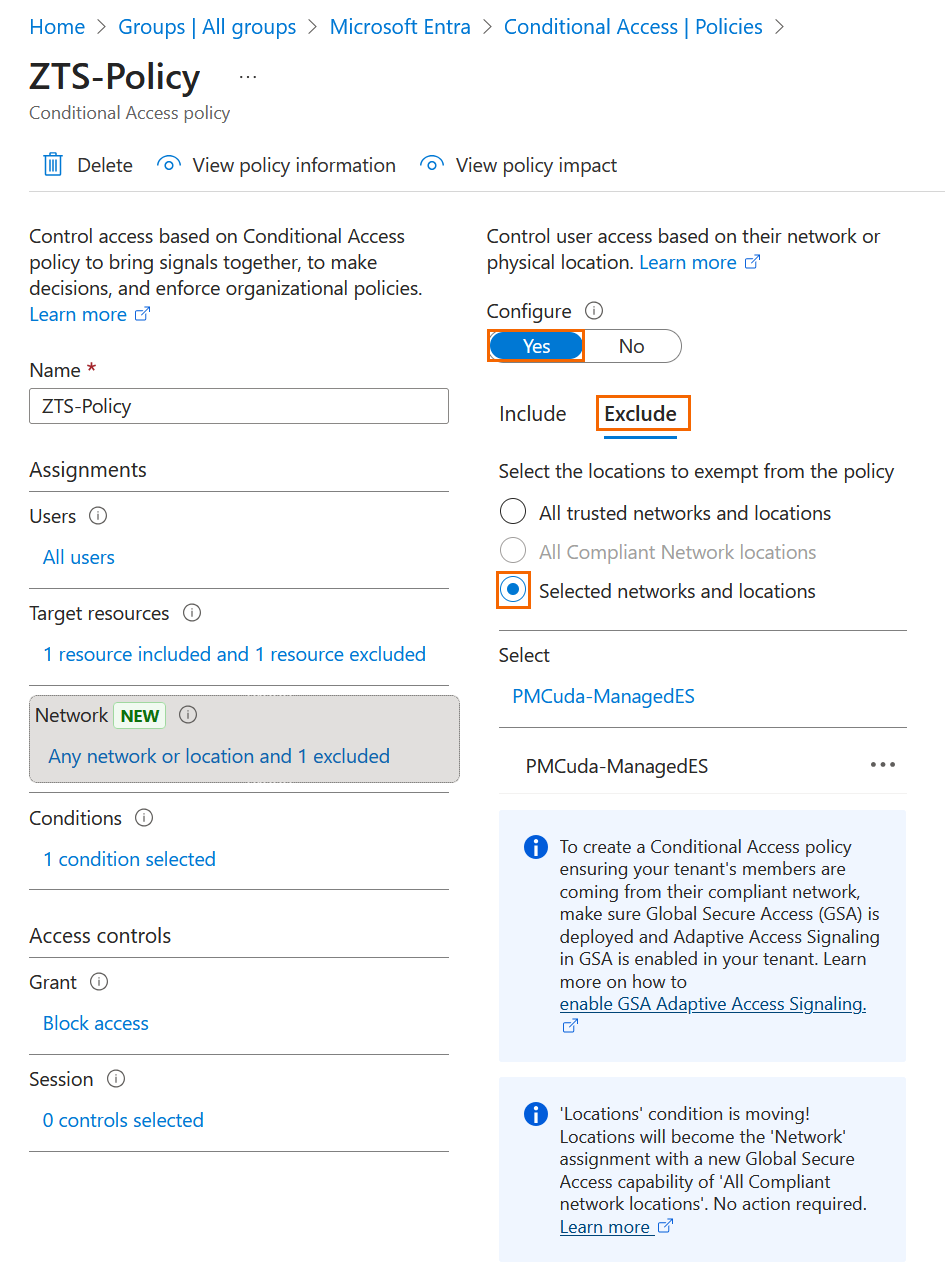
Set conditions to enforce this policy across all locations, excluding the “named location” you created.
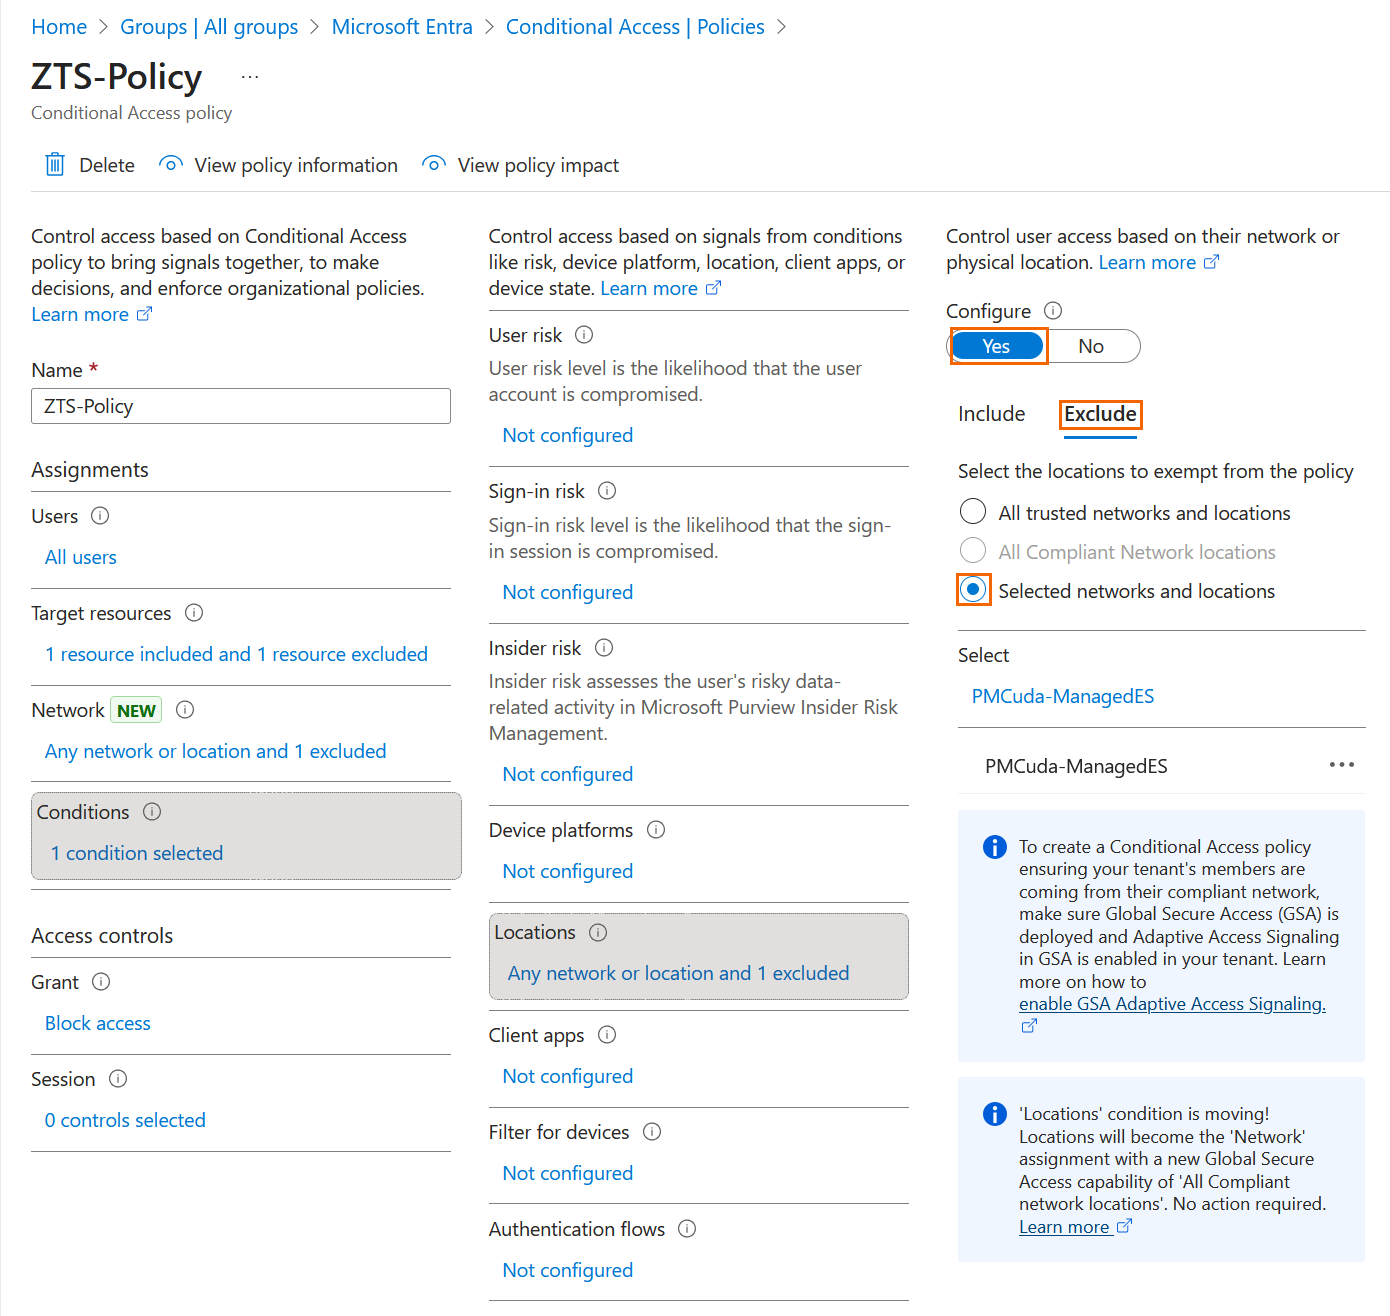
Under Grant, select Block Access.
Step 2 Create the Resources.
To create a custom web application:
Go to https://se.barracudanetworks.com and log in with your existing Barracuda Cloud Control account.
The chosen Tenant/Workspace is displayed in the top menu bar.
From drop-down menu, select the workspace you want to configure a custom web application for.
Go to Security > Apps and Resources.
The Apps and Resources page opens. In the top right of the window, click New Custom Application.
Select New Custom Web Application from the drop-down menu.
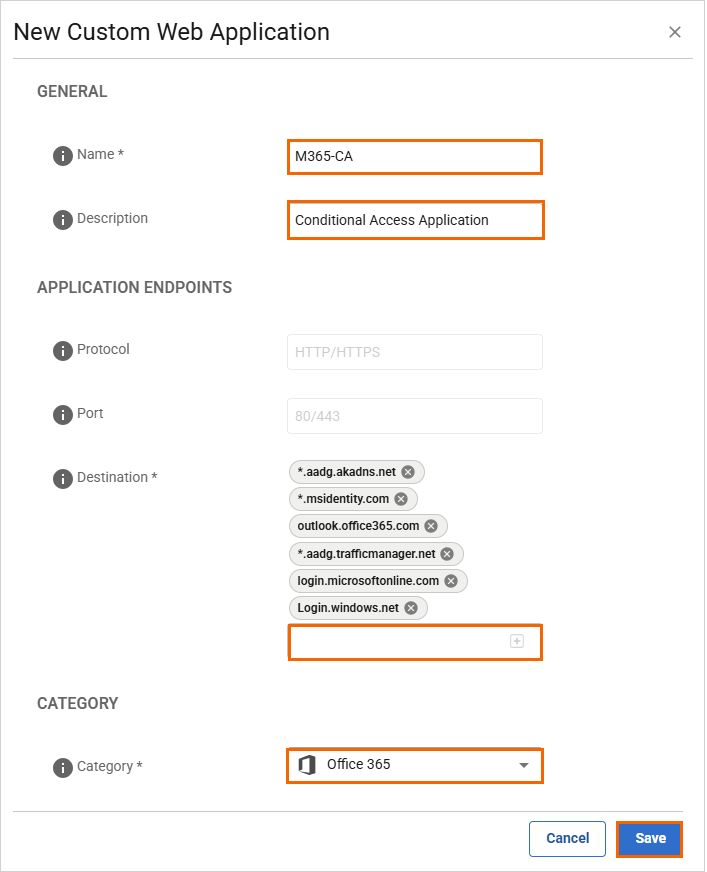
The New Custom Web Application window opens. Specify values for the following:
In the GENERAL section, specify the following:
Name – Enter a name for the custom application.
Description – Enter a description for the custom application.
In the APPLICATION ENDPOINTS section, specify the following:
Protocol – The protocol used by this custom application. It can be either an HTTP or HTTPS protocol.
Port – The port used by this custom application. It can be either port 80 or 443.
Destination – Enter the destination and click +. Note: You must add the following URLs:
*.aadg.akadns.net
*.msidentity.com
outlook.office365.com
*.aadg.trafficmanager.net
login.microsoftonline.com
Login.windows.net
In the CATEGORY section, specify the value for the following:
Category – Select the category from the drop-down menu.
Click Save.
After the configuration is complete, your resources will be created. On the Apps and Resources page, you can see the new custom web application. For more information, see How to Create Custom Applications.

Step 3 Create a Zero Trust Access Policy
Go to https://se.barracudanetworks.com and log in with your existing Barracuda Cloud Control account.
The chosen Tenant/Workspace is displayed in the top menu bar.
From drop-down menu, select the workspace you want to configure a zero trust access policy for.
In the left menu, go to Security > Access and click Zero Trust Access.
The Zero Trust Access page opens. To create a new zero trust access policy, click Add policy.
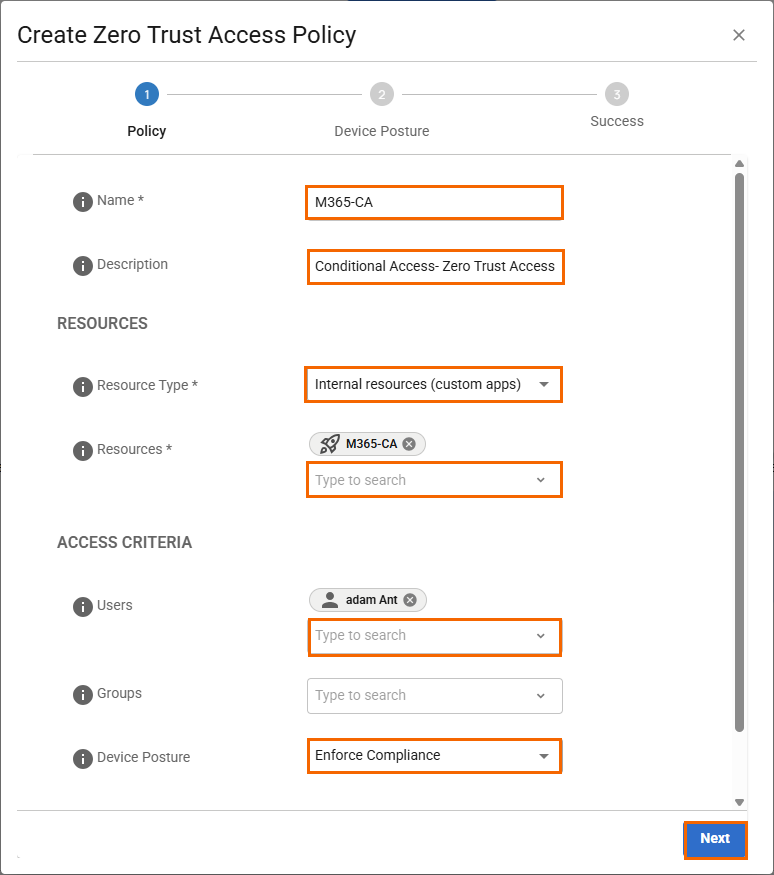
The Create Zero Trust Access Policy window opens. In the Policy tab, specify values for the following:
Name – Enter a unique name for the policy.
Description – Enter a brief description.
In the RESOURCES section, specify values for the following:
Resources Type – Select a resource type. You can choose between Internal resources (custom apps) and Public endpoint (SaaS).
Resources – Select a resource from the drop-down list, or type to search.
In the ACCESS CRITERIA section, specify values for the following:
Users – Select a user from the drop-down list, or type to search.
Groups – Select a group from the drop-down list, or type to search.
Device Posture – Select a device posture from the drop-down list. You can choose between Enforce Compliance, Log Violations, Disable.
Security Inspection – Click to enable.
Click Next.
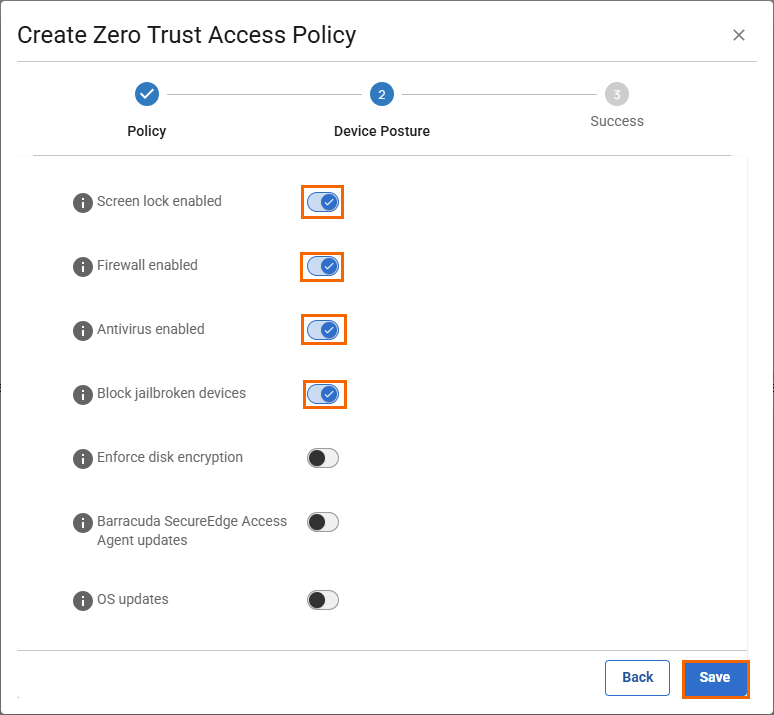
(Optional) In the Device Posture tab, specify values for the following:
Screen lock enabled – Click to enable.
Firewall enabled – Click to enable.
Antivirus enabled – Click to enable.
Block jailbroken devices – Click to enable.
Enforce disk encryption – Click to enable/disable.
Barracuda SecureEdge Access Agent updates – Click to enable/disable.
OS updates – Click to enable/disable. Click + to add more than one OS platform.
Click Save.
In the Create Zero Trust Access Policy window, verify the status of newly created zero trust access policy.
Click Finish.
After the configuration is completed, your zero trust access policy will be created. On the Zero Trust Access page, you can see the new zero trust access policy. For more information, see Zero Trust Access Policies.

