

Use tags to group different types of connected Barracuda Networks appliances into logical groups. For example, if you want to group all of the Barracuda Web Security Gateways in your Paris office by location, you might call your group ParisWSG. If you want to group multiple types of Barracuda Networks products that serve the Marketing department, you could name the group MarketingVarious, indicating that there is more than one type of product in the group.
Managing Tags
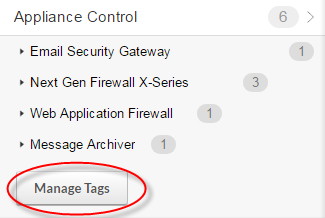
Click Manage Tags at the bottom of the Appliance Control Tree to open the Tag Management window.
Within the Tag Management window, you can choose to display by Appliances , and see their associated tags, or display by Tags , and see their associated appliances.

To create a new tag:
- At the top of the Tag Management window, click Tags.
All of the tags you have already created are shown in a list. - Click Create Tag.
- Type a name for the new tag, then click Create.
The new tag appears in the list above.
To assign appliances to tags:
When Displaying by Tags: Adding Appliances to Tags
- At the top of the Tag Management window, click Tags.
All of the tags you have already created are shown in a list. - Click the plus sign
 next to the tag to which you want to assign the appliance.
 - Select an appliance from the list, then click Add Appliance .
- Add additional appliances to the group, if needed.
If you decide not to assign the appliance, click the plus sign, which is now blue  , again to cancel the action.
When Displaying by Appliances: Adding Tags to Appliances
- At the top of the Tag Management window, click Appliances.
All of the connected appliances are shown in a list. - Click the plus sign next to the appliance to which you want to assign a tag.
- Select a tag from the menu, then click Add Tag.
Optionally, select Create New Tag at the top of the selection menu, enter the name of the new tag, then click Add Tag. - Add additional tags to the group, if needed.
If you decide not to assign the tag, click the plus sign, which is now blue , again to cancel the action.
To remove an appliance from the tag group.
- At the top of the Tag Management window, click Tags.
- Click the x icon
 associated with the appliance name within the tag.
Note: Removing an appliance from a tag group does not disconnect the devices from Barracuda Cloud Control, it just removes the tag grouping.
To delete a tag:
- At the top of the Tag Management window, click Tags.
- Click the delete icon
 next to the tag you want to delete.
 - Confirm that you want to delete the tag.
Note : Deleting a tag group does not disconnect the devices from Barracuda Cloud Control, it just removes the tag grouping.
To search for a tag:
- In the search field at the top of the Tag Management window, type some or all of the tag name and press Enter.
- Matching tag names are displayed in a list below.
- If no matches are found, you can create a new tag here.
Enter the name of the new tag and click Create.