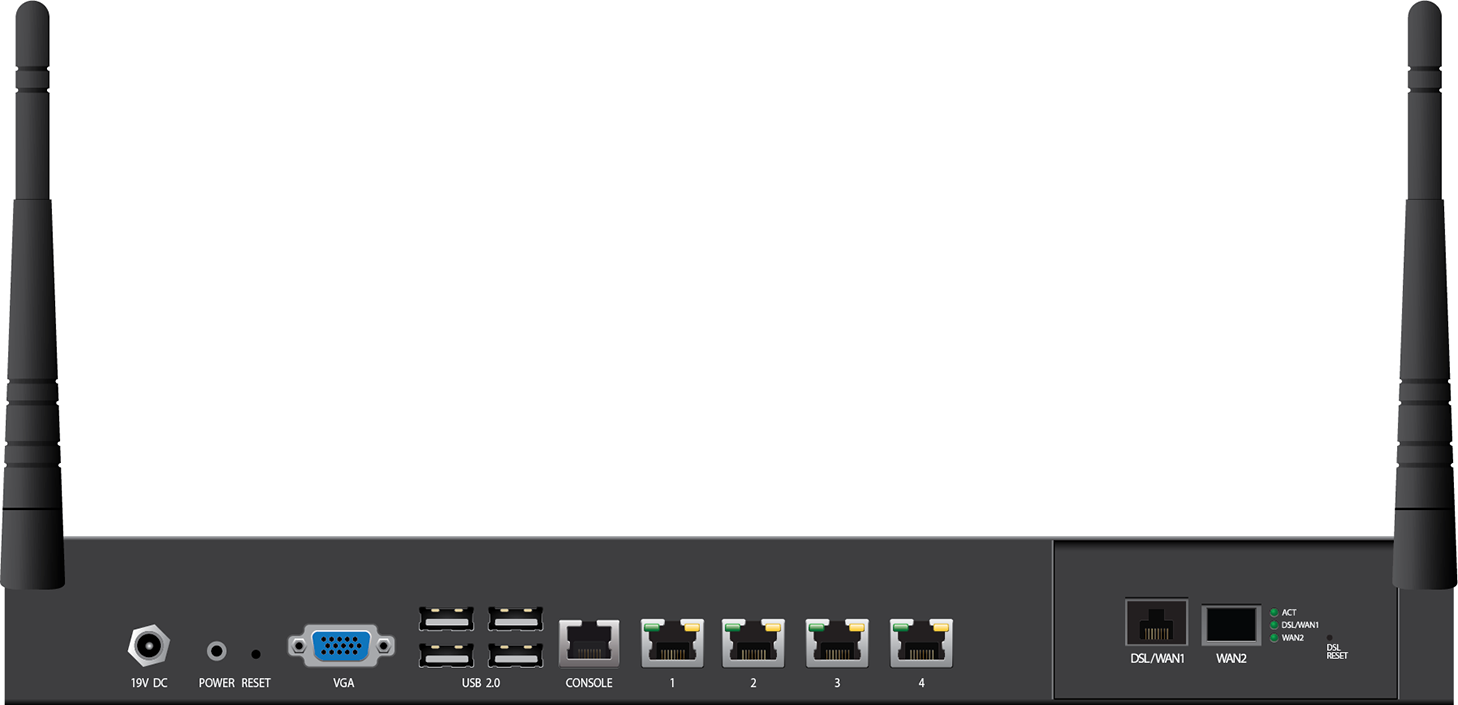
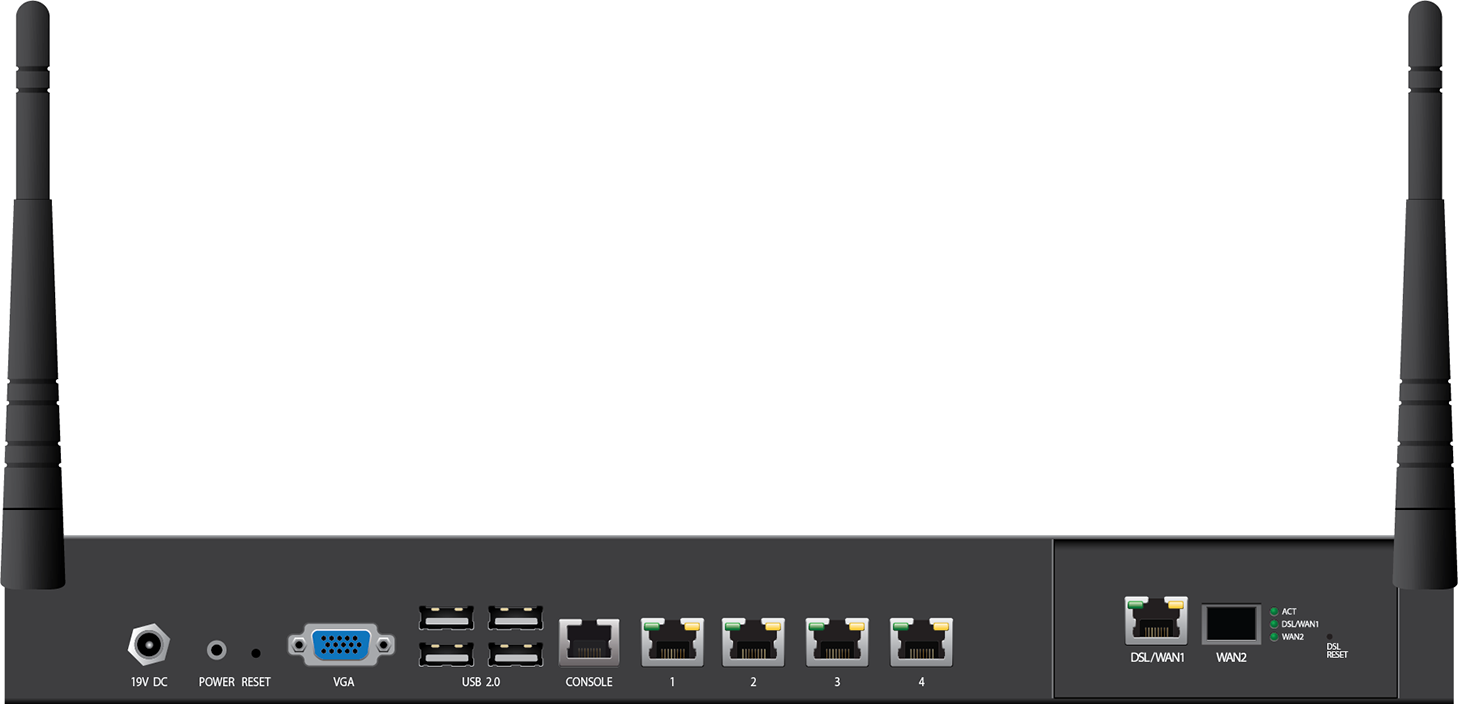
Front Side F82 Annex-A / Annex-B Revision A

Rear Side F82 Annex-A Revision A

Rear Side F82 Annex-B Revision A

Minimum Firmware Requirements
CloudGen Firewall 7.0.2 or later, or 6.2.4 or later
Default Port Configuration
| Port Label | OS Notation | Speed/Type (Revision A) | Management Port |
|---|---|---|---|
| 1 | p1 | 10/100/1000 MBit RJ45 | X |
| 2 | p2 | 10/100/1000 MBit RJ45 | |
| 3 | p3 | 10/100/1000 MBit RJ45 | |
| 4 | p4 | 10/100/1000 MBit RJ45 | |
DSL/WAN1 | dsl1 | Annex A: RJ 11 (Annex A) Annex B/J: RJ45 (Annex B/J) |
Hardware Specifications
| Component | Revision A |
|---|---|
| CPU | Intel Atom Dual Core |
| System | 4 GB |
| Mass Storage | 1 x 50 GB SSD |
| Flash Disk | - |
| LCD Module | - |
| USB | 4 x USB 2.0 |
| Form Factor | Desktop |
| Dimensions (W/D/H) | 378/160/44 mm |
| Net Weight | 2.2 kg |
| Power Supply | Single, external |
| Power Supply Input Voltage | 100 - 240 V, AC |
| Power Supply Output Voltage | 19 V, DC |
| Power Supply Frequency | 50 Hz - 60 Hz |
| Power Supply Watts | 45 W |
| Storage Temperature | –20 °C to +70 °C |
| Operation Temperature | 0 °C to +35 °C |
| Relative Humidity | 5% - 95%, non-condensing |
| Certifications | CE, FCC, ROHS |
| Wi-Fi | 802.11 b/g/n or better extended range Wi-Fi adapter |
DSL
- Compliant with ITU-T VDSL2 G.993.2
- Compliant with ITU-T G.vectoring
- Auto Fall back to ADSL2/2+
- ANSI T1.413 Issue2
- ITU-T G.992.1 G.dmt
- ITU-T G.992.3 ADSL2 (G.dmt.bis)
- ITU-T G.992.5 ADSL2+
- VDSL Band Plan: 997, 998
- VDSL2 Profile: 8a, 8b, 8c, 8d, 12a, 12b, 17a, 30a
- Annex A, Annex B, Annex M, Annex J
- Bridged (default) or Advanced Mode
- Auto failover WAN1-WAN2
LEDs and Acoustic Signals
Your appliance is equipped with a variety of LEDs and acoustic signals. The front panel of the Barracuda CloudGen Firewall F82A contains one power LED (blue), one disc LED (green), one status LED (red), and 4 port LEDs. On the back panel, you can see one power button LED and various port LEDs. Two acoustic signals indicate status of installation. The tables below show the different meanings of the different glowing states and acoustic signals:
| LED Color | Status | Meaning Installation | Meaning Operation |
|---|---|---|---|
All LEDs Off | Off | Appliance is powered off or installation has not initialized far enough for LED control when installation is started. | Appliance is powered off. |
Power LED front side - BLUE | Steady | - | Appliance is plugged in and is on. |
| Status LED front side - RED | Off | Installation has finished successfully. | Box is running normally. |
Status LED front side - RED | Steady | After a hotfix installation, the LED turns to red until the next reboot in case the hotfix installation failed. This feature requires firmware 7.1.3 or higher OR 7.2.2 or higher. | Appliance is halted and may be disconnected, or an error occurred preventing the appliance from entering the up state. |
| Status LED front side - RED | Blinking slowly (1/s interval) | Normal installation. | Appliance is either booting, shutting down, or performing a system update. |
Status LED front side - RED | Blinking fast (4/s interval) | Error during installation. | Appliance is in ART mode. |
Disc LED - GREEN | Blinking | Appliance is reading or writing on storage. | Appliance is accessing the internal storage. |
Port LEDs - GREEN/YELLOW | Left blinking | Data transfer – Yellow (10/100 Mbps) | Port in use. |
| Right steady | - | Port is on. | |
| xDSL LEDs back side | ACT blinking | - | xDSL modem is active |
| DSL/WAN1 steady | - | DSL/WAN1 connected | |
| WAN2 steady | - | WAN2 connected | |
| PSU LEDs - GREEN | Steady | PSU modules connected and running | Power supply unit is up and running. |
| Off | Power defective, standby, or shutdown | Power supply unit is off or in standby mode. |
| Acoustic Signal | Frequency | Meaning |
|---|---|---|
| Beep | 1 time (.) | Appliance is starting to boot. |
| Beep | 3 times (. . .) | Installation was completed successfully; appliance is halted for reboot. After reboot, one beep will again indicate booting. |
| Beep | 3 times long (_ _ _) | Error during installation. |
Serial Console Port
In order to establish a console connection to the appliance using a serial cable (RJ45), you need to configure the serial port on the terminal using the following parameters:
| Parameter | Value |
|---|---|
| Baud | 19200 |
| Bits | 8 |
| Stop bit | 1 |
| Parity | None |
| Handshake | None |
