

Applicable Products
These instructions apply to the following products:
- Barracuda Intronis Backup - MSP
Hyper-V Rapid Recovery Restore Tabs

The following table provides a description of the page features.
| Page | Description |
|---|---|
| Select | Select at least one available VM to restore. |
| Schedule | Choose where the data is restored: Rapid Recovery of VM files at the original storage location This option is the quickest and makes the VM files accessible at their current storage location for import into Hyper-V manager. Restore all VM files to this destination This option performs a full copy of the data from storage and is slower than the Rapid Recovery option. |
| Summary | A list of your selections is displayed. |
Restoring Hyper-V Rapid Recovery Backups
To restore a backup with Hyper-V Rapid Recovery, perform the following steps.
- Navigate to the Computer page.
The Computer page is displayed.
- Click the Restore tab.
The Restore Selections page is displayed.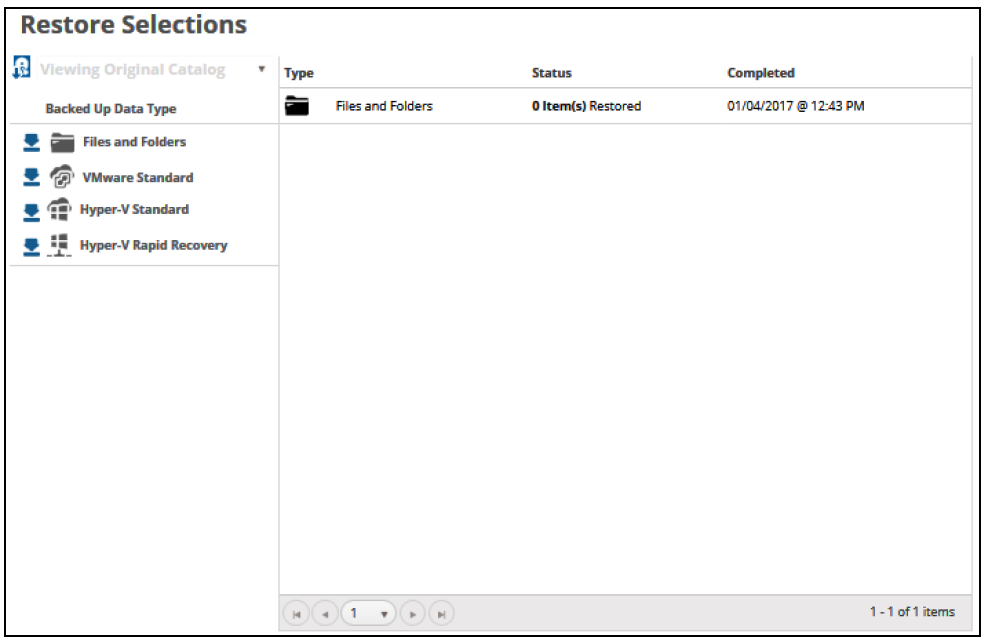
- Click the restore
 icon of the backup type you want to restore.
The Select page is displayed with Rapid Recovery selected as the default.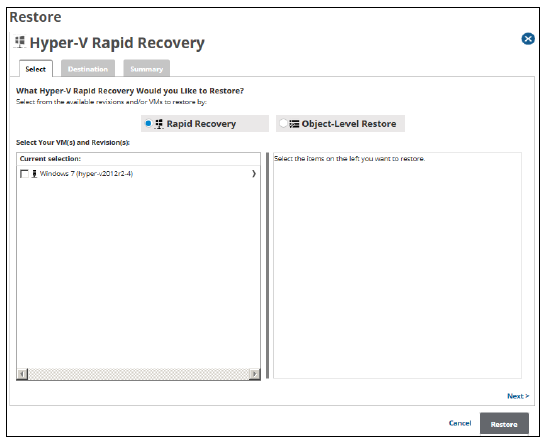
- In the Current Selection pane, select the VM and revisions you would like to restore.
Note: You can only choose one revision to restore per selected VM.
Clicking the arrow at the right of the items displays more revisions.
The selection is displayed in the far right pane. Click the remove icon to remove any selections, or clear the item check box.
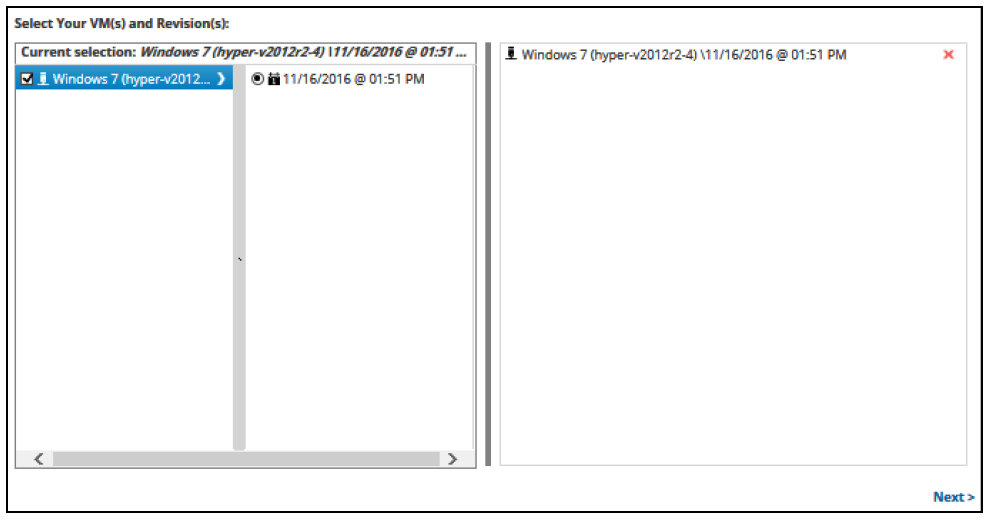
Click Next.
The Destination page is displayed.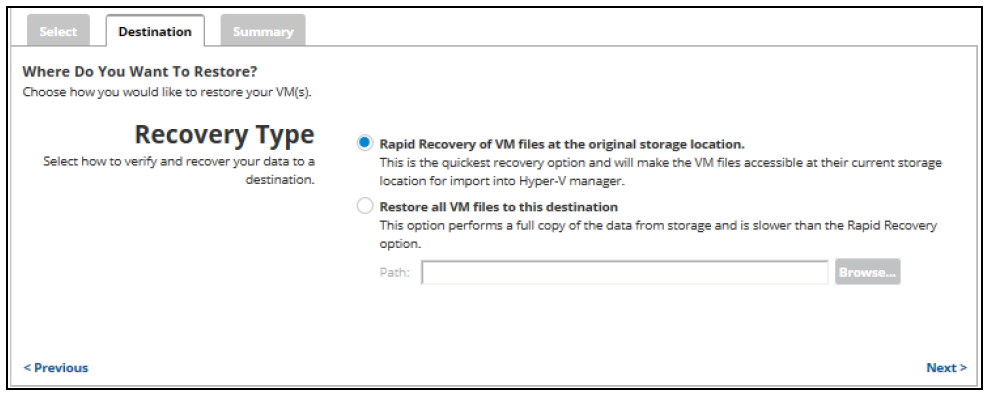
Note: The following table provides a description of the restore options.Restore Option Description Rapid Recovery of VM files at the original storage location. This option provides the fastest recovery time. A differencing disk and configuration file in the existing local storage destination are created that can be imported into Hyper-V Manager. Restore all VM files to this destination. This option recovers the full VMs files (virtual hard disks and configuration) to an alternate location. Because it performs a copy process, it takes longer. Use this option to archive a copy of your VM or to restore to a storage more suited to run the VM.” - Select a restore option radio button.
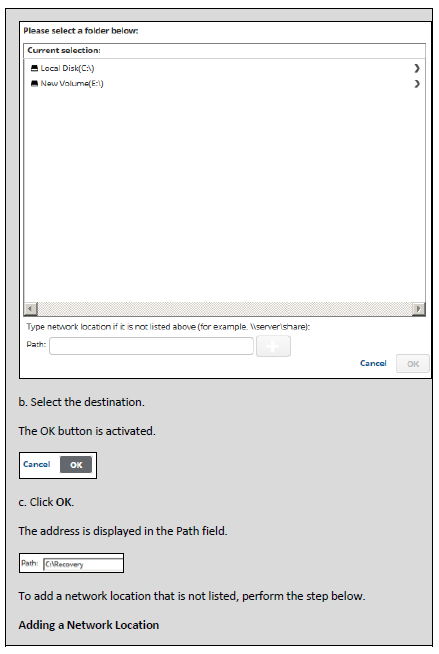
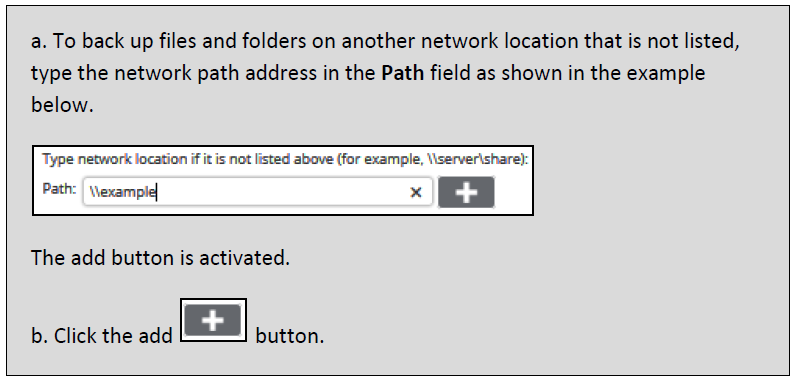
- If you selected the Restore all VM files to this destination option, at the Path field, type a path, or click the Browse button to select the destination of your restore.

- After selecting the destination of your restore, click Next.
The Summary page is displayed.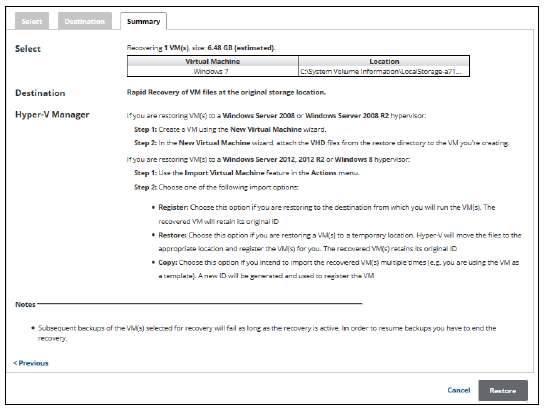
Important: Make sure to add the recovered VMs to a backup set so they are backed up properly.
Notes:- Subsequent backups of the VMs selected for recovery fail as long as the recovery is active. To resume backups, you must end the recovery.
- Subsequent restores also fail for active recoveries.
- Verify your selections, and then click the Restore button.
The confirmation pop-up is displayed.
- Click Yes.
The Restores Selections page is displayed showing the status of the restore.
Restoring VMs to a Windows Server 2008, or Windows Server 2008 R2 Hypervisor
If you are restoring VMs to a Windows Server 2008, or Windows Server 2008 R2 hypervisor, perform the following tasks.
- Create a VM using the New Virtual Machine wizard.
- In the New Virtual Machine wizard, attach the VHD files from the restore directory to the VM you are creating.
Restoring VMs to a Windows Server 2012, 2012 R2, or Windows 8 Hypervisor
If you are restoring VMs to a Windows Server 2012, 2012 R2, or Windows 8 hypervisor, perform the following tasks.
- Use the Import Virtual Machine feature in the Actions menu.
- Choose one of the following import options:
- Register: Choose this option if you are restoring to the destination from which to run the VM). The recovered VM retains its original ID.
- Restore: Choose this option if you are restoring a VMs to a temporary location. Hyper-V moves the files to the appropriate location and registers the VMs. The recovered VM retains its original ID.
- Copy: Choose this option if you intend to import the recovered VMs multiple times (for example, you are using the VM as a template). A new ID is generated and used to register the VM.