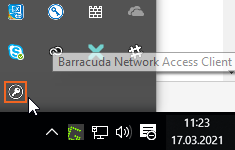
Barracuda VPN Control is the user interface of the VPN Client for Windows for configuring VPN profiles and Barracuda VPN adapter settings as well as for the management of certificates. You can launch the VPN Client by left-clicking the Barracuda Network Access system tray icon.

You can also access the Barracuda VPN Client from the Windows Control panel. When started from the Windows Control panel, Barracuda VPN Control opens with the VPN profiles area.
Configure the Barracuda VPN Client for Windows
Use the Barracuda VPN Control panel to create your VPN profiles and configure VPN connection and adapter settings.
Step 1. Create a VPN Profile
To launch the VPN Client for Windows, left-click the icon in the system tray, and click Connect. The default profile is displayed in the overview window. To create a new VPN profile, follow the steps described in How to Create VPN Profiles. You can also import, modify, copy, or delete a VPN profile. The Barracuda VPN Client supports Barracuda Networks authentication, username/password, and X509 authentication.
Step 2. Configure VPN Settings
- In the VPN Client window, click the settings icon on the top left to open the VPN Settings panel.

- Select VPN Settings from the drop-down menu.
- Configure the settings according to your requirements. For more information, see the following VPN Settings section.

VPN Settings
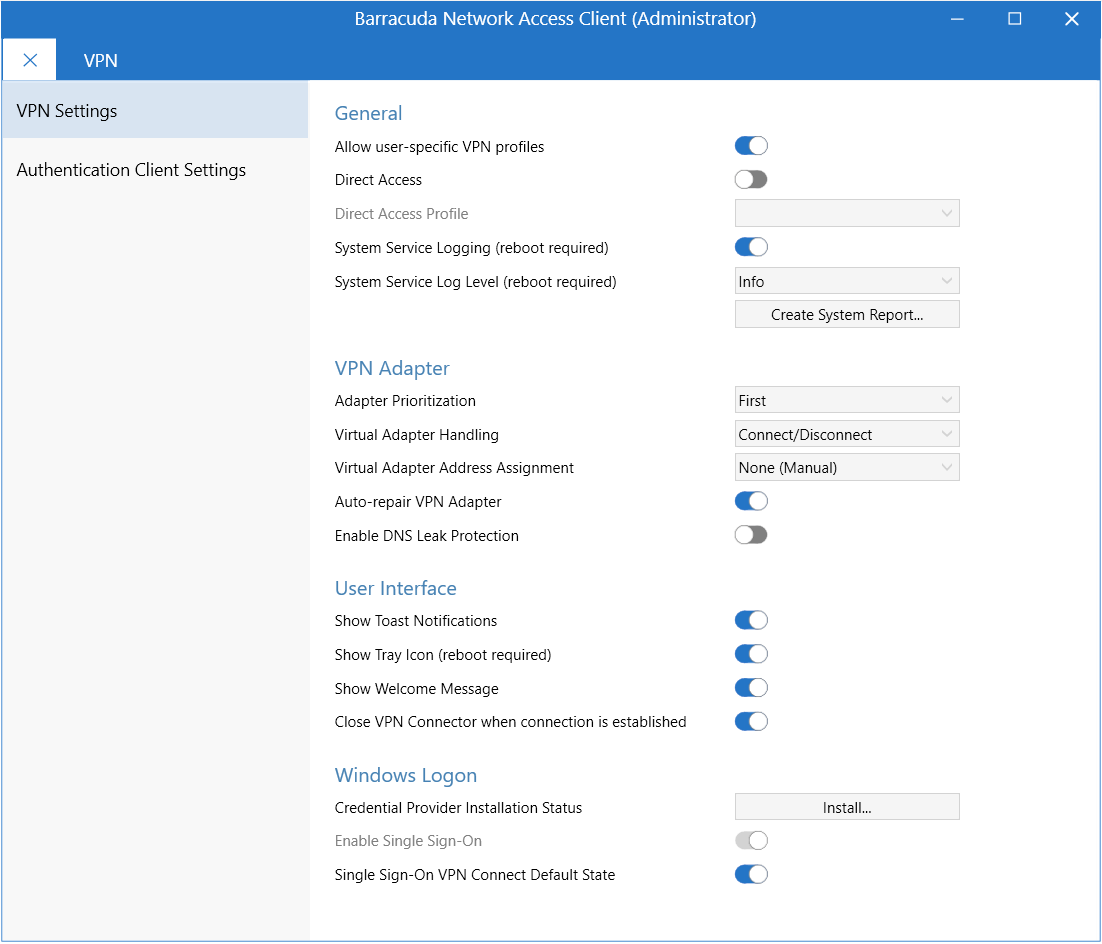
You can configure the following General VPN settings:
- Allow user-specific VPN profiles – Enable to allow user-specific VPN profiles.
- Direct Access – The VPN client can be configured so that it automatically reconnects to different gateways, if available. In case of an unwanted disconnection, the VPN client tries to reconnect to the same gateway three times. This gives mobile users seamless access to corporate networks wherever they have Internet access. For more information, see How to Configure Direct Access for Mobile Users.
- Direct Access Profile – Select the configured VPN profile that should be used for establishing Direct Access connections.
- System Service Logging / System Service Log Level – Enable or disable service logging for the VPN client and select the log level. To generate a report, click Create System Report.
You can configure the following VPN Adapter settings:
- Adapter Prioritization – The position of the VPN client's virtual adapter within the Windows adapter bindings. The sequence affects, for example, the DNS resolution of short DNS names and the function of Windows Remote Assistance.
- None – The VPN client's virtual adapter has no priority over other network adapters.
- First – The virtual adapter has first priority. This mode is recommended for situations where fast VPN initiation timings are necessary.
Last – The virtual adapter has last priority.
- Virtual Adapter Handling
- Connect/Disconnect – Disconnects the virtual adapter whenever there is no active VPN connection. The adapter will be re-connected as soon as a VPN connection is established. The adapter is not completely disabled, which results in a faster VPN initiation time. This mode is recommended for situations where fast VPN initiation timings are necessary.
- Enable/Disable – Disables the virtual adapter as long as there is no active VPN connection. The adapter will be re-enabled as soon as a VPN connection is established.
Always on – The virtual adapter is always enabled.
- Virtual Adapter Address Assignment – Select the method to be used for gathering IP addresses:
- None (Manual) – The IP address is entered manually in the NIC properties.
- Internal (DHCP) – (default) Uses the integrated DHCP for assigning the IP address.
- Direct (WMI) – Uses WMI (Windows Management Instrumentation) for assigning the IP address. This is recommended if DHCP is not available due to security reasons.
- Auto-Repair VPN Adapter – Enable VPN adapter auto-repair when the connection breaks.
- Enable DNS Leak Protection – DNS Leak Protection blocks outgoing DNS requests on all adapters with the exception of the VPN adapter in order to ensure that all DNS queries are made securely via VPN.
You can configure the following User Interface settings:
- Show Toast Notifications – If enabled, users get notified in case of VPN connection changes.
- Show Tray icon – Select whether the icon in the notification area should be visible or not. This requires a reboot.
- Show Welcome Message – Display a welcome pop-up message when the VPN connection is established.
- Close VPN Connector when connection is established – Close the VPN connector as soon as the connection has been established.
Configure the Windows Logon settings.
In order to establish a VPN connection, the Internet connection must be accessible before logging on to the PC. A VPN profile using the required connection parameters must previously have been set up. The certificate for the VPN must be trusted because the user cannot be prompted during the Single Sign-On to trust a certificate.
Credential Provider Installation Status – Indicates whether a credential provider is installed or not. To install a credential provider, click Install.
Enable Single Sign-On – If enabled, the user is presented with the option to use Barracuda Single Sign-On on the Windows login screen to establish a VPN connection before logging into the Windows domain. This feature works only with username/password VPN authentication (preferably MSAD), and the Windows user credentials must match the client-to-site VPN user credentials. The credential provider will automatically be installed by enabling this setting. Note that the profile cannot be used with the Single Sign-On feature if Time-Based One-Time Password (TOTP) is enabled in the VPN profile.
- Single Sign-On VPN Connect Default State – Enables the default state (checked or unchecked) of the check box for Single Sign-On.
