

Applicable Products
These instructions apply to the following products:
- Barracuda Intronis Backup - MSP
Hyper-V 2016
With this release of Hyper-V 2016, Barracuda MSP extends support of current Hyper-V features (Standard and Rapid Recovery) to the latest Hyper-V 2016 platform released by Microsoft. Microsoft's RCT technology is used to determine the changed blocks in a virtual disk for a VM running on a Windows Server 2016 system.
Because RCT works only for VMs using the new configuration format introduced with Windows Server 2016 (version 8.0 or later) the backup agent can no longer backup VMs running the older version of the configuration format.
To backup VMs using RCT, the VM’s configuration format must be upgraded to the latest version (8.0). Older VMs still can be added to Hyper-V backups sets, but a warning is displayed that the VMs must be upgraded before being backed up. If the Agent detects a VM using a pre-version 8.0 configuration format running on Windows Server 2016, it does not attempt to back up the VM, instead it logs an error message, and then moves to the next VM in the backup set.
Windows Server 2016 Hyper-V Deployment Considerations
To reduce downtime and allow for an acceptance period, it is recommended that you perform a clean installation of Windows Server 2016 Hyper-V when migrating from previous Hyper-V server versions.
The following table provides the deployment tasks.
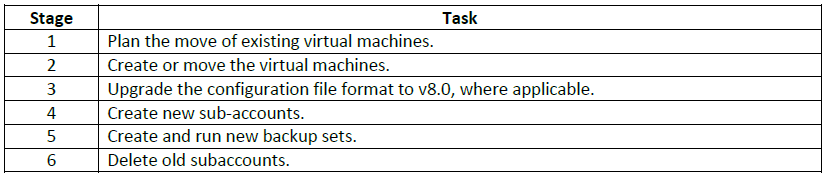
For existing Windows Server 2016 Hyper-V deployments, do the following:
- Install/upgrade the latest agent.
- Upgrade the virtual machine configuration file format to v8.0, if necessary.
- Create and run new Hyper-V 2016 backup sets.
If you are running Physical Imaging backups of virtual machines and you want to migrate to Hyper-V 2016, do the following:
- Ensure you have the latest backup set.
- After your new Hyper-V backups have been created, delete the old Physical Imaging subaccounts.
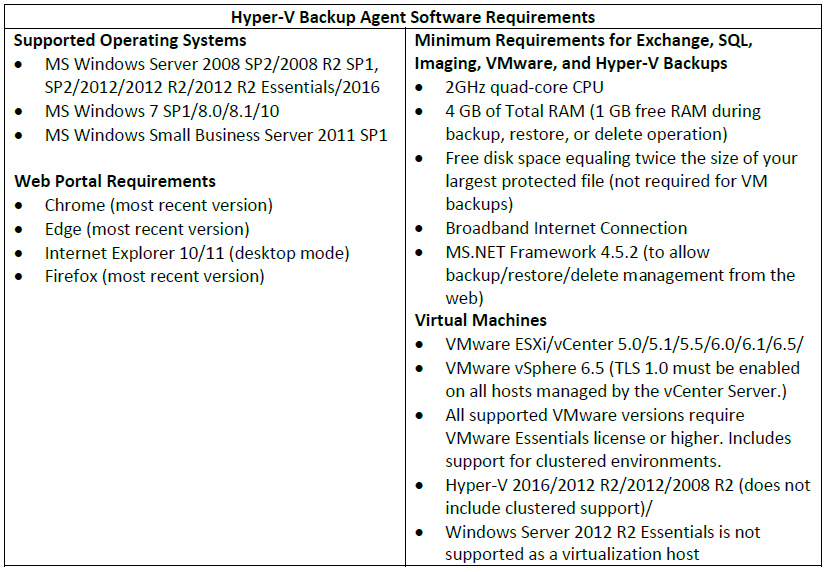
Hyper-V 2016 Backup Agent Software Requirements
The following table provides the requirements for running the Backup Agent software.
Hyper-V Standard Backup Overview
Hyper-V backups can be stored locally and in the cloud. When Hyper-V backups are stored locally, they are stored in a proprietary format (encrypted and compressed) and require a restore to access backed-up data.
When the backup agent is installed on the Hyper-V host, it can back up any virtual machine on that host. You can select any number of virtual machines to be backed up. However, a VM can only be included in one backup set at a time.
If you are backing up to the cloud, then ensure that each VM you need to back up has the most recent version of Integration Services (IS) installed. The Hyper-V host’s Integration Services also must be updated (if the host’s IS is older, then the backup fails).
You can schedule a backup set to run on a recurring schedule. The default is running once per night.
You can add more than one VM to a backup set, but, by default, only one virtual disk is processed at a time when the backup runs. You can change this behavior by increasing the number of concurrent Hyper-V worker threads on the System Page. Increasing the number of worker threads allows multiple disks to be backed up concurrently but may use more resources on the host.
Hyper-V backups copy a full, initial backup of selected VMs. After this initial backup, incremental backups containing only the changed portions of each VM are performed until the next full backup is scheduled.
Note: Windows XP and Nano Server are backed up in a crash-consistent state instead of an application-consistent state.
Creating Hyper-V Standard Backup Sets
To create a Hyper-V Standard backup set, perform the following steps.
- Navigate to the Computer page.
The Computer page is displayed.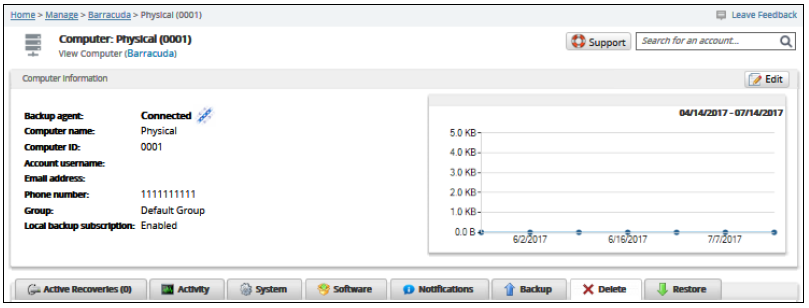
- Click the Backup tab.
The Backup Selections page is displayed.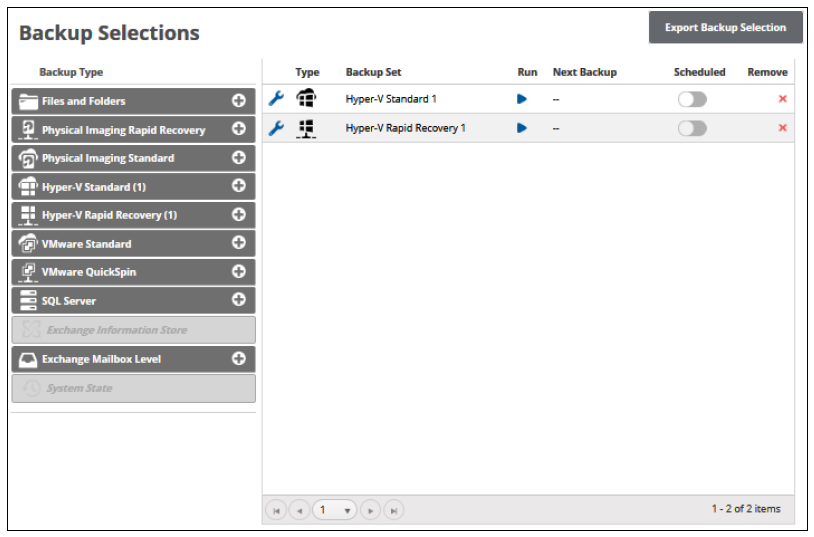
- In the Backup Type pane, click Hyper-V Standard.
The Select page is displayed.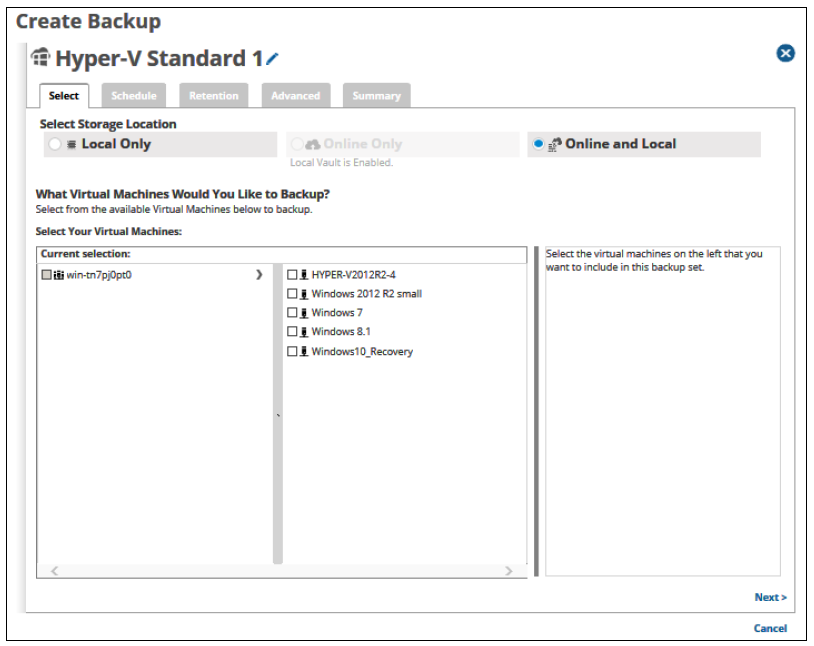
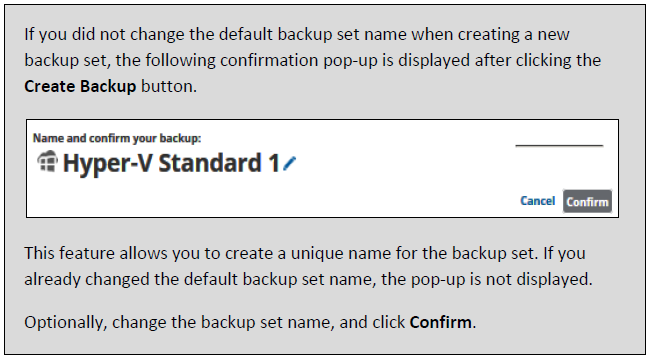
- Click the Backup Name to provide a new name for your backup set or accept the default.
- At the Select Storage Location section, click one of the following radio button options.
Note: This procedure applies to all options.- Local Only (Local Vault must be enabled, and a local subscription is required. Data is not backed up to the cloud.)
- Online Only (An enabled Local Vault disables this option.)
- Online and Local (Local Vault must be enabled.)

- In the Current Selection pane, select the available virtual machines you would like to back up.
Notes:- Any VMs that already are included in other backup sets are grayed out.
- A warning icon is displayed for VMs that have not been upgraded.
 at the right of the items displays more VMs.
Your selections are displayed in the right pane. Click the remove icon to remove any selections or clear the VM check box.
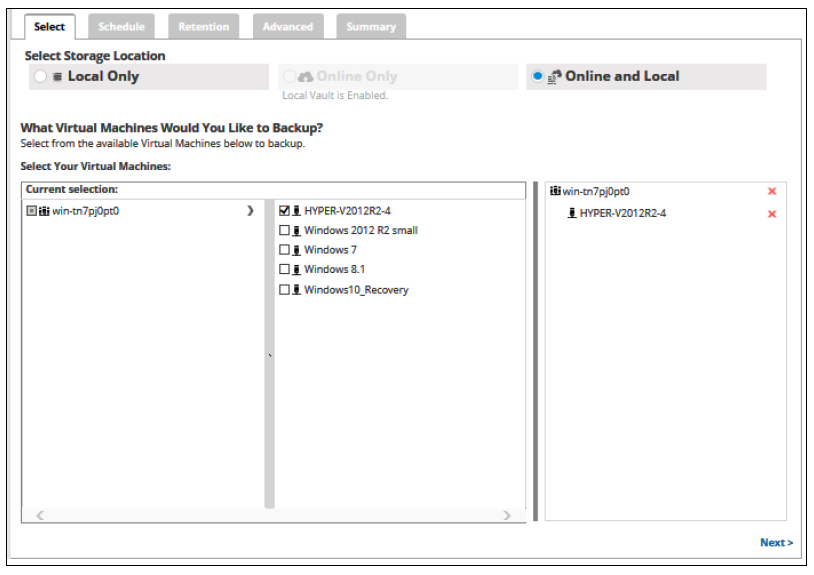
- After making your selections, click Next.
The Schedule page is displayed.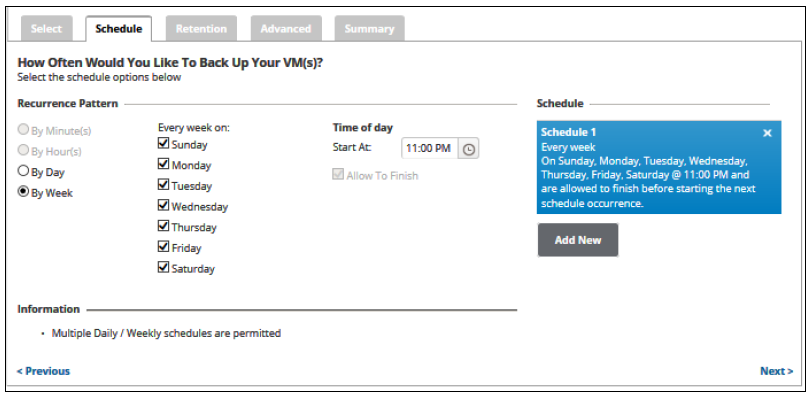
- Accept or edit the default schedule.
Notes:- The default schedule is by the week on every day starting at 11 p.m.
- Multiple daily/weekly schedules are permitted (if they do not overlap).
- The Allow to Finish check box is always selected and grayed-out.
 to delete schedule.
 - After setting the schedule, click Next.
The Retention page is displayed.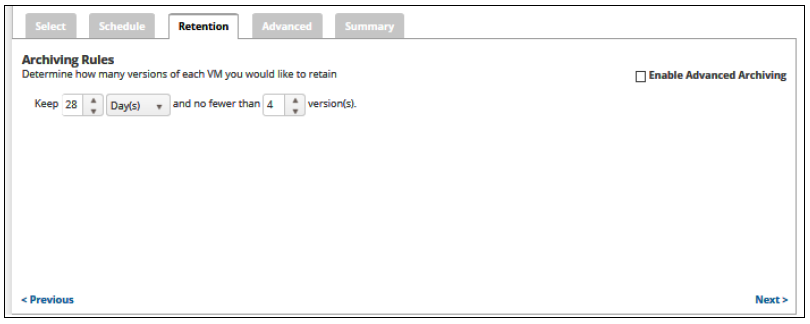
- Select the number of versions you wish to retain, and for how long.
Note: The default is 4 recoverable versions of backups at the storage location that are retained for 28 days. - Optionally, select the Enable Advanced Archiving check box.
The Advanced Archiving fields are displayed.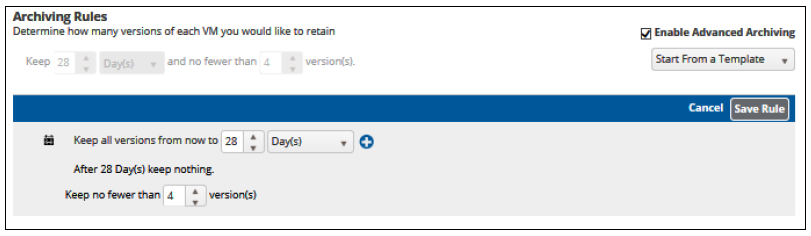
- Make your selections, click Save Rule, and then click Next.
The Advanced page is displayed.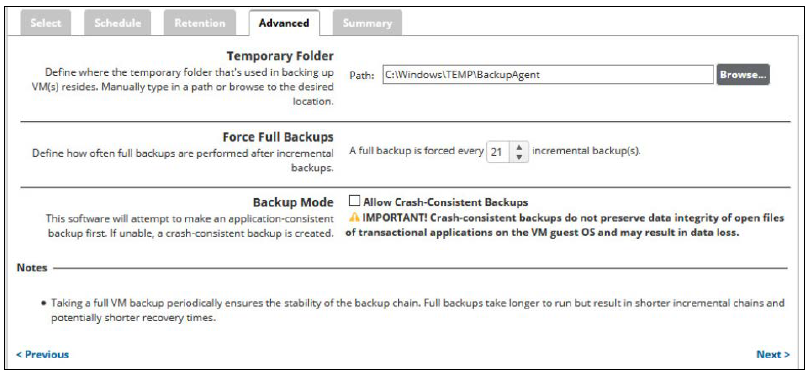
Requirement: You must specify a temporary folder located on a disk with sufficient space. Temporary space of 1 GB is recommended for Hyper-V backups. - At the Temporary Folder field, accept the default, type a new path, or click the Browse button to locate the temporary folder that is used during backing up.
- At the Force Full Backups section, use the arrows to specify how often full backups are performed after incremental backups.
Notes:- The default full backup is every 21 incremental backups.
- Taking a full VM backup periodically ensures the stability of the backup chain. Full backups take longer to run but result in shorter incremental chains and potentially shorter recovery times.
- At the Backup Mode section, optionally select the Allow Crash-Consistent Backups check box.
CAUTION!Crash-consistent backups do not preserve the integrity of data for open files of transactional applications on the VM guest OS and may result in data loss.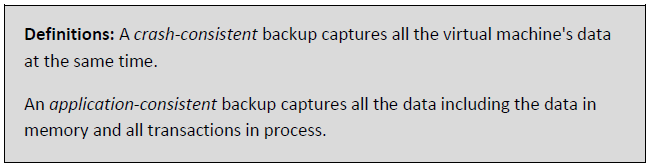
Note: The software attempts to make an application-consistent backup. If unable, a crash-consistent backup is created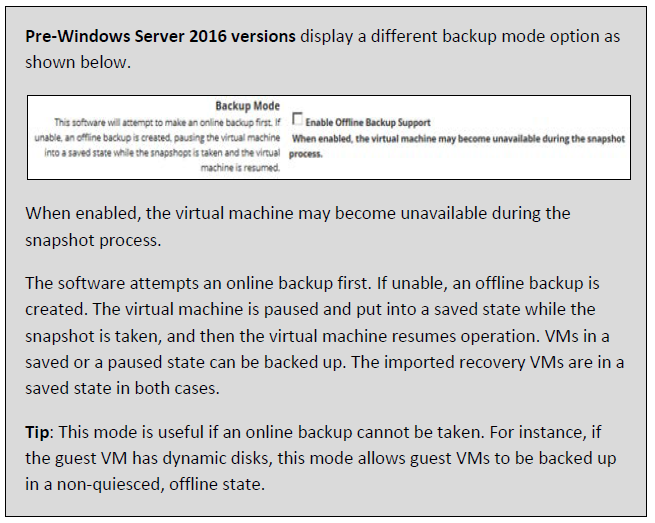
- Click Next.
The Summary page is displayed.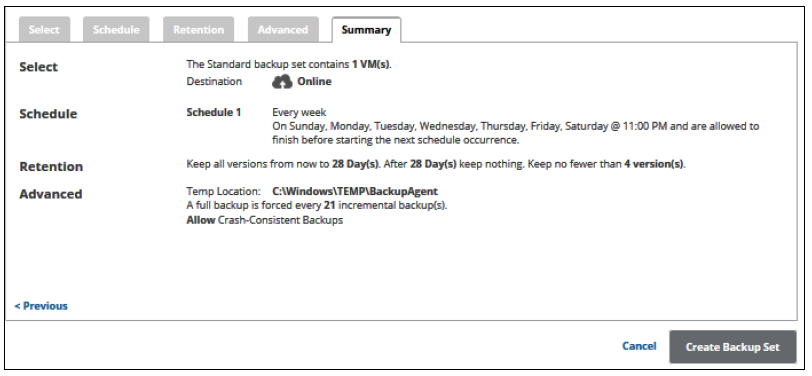
- After reviewing your selections, click the Create Backup Set button.
Your scheduled backup is displayed on the Backup Selections page.