

This page provides the following topics:
- Editing the Software Page
- About the Custom Backup Installer
- Creating a Custom Backup Installer
- Applying a Template to a Single Computer from the Software Page
Editing the Software Page
To edit the Software page, perform the following steps.
- At the Computer page, click the Software tab.
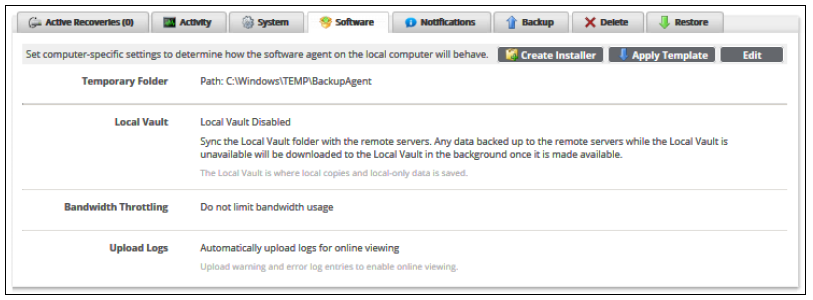
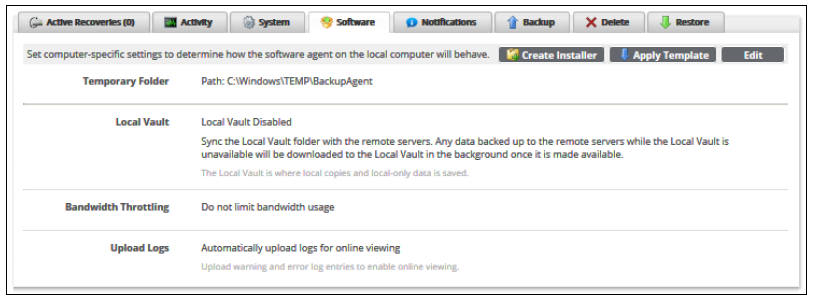
The Software page is displayed.
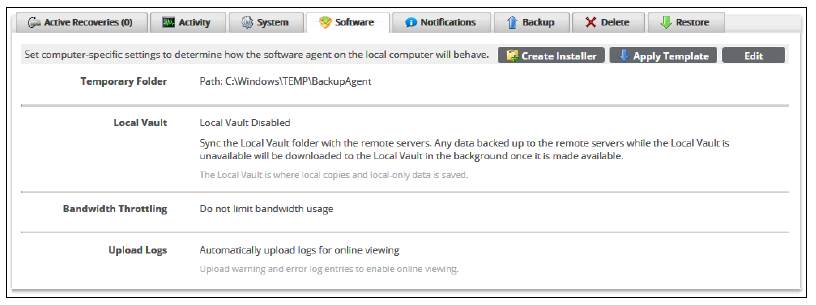
Click the Edit button.
The fields are displayed.
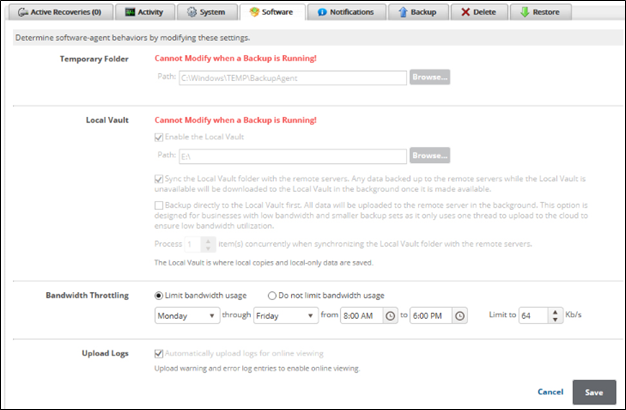
Local Vault and Temporary Folder Disabled for Editing When Backup Sets Run
You cannot make edits to the settings for the Temporary Folder or the Local Vault if the backup set is running.
If a backup set is running, the following message is displayed on the page.
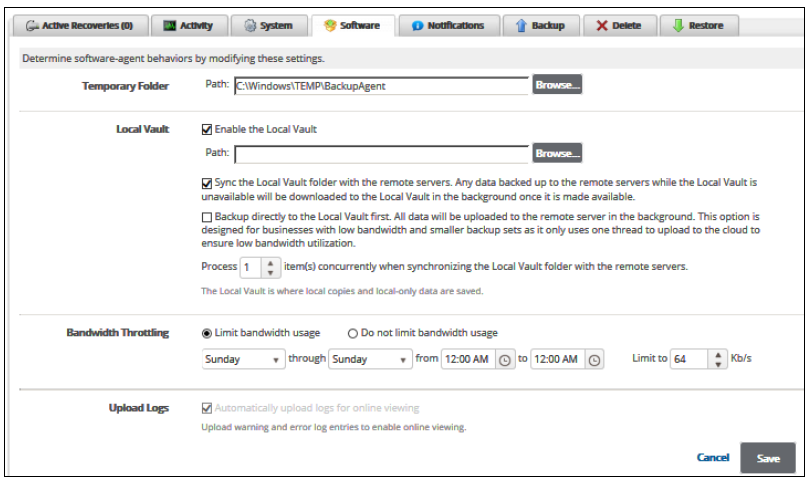
- At the Temporary Folder section, accept the default, type a new path, or click the Browse button to locate the temporary folder. See Browsing to a Folder.
- At the Local Vault section, optionally select the Enable the Local Vault check box.
Definition: The Local Vault is where local copies and local-only data are saved.- If enabled, click the Browse button to locate the Local Vault. See Browsing to a Folder.
- Optionally, select one of the following check boxes.
- Sync the Local Vault folder with the remote servers.
Note: Any data backed up to the remote servers while the Local Vault is unavailable is downloaded to the Local Vault in the background once it is made available. - Backup directly to the Local Vault first.
Note: All data is uploaded to the remote server in the background. This option is designed for businesses with low bandwidth and smaller backup sets as it only uses one thread to upload to the cloud to ensure low bandwidth utilization.
- Sync the Local Vault folder with the remote servers.
- Select from 1 to 5 items to process concurrently when synchronizing the Local Vault folder with the remote servers.
- At the Bandwidth Throttling section, optionally select the Limit bandwidth usage radio button.
- The usage fields are enabled.
- Set the usage limits.
Note: The default setting is Sunday through Sunday from 12 AM to 12 AM with a limit of 64 Kb/s. - At the Upload Logs section, optionally select the Automatically upload logs for online viewing check box.
Note: This option uploads warning and error log entries to enable online viewing. - When you have completed your selections, click the Save button.
- The confirmation pop-up is displayed.
- Click Yes.
- The new settings are displayed.
About the Custom Backup Installer
You can create a custom installer file that allows the software to self-install with the proper username, and Computer ID.
This option also allows you to configure the backup agent’s settings from the Management Portal.
Creating a Custom Backup Installer
To create a custom backup installer, perform the following steps.
- At the Computer page, click the Software tab.
The Software page is displayed.
- Click the Create Installer button.
The Installer Created pop-up is displayed.
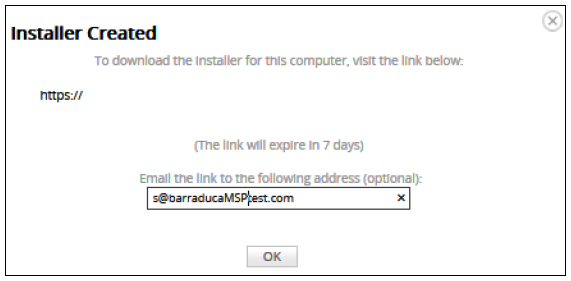
- Copy and paste the link or email it to the contact for this computer, and then click OK.
- Run the installer.
The Setup Wizard is displayed.
Applying a Template to a Single Computer from the Software Page
To apply a template to a single computer, perform the following steps.
- At the Computer page, click the Software tab.
The Software page is displayed.
- Click the Apply Template button.
The Apply Template pop-up is displayed.
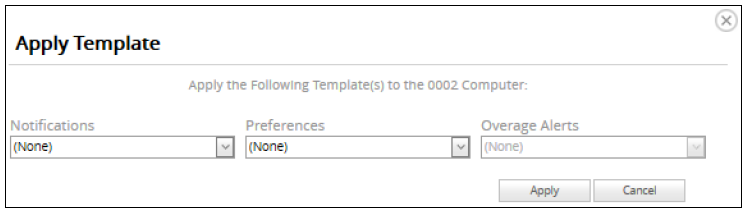
- Select the desired template from the drop-down menus, and then click Apply.
- If applying Preferences templates, the changes are applied to the selected Agent the next time the Agent checks in. The Agent checks in every 15 minutes.
- Note that a Pending status for a Preference template is displayed on the Computers section of the Manage Account page until the template is applied, as shown below.

- If applying Notifications templates and/or Overage Alerts templates, the Append pop-up is displayed, as shown below.
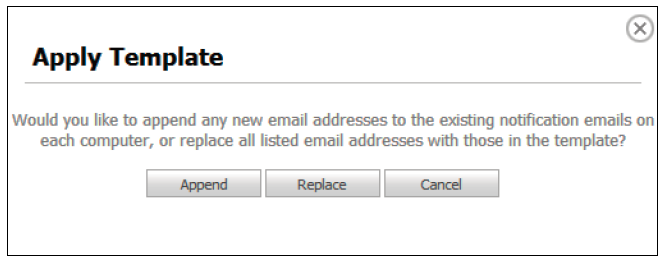
- Append adds settings not already specified (good for modifying notifications settings).
- Replace overwrites all settings with exactly what was chosen in the template (good for resetting or clearing notifications settings).
- Click Append or Replace.
The new email notifications are added or replaced.