The Web Filtering Logs show activities related to the filtering policies you have configured. Search includes by user, action, domain, categories and location. For policy configuration information, see How to Configure DNS Filtering and Policies and/or How to Configure Advanced Filtering Policies, depending on whether you are using BCS or BCS Plus. To access Web Filtering Logs, while managing an account, select Web Filtering Logs from the left panel.
The Web Filtering Logs page displays the following. By default, the logs are sorted by date, with recent entries at the top.
- Date Range of the activity shown in the log, with up to a maximum history of 30 days of data. Click the arrow to the right of Date column title in the table to reverse chronological order of log items.
- View additional details of the log entry, such as the full URL of a blocked site, by clicking the double 'down arrow' to the left of the date in this column.
- To set the date range, see below.
- To set the time zone, see How to Set the Time Zone.
- View additional details of the log entry, such as the full URL of a blocked site, by clicking the double 'down arrow' to the left of the date in this column.
- Action: Blocked or Allowed
- User ID/Location: With BCS, the Location name is displayed. With BCS Plus, the Username is displayed. Note: If the user is not signed in as a domain user, this field will not be populated. Note that, as explained above, Windows system 'user' activities may also appear in the logs.
- Rule: Click View Rule to go to the Advanced Filtering or DNS Filtering page to see details of the rule applied for that UserID or Location.
- Categories: Category classification of domain user visited.
- Domain: Domain that triggered the rule.
Use the tools located above or within the table of log entries to perform the following tasks:
- Set the Date Range for search results:
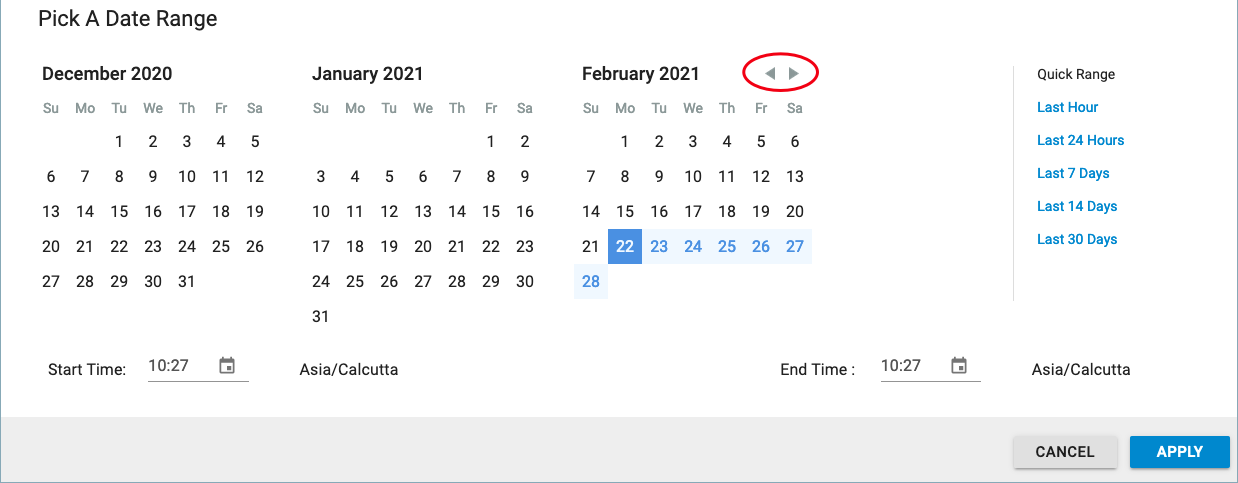
- Click the date range box at the top of the page. There are two ways to set a date range:
- Choose Last Hour, Last 24 Hours, etc. from the Quick Range list of links, and then click APPLY. – OR –
- Choose a custom date range:
- Click first on a date to start, then on a date to end for the date range.
- Click the arrows (circled below) to move ahead or back in time by month.

- Click a Start Time, and then an End Time at the bottom of the window. The time zone is displayed between the Start Time and End Time widgets. To set the time zone for BCS (and all of your Barracuda cloud products), see How to Set the Time Zone.
- Click APPLY.
- Search results: Click the left drop-down box to filter on Categories, Supercategories, Location, Name, User ID, Action, or Domain. After choosing a filter, use the right drop-down to search on values for the chosen filter; you can enter part of all of the value. For Domain, you can enter a partial or complete domain name. Click Search. To use multiple search values, see Compound (multiple) Searches below. To clear your filter, click CLEAR.
Update to the latest traffic information: Click Refresh Logs to view the latest traffic information. Note that clicking Refresh Logs maintains your time frame selection, whereas performing a browser refresh (pressing F5) reverts to the default Last 7 days setting.
Save the data and analyze it: Click Download CSV.
Select which columns to display: Click Columns.
Compound (multiple) Searches
If you want to use multiple items or values in a search, use the "+" and "–" buttons. Some examples of multiple filter searches include:
- Search on multiple User IDs. Begin by selecting the User ID filter, and then selecting a user. Next, click "+" and repeat for a second user. Click Search. Since you have selected more than one user for the User ID filter, the search will be an 'OR' operation, which means that search results will include one or more of the chosen users, depending on the data.
- Search with multiple filter types. Begin with the first filter type – say, Categories – and select the first category. Next, click "+" and repeat for a second category. Next, select a User ID filter, and then select a user. Finally, click "+" and select an Action (Blocked or Allowed). The search results will include either or both categories (an 'OR' operation), AND the selected User ID, AND the chosen Action.
- To clear your filter, click CLEAR.
