

Static routes can be configured to connect to a specific network or sub-network in cases where the routing is not happening automatically. Since Barracuda Backup requires the use of a VPN to manage the device and uses an internal network of 10.128.0.0/9, routing conflicts can occur on customer networks that also use the 10.128.0.0/9 network. Static routes can be created to properly connect to those data sources. Static routes can also be used to connect to data sources that are not on the same network or sub-network as the Barracuda Backup device.
Static routes are not automatically updated; you must manually reconfigure static routes when network changes occur.
Follow the steps below configure static routes:
- Log into Barracuda Backup and select the associated Barracuda Backup device in the left pane or in the devices table (for customers with multiple Barracuda Backup devices).
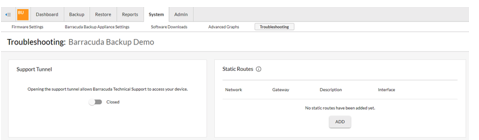
- Go to the System > Troubleshooting page and click the ADD button in the Static Routes tool.
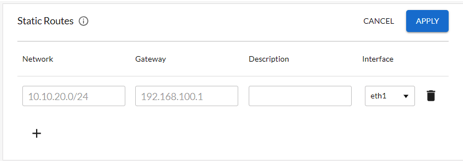
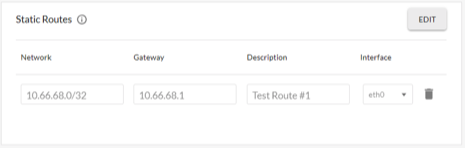
Enter the Network that needs to be reached, the Gateway to get there, a Description to identify the route, and the Interface (NIC) to apply the route to.
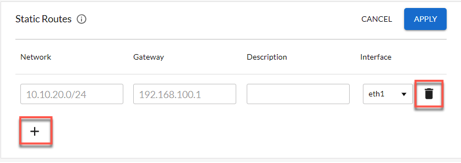
- To add an additional route, click the '+' icon. To delete a route, click the <trash_can> icon.
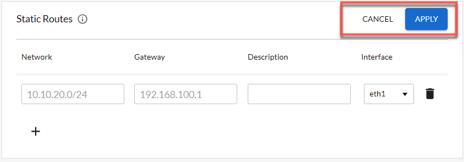
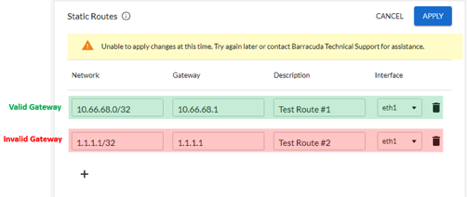
- After you finish adding routes, click APPLY. Clicking CANCEL will disregard all changes and revert the static routes form to the previous saved state. When you click APPLY, the Barracuda Backup device validates that it can communicate with the specified gateway.
- After they are applied, the configured routes are shown in the Static Routes tool.
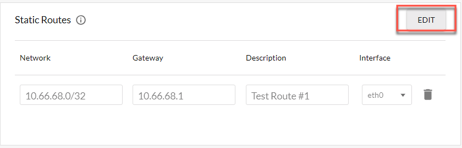
- To make changes, such as adding new or deleting existing routes, click EDIT. This “unlocks” the form and puts it into edit mode. While in edit mode, routes can be added and removed, without being applied to the Barracuda Backup device. Only when APPLY is clicked will the routes be saved.
Invalid Gateway
After you click APPLY, the Barracuda Backup device validates that it can communicate with the specified gateway(s). If a specified gateway is either invalid, non-existent, or unreachable, all of the changes to the static routes form will fail to be applied. This can be corrected by removing the route with the invalid gateway or entering a valid gateway in the affected route. The following is an example of a route with an invalid gateway and the associated error message:
Resetting the Static Routes Configuration
If changes are made to the static routes configuration which result in a loss of Barracuda cloud connectivity or other undesirable behavior, the static routes configuration can be reset from the local user interface.
To reset the static routes configuration:
- Access the local user interface by typing the IP address of the Barracuda Backup device into a browser, and then log in using your credentials.
- Go to the System > Device Information page and click Reset in the Static Routes section.

- Clicking Reset will remove ALL configured static routes from the Barracuda Backup device.