To establish a connection from a CGF to a SecureEdge service via a TINA transport, you must configure an interface as a Direct Internet Access interface and select the check box Establish transport to SecureEdge in the configuration window. You can do so in the following three places:
Network configuration for shared IPs: CONFIGURATION > Configuration Tree > Network > IP Configuration, section Shared Networks and IPs.
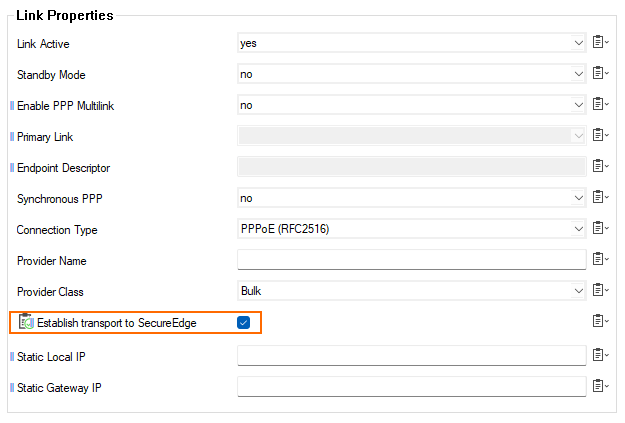
Network configuration for xDSL: CONFIGURATION > Configuration Tree > Network > IP Configuration, section xDSL Setup, xDSL Links.
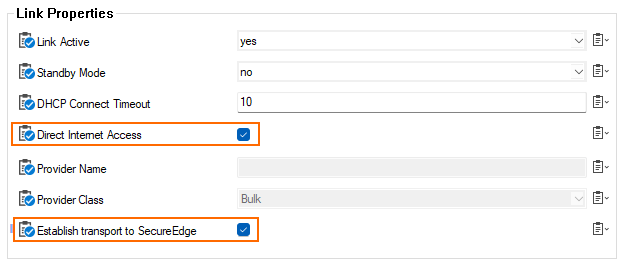
Network configuration for DHCP: CONFIGURATION > Configuration Tree > Network > IP Configuration, section DHCP Client Setup, DHCP Links.
Before You Begin
The CloudGen Firewall must already be integrated into SecureEdge.
The CloudGen Firewall must be associated with an upstream Edge service in the SecureEdge Manager (SEM).
How to Configure an Interface to Establish a Connection via a TINA Transport for SecureEdge
During configuration, the following two fields must be set (if present in the corresponding configuration window):
Direct Internet Access
Establish transport to SecureEdge
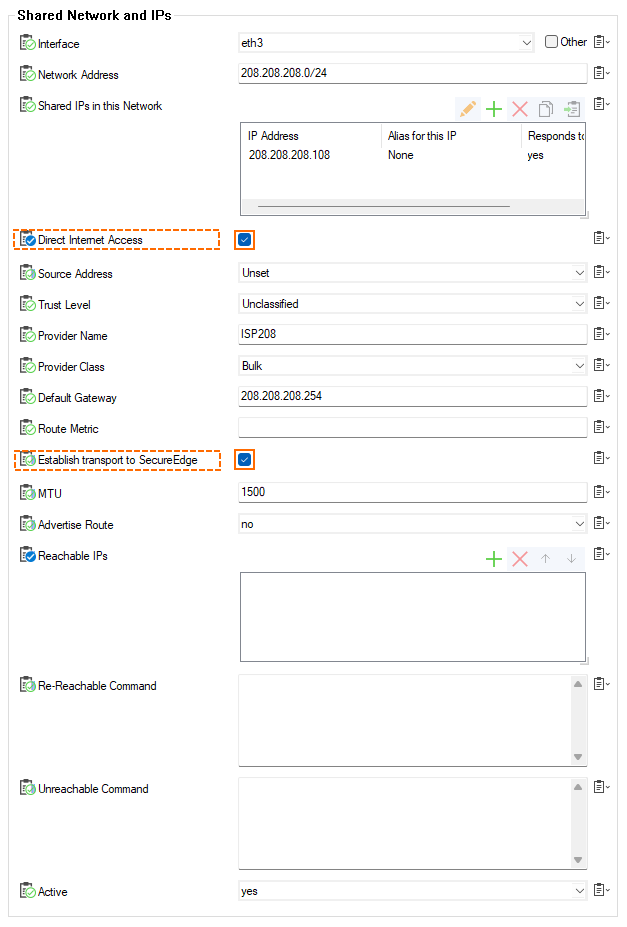
The following example shows how to configure the relevant fields in the SharedIPs section:
Go to CONFIGURATION > Configuration Tree > Network > IP Configuration.
Switch to Advanced Mode in Firewall Admin
Click Lock.
Go to the section Shared Networks and IPs.
Click the green '+'.
The Shared Networks and IPs window is displayed.
Enter the name for the shared network.
Click OK... .
The configuration window for Shared Networks and IPs is displayed.
For Interface, select the relevant interface from the drop-down menu.
For Network Address, enter the relevant network address.
For Shared IPs in this Network, click the green '+'.
The Shared IPs in this Network window is displayed.
For IP Address, enter the relevant IP address in this network.
For Responds to Ping, select yes.
Click OK.
For Direct Internet Access, select the check box.
For Provider Name, enter the name for the provider.
For Default Gateway, enter the IP address for the default gateway.
For Route Metric, enter the required value if necessary.
For Establish transport to SecureEdge, select the check box.
Click OK.
Analog Configuration for xDSL and DHCP
Configure all fields according to your requirements and select the check boxes for Direct Internet Access and Establish transport to SecureEdge.
Example Screenshot for xDSL
Example Screenshot for DHCP