

This section walks you through the steps on how to integrate the Barracuda WAF Access Control module with OpenID Connect-based authentication. The Barracuda Web Application Firewall allows customers to authenticate users in a simplified way using OpenID Connect. The URLs are personalized and can be referred here.
After installing OKTA, users will authenticate with OKTA through OpenID Connect for accessing the service hosted on the Barracuda Web Application Firewall. The authentication is done before allowing access to the application protected by the service on the WAF.
Step 1 : Configuring OKTA
Note: Before starting the configuration, ensure that you have an active account created on OKTA.
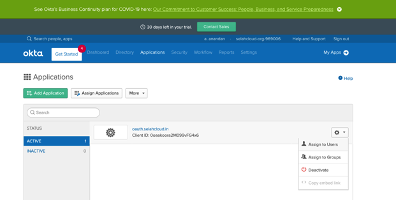
- Log into the Okta Developer Dashboard and click Applications > Create New App.
- In the Create a New Application Integration dialog box, select OpenID Connect and then click Create.
- Enter the following details:
- Add the domain name of the application that you want to provide authentication.
- Configure the Login Redirect URI as https://domain/openid-connect/redirect
- Click Save to save the configuration. Also, make a note of the client ID and Client Secret strings.
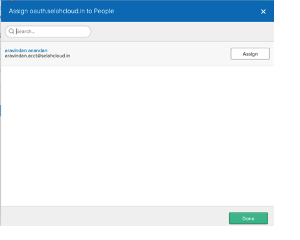
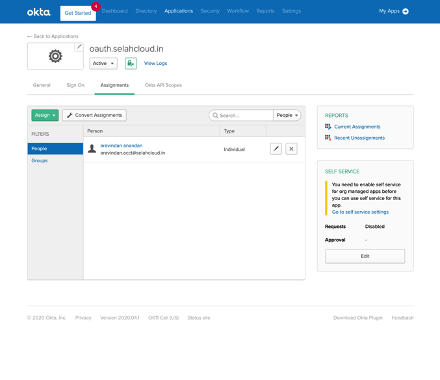
- Bind users to the application in OKTA. You can follow the instructions of the OKTA screens to assign users.
- OKTA OpenID Connect Discovery URL.
The discovery URL is of the format: https://<oktadomain>/.well-known/openid-configuration
Example https://selahcloudoauth.okta.com/.well-known/openid-configuration
The domain name can be retrieved from the Single Sign On tab as shown below:
Step 2 : Configuring OKTA for OpenID Connect on the Barracuda Web Application Firewall
- Log into the Barracuda Web Application Firewall and navigate to ACCESS CONTROL > Authentication Services > Open ID Connect.
- In the Realm Name box, specify a name to identify the authentication service on the Barracuda Web Application Firewall. The OpenID Connect Alias name for the identity provider displays the application login page.
- Enter the discovery URL and click Retrieve to display the end point URLs in the fields by default (except for client/clientsec).
- Configure the client ID and client secret that you noted in the OKTA configuration. Also, ensure that the Scope field has the OpenID displayed.
- Click Add. The OKTA OpenID Connect authentication service is displayed in the Existing Authentication Service section.
- Configure the authentication policy and authorization rule for the service.
Step 3 - Configure the Authentication Policy for the Service
- Go to the ACCESS CONTROL > Authentication Policies page.
- In the Authentication Policies section, for the service to which you want to enable authentication, click the drop-down list and select Edit Authentication from the Options column.
- In the Edit Authentication Policies window, configure the following:
Set Status to On.
From the Authentication Service drop-down list, select the authentication service realm.
Enter the redirect URL. Ensure that you use the same redirect URL that was configured on the OKTA server. For example, if the redirect URL configured on the OKTA server is https://www.oauthtest.com/redirect.html, then you can use /redirect.html here.
The login page is selected by default in the Access Control Pages section.
(Optional) In the OpenID Connect Claim Configuration section, specify the claim name and local ID received from the identity provider that needs to be sent to the application server.
Click Save.
Step 4 - Configure the Authorization Policy for the Service
- Go to the ACCESS CONTROL > Authentication Policies page.
- In the Authentication Policies section, click Add Authorization next to the service to which you want to enable authorization.
- In the Add Authorization Policy section, configure the following:
- Policy Name – Enter a name for the policy.
- Set Status to On.
- URL Match – Enter the URL that needs to be matched in the request. For example “/*”
- Host Match – Enter the host name to be matched against the host in the request.
- Click Save.
Step 5 : Validating the Integration
- Go to the URL for which the authorization rule exists. In this example the URL is https://oauth.selahcloud.in/index.html.
- Select the OpenID Connect Realm and then click Submit.
- Enter the credentials to log in.