

To restore using Rapid Recovery, perform the following steps.
- Navigate to the Computer page.
The Computer Page is displayed.
- Click the Restore tab.
The Restore Selections page is displayed.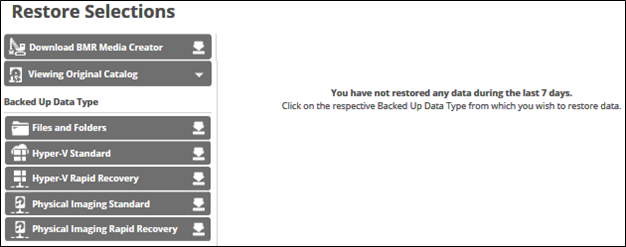
- In the Backup Type pane, click Physical Imaging Rapid Recovery.
The Select page is displayed with Rapid Recovery selected as the default.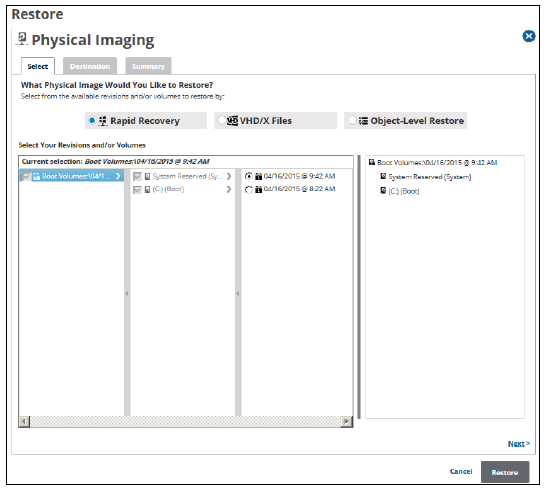
In the Current Selection pane, the boot volume is selected by default (it is grayed out). - Select any other volumes and revisions to be restored.
Clicking the arrow at the right of the items displays more files and folders.
The selection is displayed in the far right pane. Click the remove icon to remove any selection.
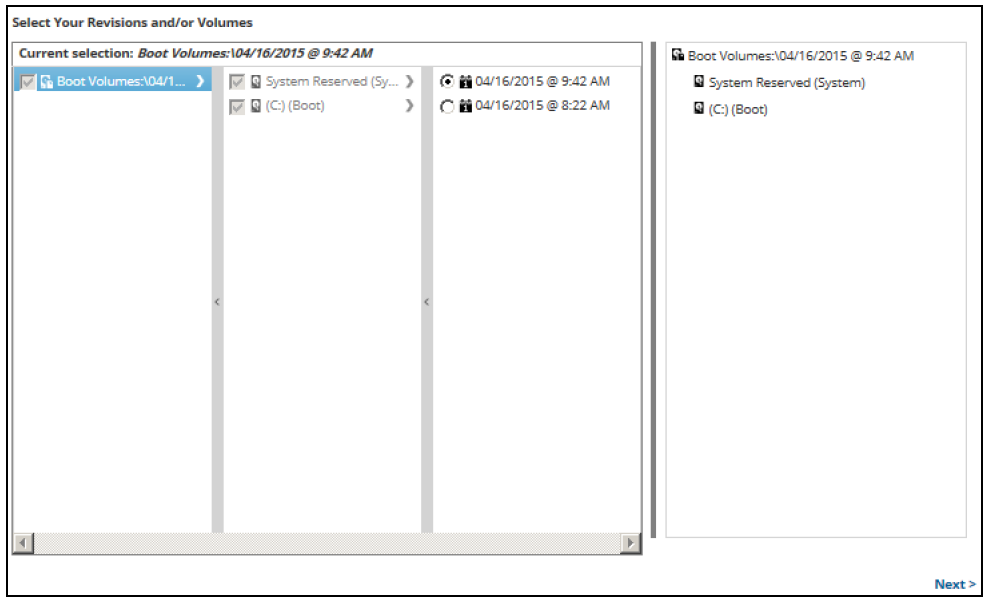
- After making your selections, click Next.
The Destination page is displayed.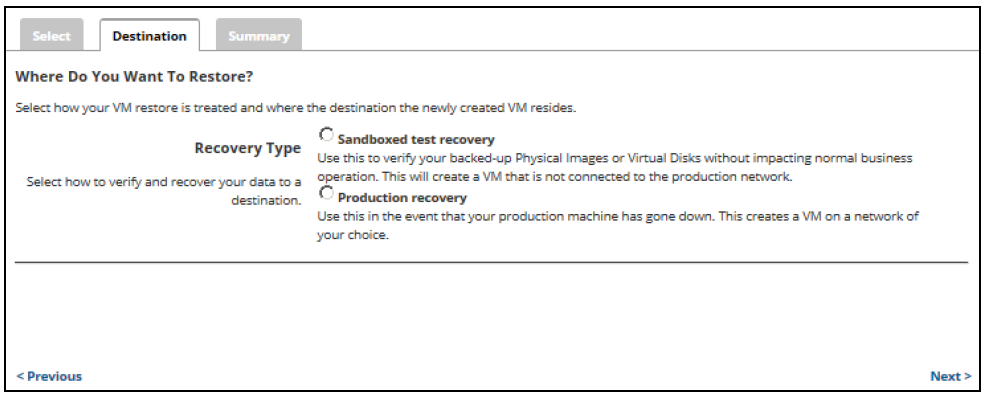
Notes:
- Use Sandboxed test recovery to verify your backed-up Physical Images or Virtual Disks without affecting normal business operation. This option creates a VM that is not connected to the production network. Sandboxed Test Recovery is a non-destructive means for you to verify the integrity of your backed-up images without affecting normal business operation. Your production images remain powered on and operational.
- Use Production recovery in the event that your production machine has gone down. Production Recovery performs a recovery of your production images with selected recovery images. - Select a Restore type radio button.
If you select Sandboxed test recovery:- The source/production images are not shut down.
- The recovery VMs created are started on their own separate VLAN to avoid conflicts with the production VMs.
- The source/production VMs are shut down.
- The recovery VMs selected are started on the production network. They assume the role of the original production machines.
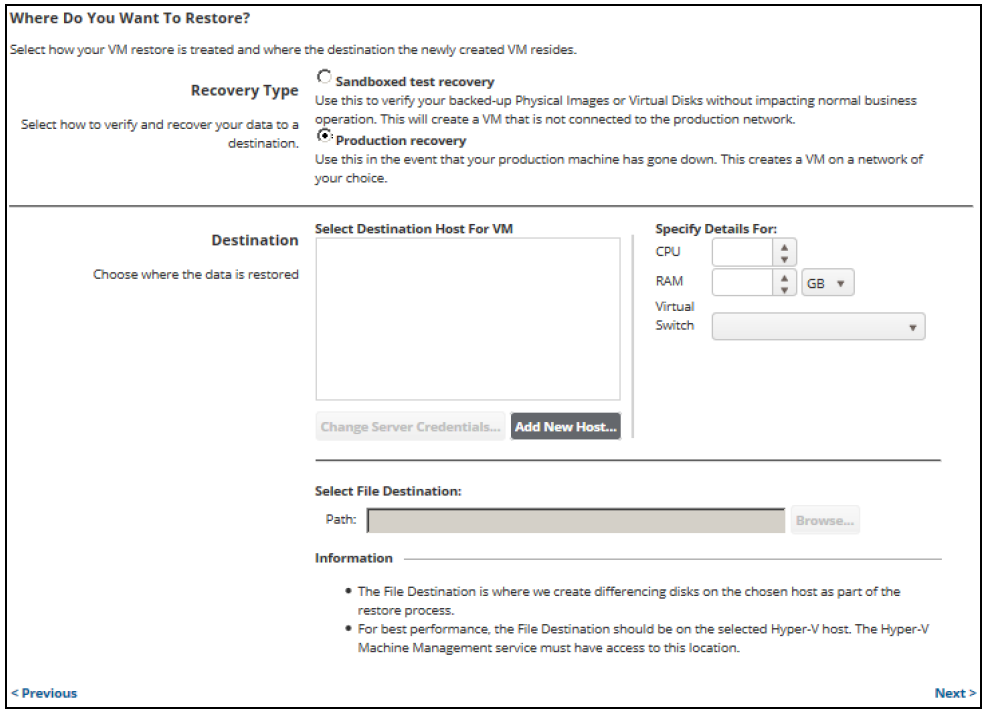
- At the Select Destination Host for VM pane, click the Add New Host button.
The Server IP Address pop-up is displayed.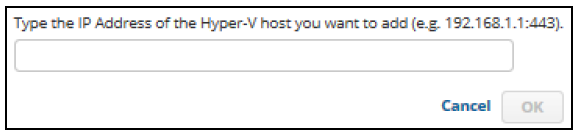
- Type the IP address of the Hyper-V host, and then click OK.
The sign-in pop-up is displayed.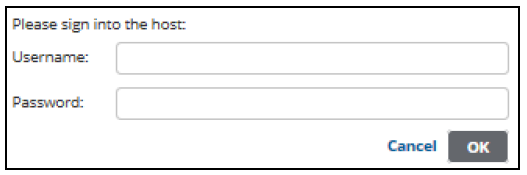
- Sign in, and then click OK.
- At the Specify details for Host VM panel, select the CPU and the RAM size.
- If you selected the Production Recovery option, select the Virtual Switch.
- At the Path field, type or browse to the destination of your restore.

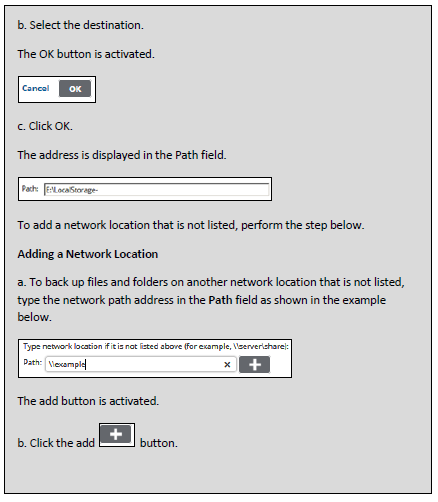
Notes:- The File Destination is where differentiating disks are created on the selected host as part of the restore process.
- For best performance, set the File Destination on the selected Hyper-V host. The Hyper-V Machine Management service must have access to this location.
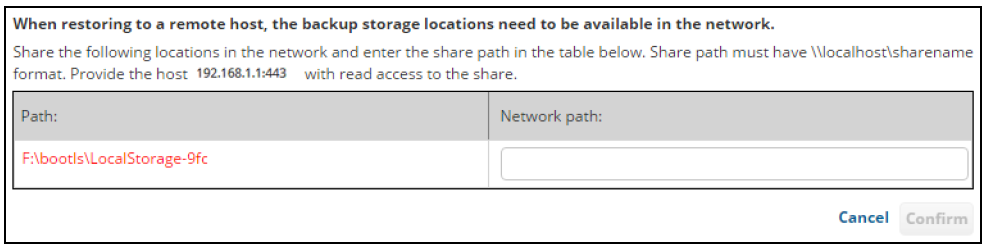
- If you select a remote host and the backup destination is a local non-shared folder, the following pop-up is displayed asking to share the backup destination. Canceling this pop-up deselects the remote host.
- After selecting the destination of your restore, click Next.
The Summary page is displayed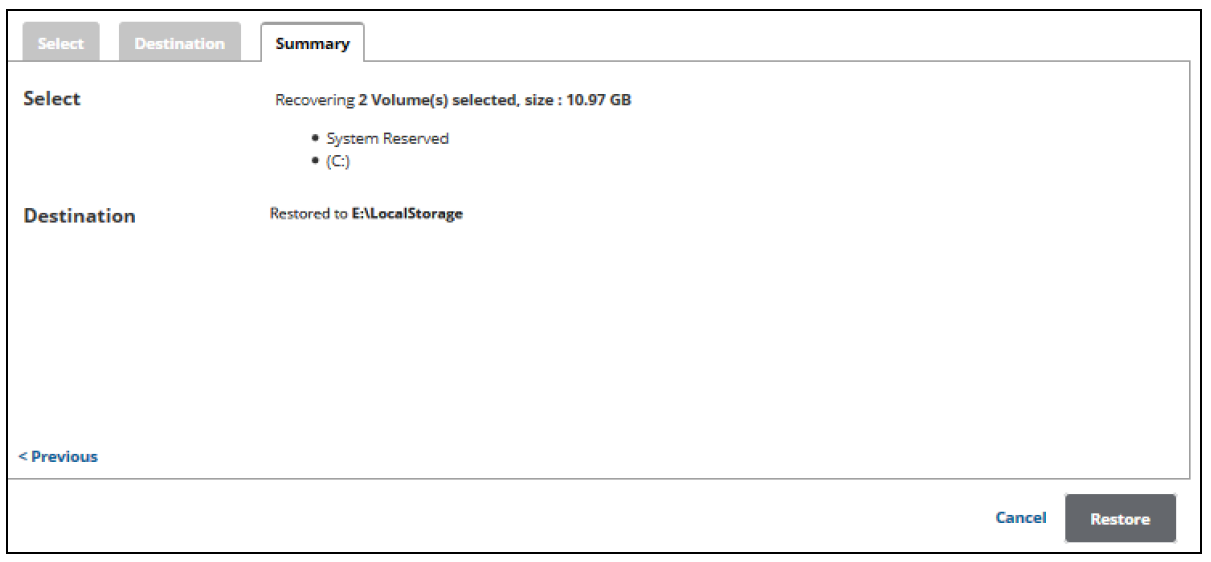
- Verify your selections, and then click the Restore button.
The confirmation pop-up is displayed.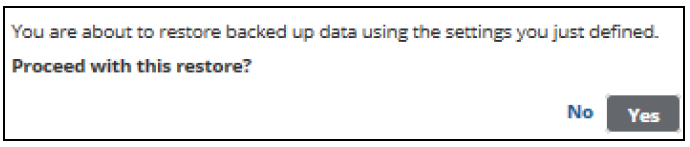
- Click Yes.
The Restore Selections page is displayed with the status and a record is created in the Active Recovery tab.
If the Manage Recovery action is not performed, you cannot run a backup/restore for the volumes that were restored using Rapid Recovery type. - After the restore is finished, see Managing an Imaging Rapid Recovery for instructions in handling a restored virtual machine.