To add a new local user:
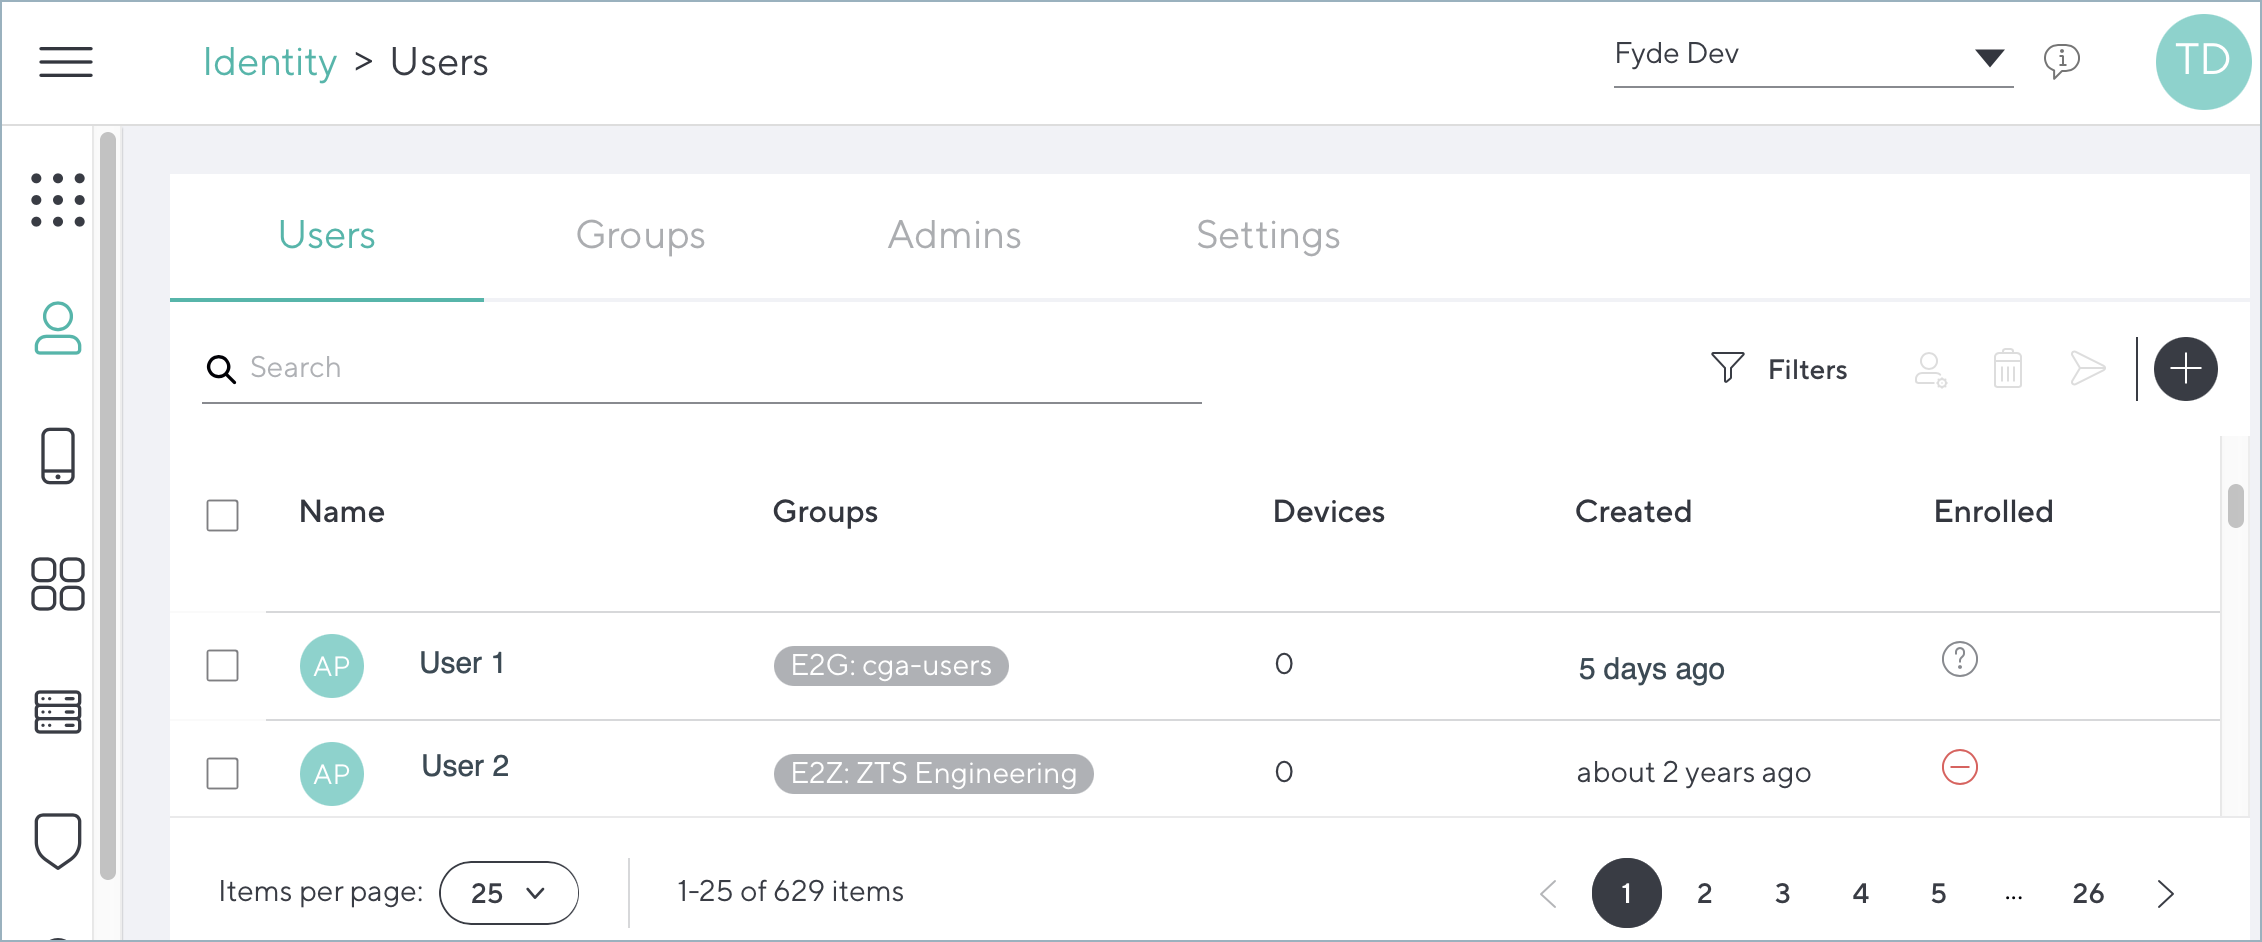
- Go to Identity and navigate to Users. Click the + icon in the top right.

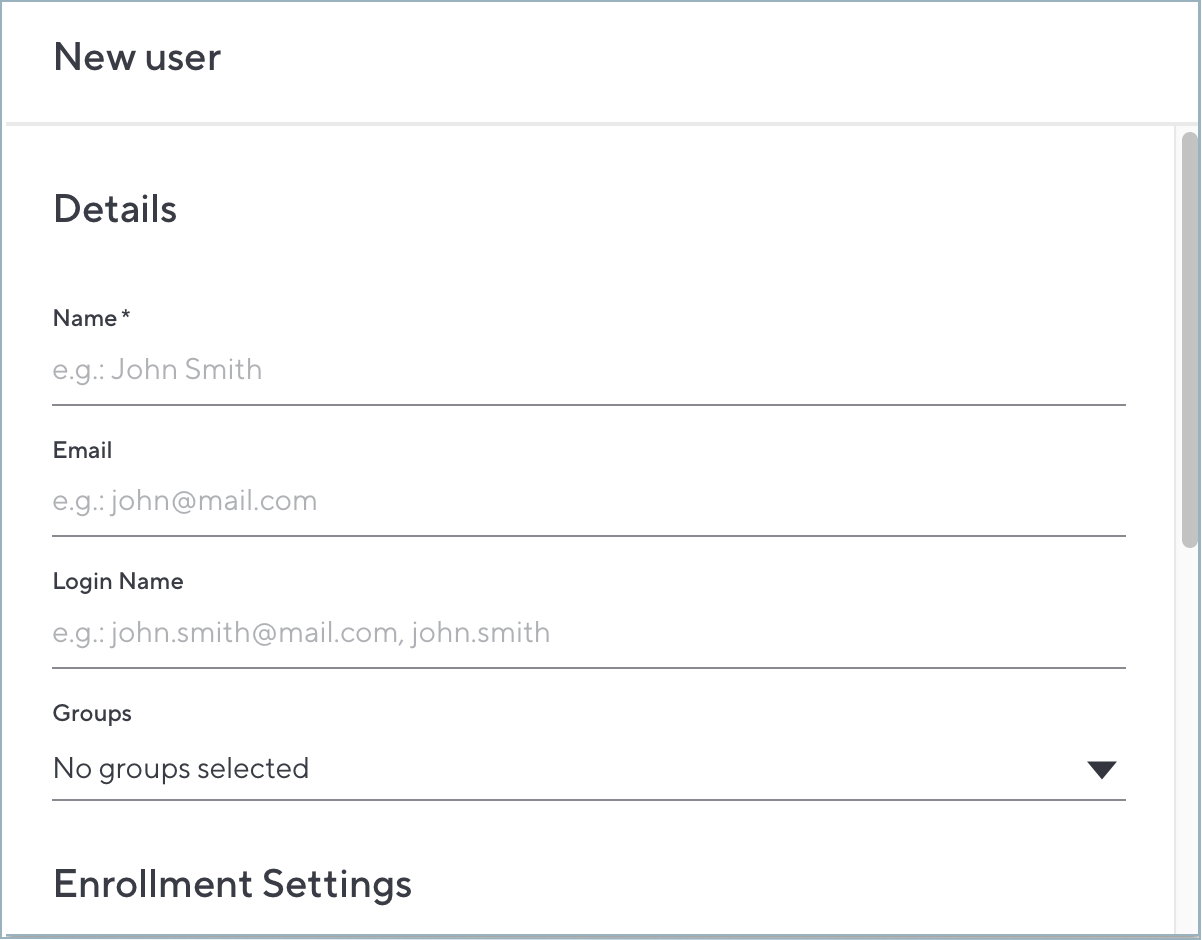
First, fill in the following User Details in the New User modal as shown below:- Name – Name to identify the user.
- Email – Required to send the enrollment to the user link via email.
- Login Name – Email address or name used to log in, e.g. john.smith@mail.com, john.smith
- Groups (optional) – Groups that the user belongs to.

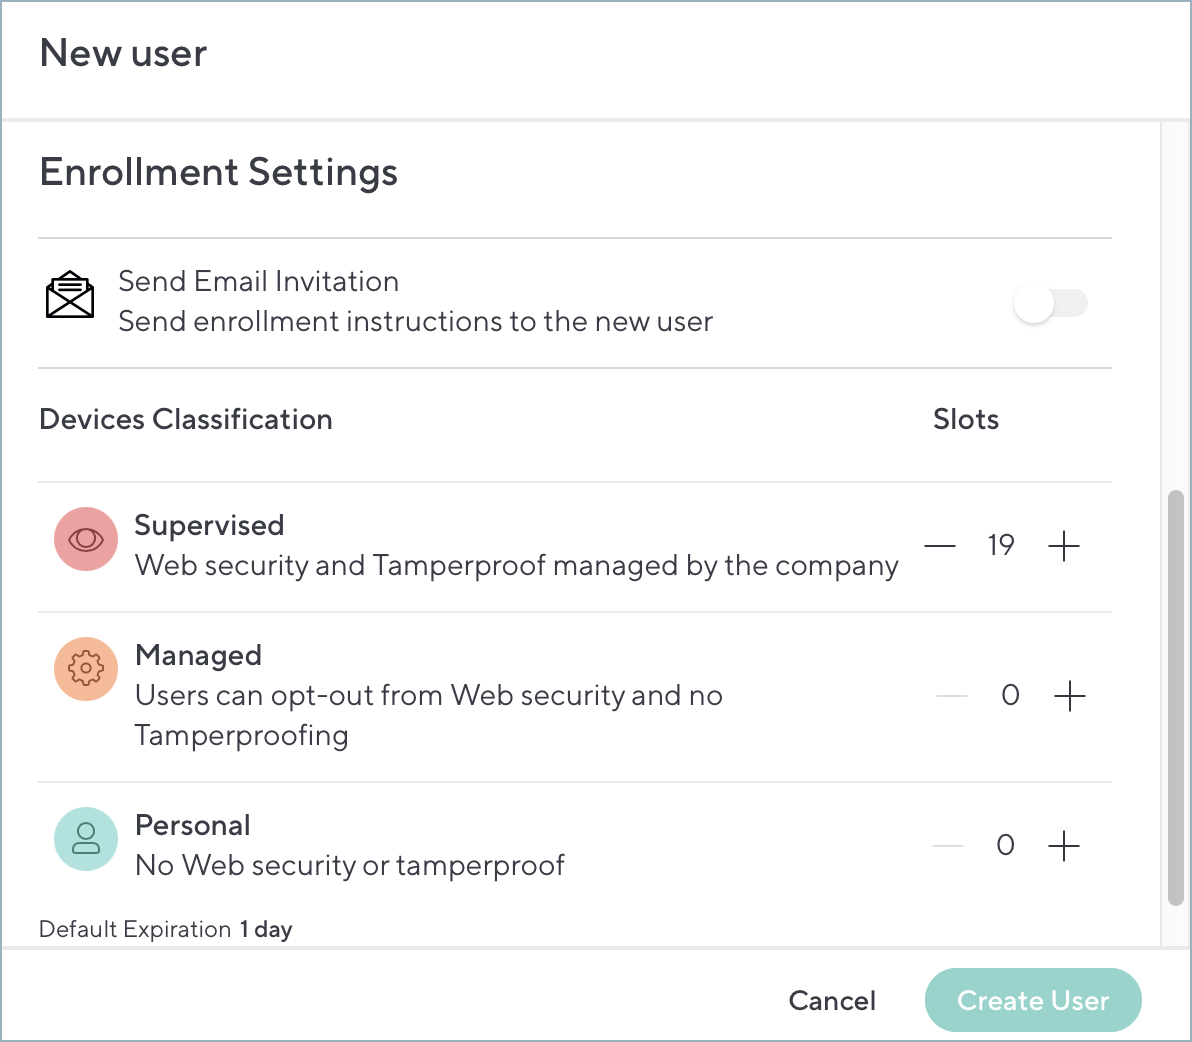
- In the Enrollment Settings section:
- Select Send email invitation (optional) to send an email to the user with enrollment steps.
- Select a Device Classification for the user. (See Device Classification for more information).
- Supervised – The Tamperproof feature is allowed and your organization's Web Security policies are enforced.
- Managed – The Tamperproof feature is disabled, and the organization's Web Security policies are enabled, but optional (user can opt-out).
- Personal – The Tamperproof feature and Web Security features are disabled. The organization CANNOT see the web traffic on the device, even if the CloudGen Access app is installed and running
- The number of available Slots correspond to user devices. When all of the slots have been taken, the token is finished. Tokens can, alternatively, expire in 14 days from creation.

- Click Create User.
To enroll a device:
- Open the enrollment email.
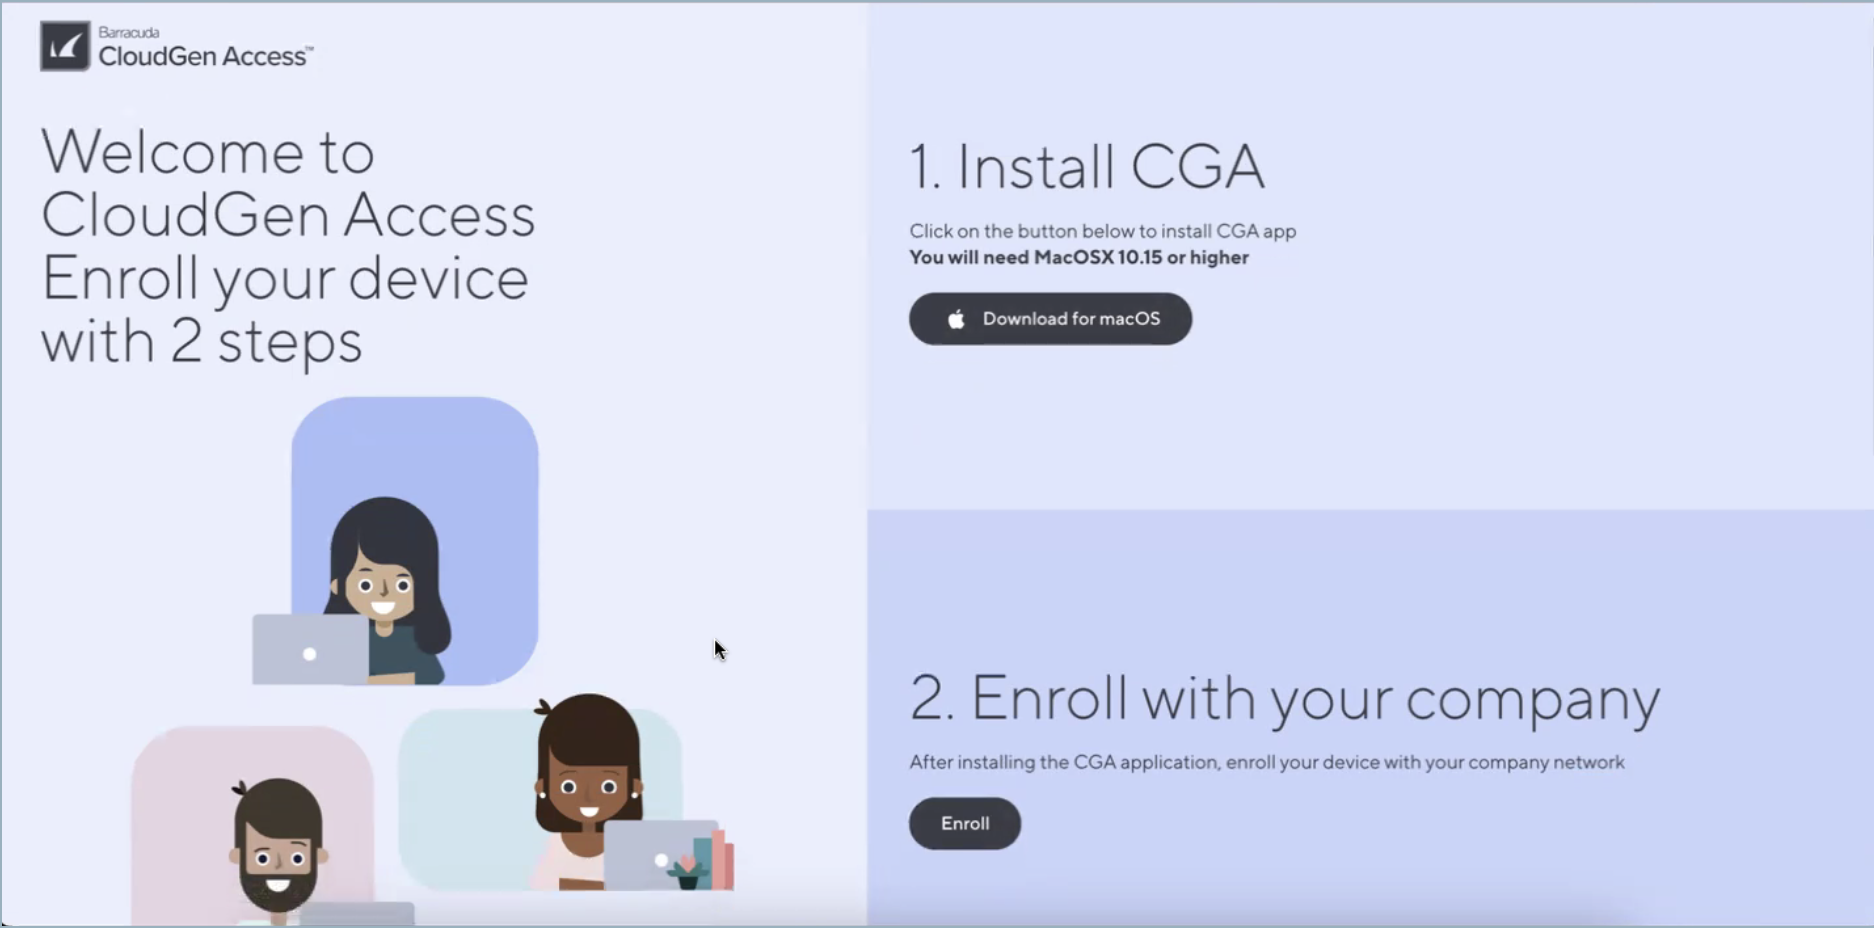
- Click on Download for macOS.
- After installing the CGA app, click Enroll.
Notes:
See Device Classification for details about how devices are managed.
If there is an issue with enrolling, and the Report Issue screen is not readily available, open cga://nav/troubleshoot/issue_report to navigate to the Report Issue screen.

