Use the following steps to create an Okta SAML application to use with CloudGen Access Enterprise Console.
- These steps are also found in this Okta tutorial.
- This tutorial was created with Okta Version 2019.03.2
Configure SAML
- Log into your Okta organization as a user with administrative privileges.
- Create a new application by selecting Applications and then Add Application.
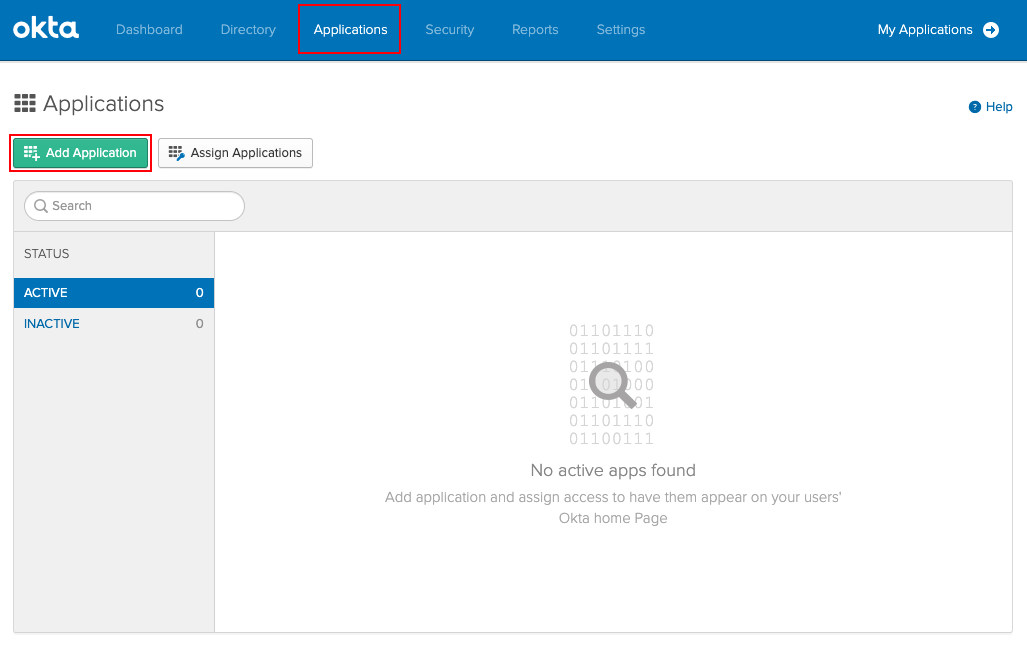
- Select Create New App.
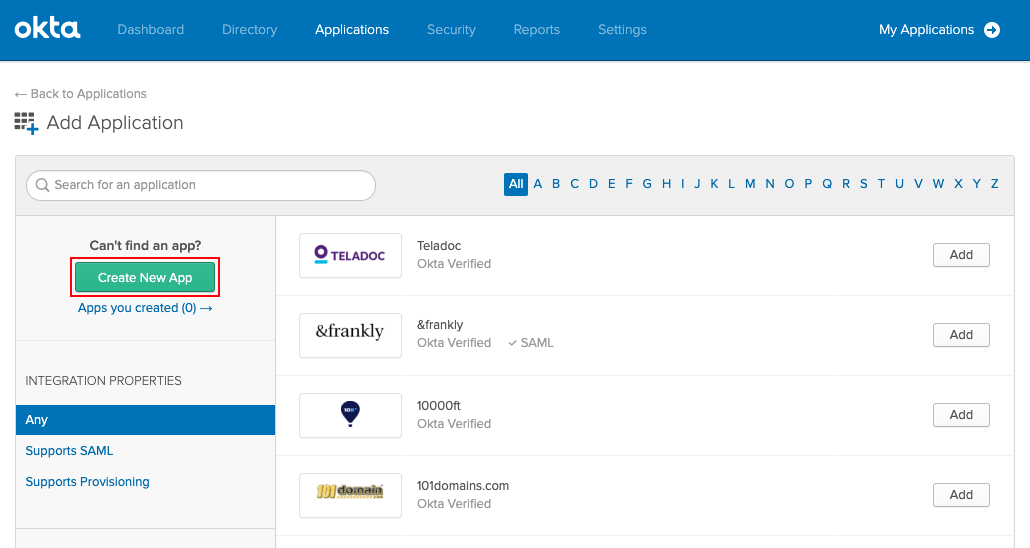
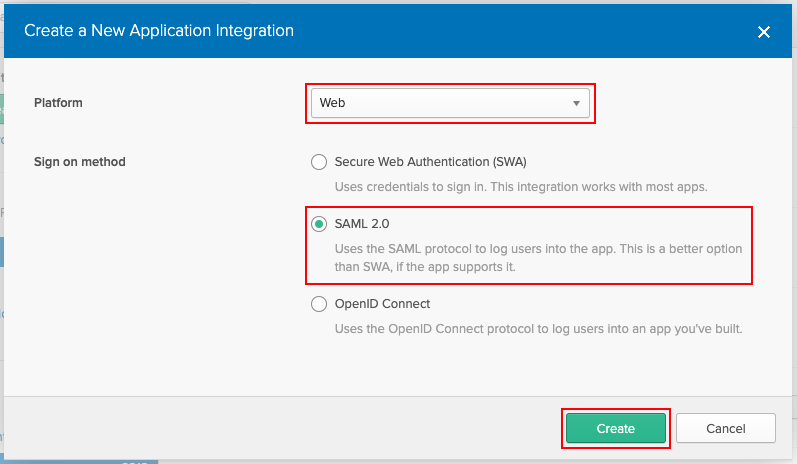
- Configure custom application type:
- Select Platform Web.
- Select Sign on method SAML 2.0.
- Click Create to continue.
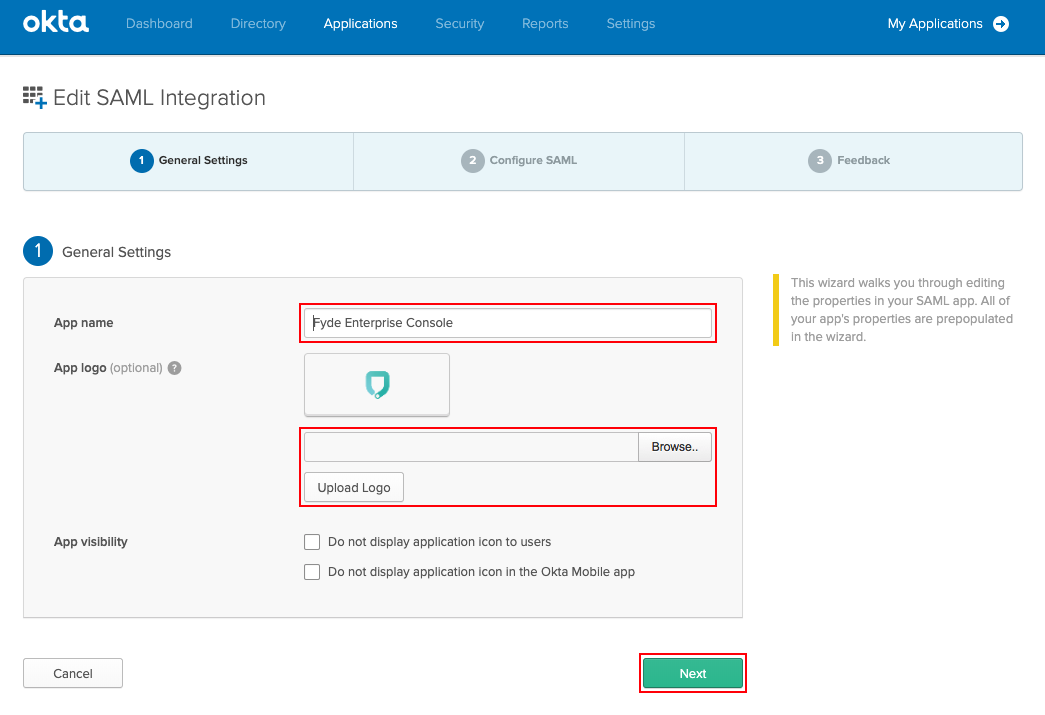
- Configure custom application type:
- Insert the desired App name (for example:
Enterprise Console).
- Insert the desired App name (for example:
- Select Next to continue.
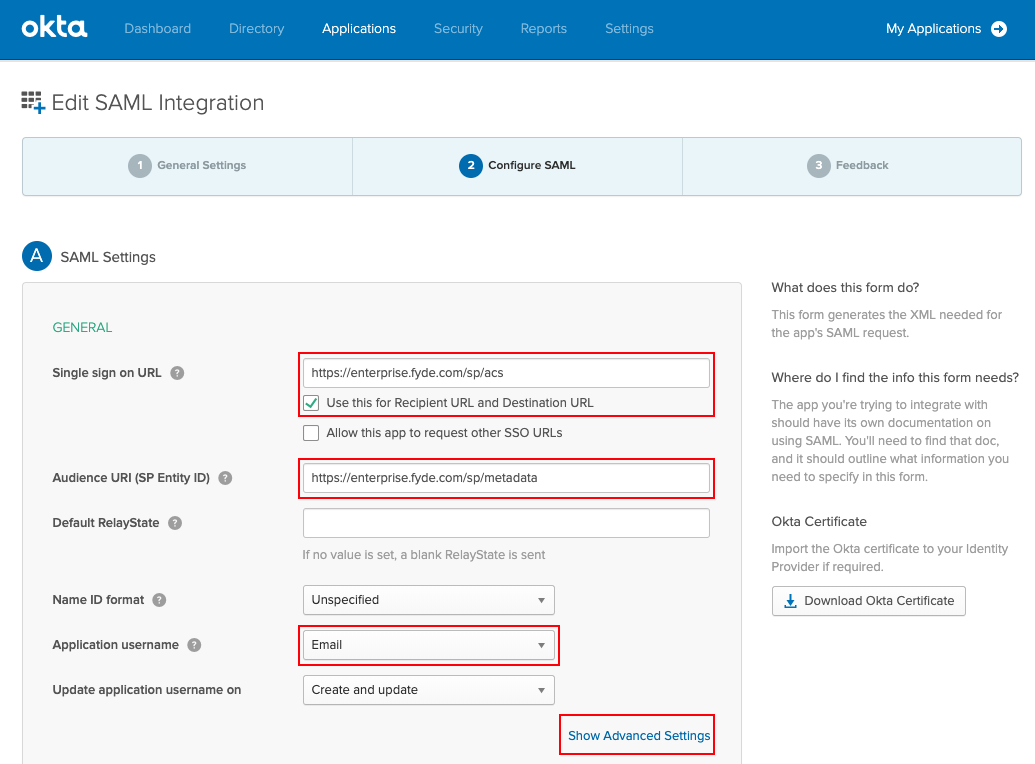
- In this menu, the values will be used that were obtained from Step 2 in How to Configure SAML 2.0 Configuration:
Fill in the following:- Single sign on URL (Assertion Consumer Service URL)
- Ensure the Use this Recipient URL and Destination URL check box is selected.
- Audience URI (SP Entity ID)
- Ensure Application username is set to Email.
- Leave the remaining fields to defaults (as shown).
- Select Show Advanced Settings to continue.
- In the Advanced Settings section, ensure that all the values are set as below.
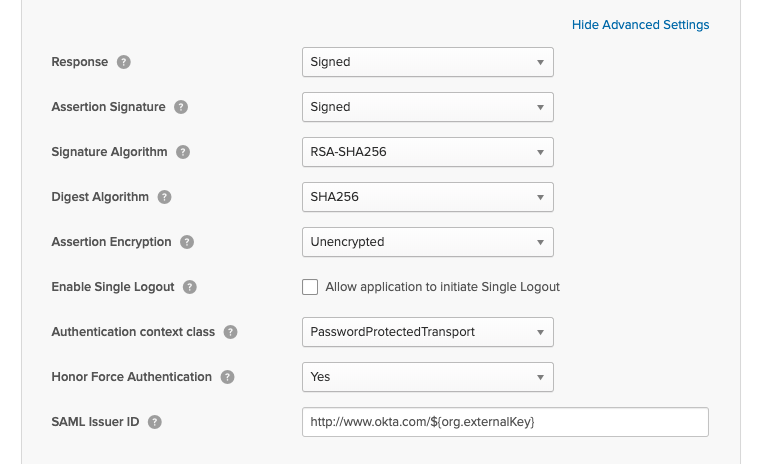
- Click Next to continue.
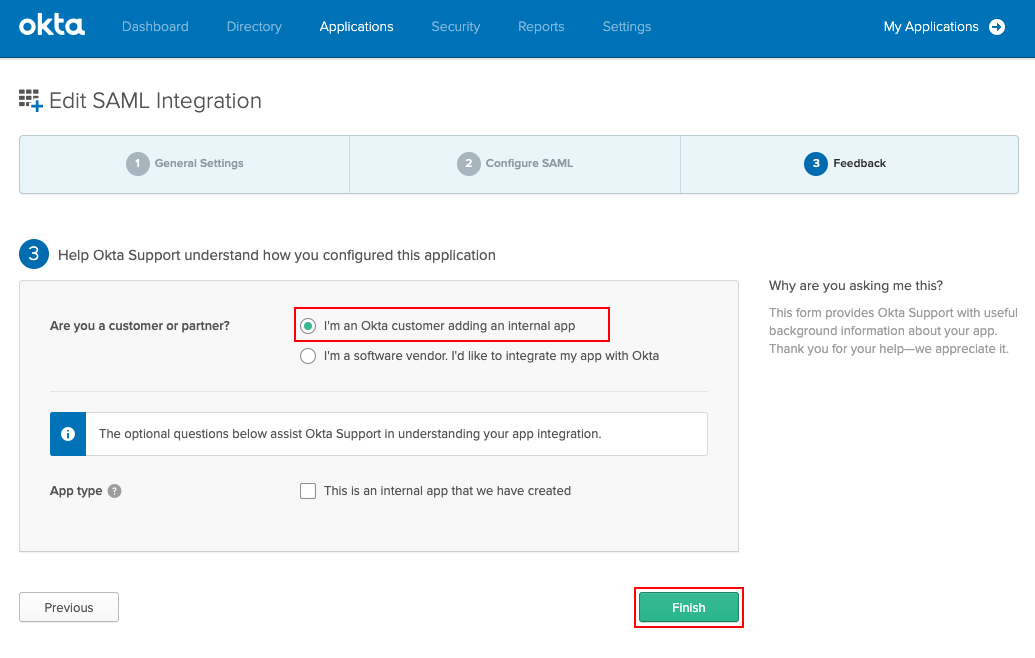
- Configure feedback and click Finish.
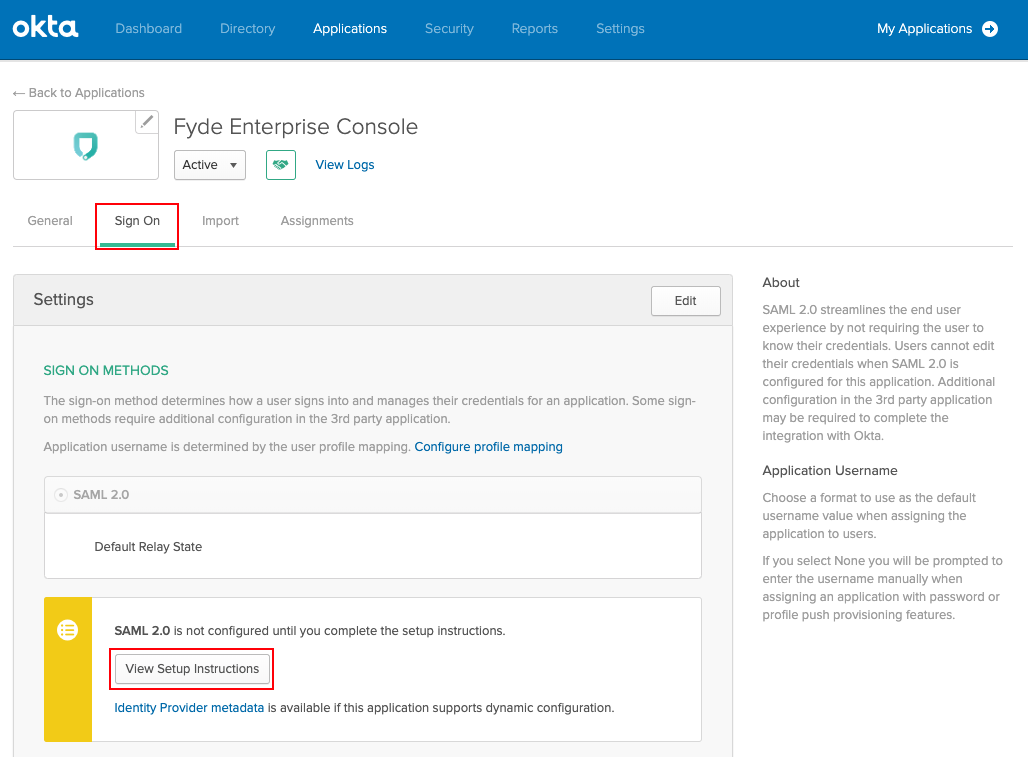
- Get provider definitions by selecting Sign On and View Setup Instructions.
- Use the values obtained to continue the Step 3 configuration in How to Configure SAML 2.0 Configuration:
- Identity Provider Issuer - Entity ID
- Identity Provider Single Sign-On URL - SSO URL
- X.509 Certificate - Certificate
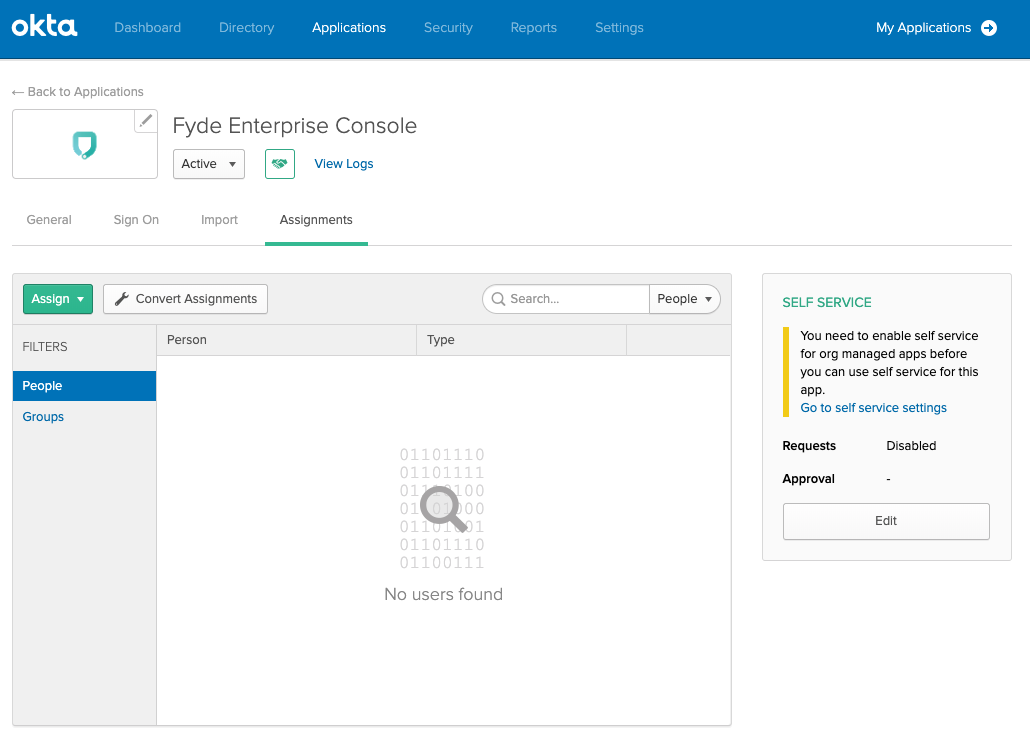
This app must be assigned to users: