

Directly attached routes are routing entries for networks that can be reached from an interface of the firewall without having to use a next hop gateway.

Before You Begin
Connect the network to a port of the Barracuda CloudGen Firewall.
Step 1. Configure a Direct IPv6 Route
- Go to CONFIGURATION > Configuration Tree > Box > Network.
- In the left menu, click Advanced Routing.
- Click Lock.
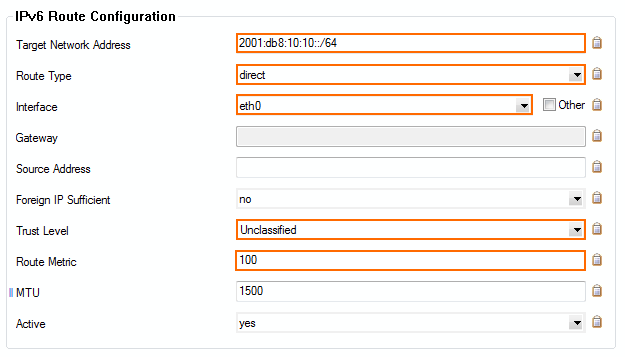
- Click + to add a directly attached route to the IPv6 Routing Table:
- Name – Enter a name.
- Target Network Address – Enter the IPv6 network. E.g.,
2001:db8:10:10::/64
- Route Type – Select directly attached network.
- Interface – Select the interface used to connect to the network. E.g., eth0
- Trust Level – Select the trust level. Your network will automatically be connected to the corresponding network objects. Use Untrusted for WAN connections, Trusted for LAN connections. For more information, see Network Objects.
- Route Metric – Enter the preference for the route. When two identical routes are present, the route with the lower preference is used.
- Click OK.
- Click Send Changes and Activate.
Step 2. Activate the Network Configuration
After you have configured the network route, you must activate your new network configuration.
- Go to CONTROL > Box.
- In the left menu, expand Network and click Activate new network configuration.
- Select Soft. The Network Activation Succeeded message is displayed after your new network configurations have been successfully activated.
The directly attached route is now displayed as pending on the CONTROL > Network page. To make the route active, you must use one of the IP addresses in the network as a shared network IP address.
Next Steps
Add at least one IP address from the network as a Shared IPv6 Address. If you are using a high availability setup, these IP addresses will be transferred to the secondary firewall in case of a failure.