

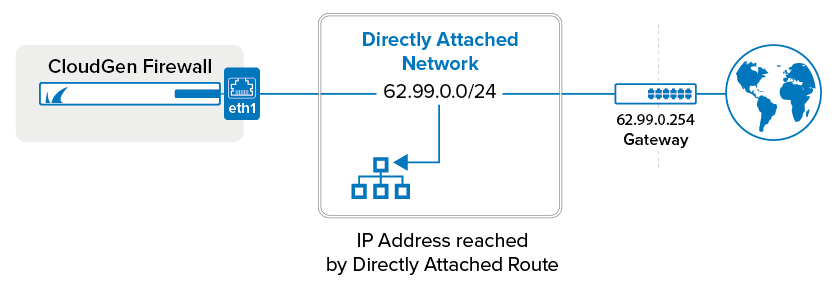
Directly attached routes are routing entries for networks that can be reached from an interface of the Barracuda CloudGen Firewall without having to use a next hop gateway.
Before You Begin
Connect the network to a port of the firewall. Do not use the management port.
Step 1. Configure a Direct Route
Add a route for the directly attached network.
- Go to CONFIGURATION > Configuration Tree > Box > Network.
- In the left menu, click Advanced Routing.
- Click Lock.
- In the IPv4 Routing Table section, click + to add a route:
- Name – Enter a Name.
- Target Network Address – Enter the network in CIDR format. E.g.,
62.99.0.0/24 - Route Type – Select directly attached network.
- Interface – Select the interface used to connect to the network. E.g., eth1
- Trust Level – Select the trust level. Your network will automatically be connected to the corresponding network objects. Use Untrusted for WAN connections and Trusted for LAN connections. For more information, see Network Objects.
- (optional) Advertise Route – To propagate this network route via the OSPF/RIP/BGP service, select Yes. For more information, see Dynamic Routing Protocols (OSPF/RIP/BGP)
- Click OK.
- Click Send Changes and Activate.
Step 2. Activate the Network Configuration
After you have configured the network route, you must activate your new network configuration.
- Go to CONTROL > Box.
- In the left menu, expand Network and click Activate new network configuration.
- Select Soft. The Network Activation Succeeded message is displayed after your new network configurations have been successfully activated.
The directly attached route is now displayed as pending on the CONTROL > Network page. To make the route active, you must use one of the IP addresses in the network as a box IP address (default) or as a shared network IP address (remote units).
Next Steps
You must use at least one IP address from the network as a shared network IP address. If you are using a high availability setup, these IP addresses will be transferred to the secondary CloudGen Firewall in case of a failure.