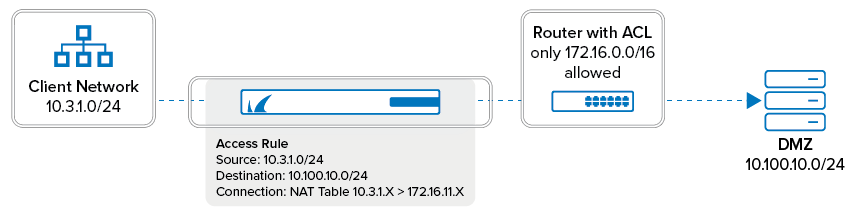
NAT Tables are an expanded type of source NAT for a network or IP address range. The NAT Tables connection object rewrites the source IP address to a source NAT IP address range. To rewrite both the destination and the source address of the connection, you can choose to use a NAT Table connection object with a MAP access rule. You can enter multiple rewriting maps, which are processed from top to bottom. The first matching rewrite map is used.
Create a NAT Table Connection Object
- Go to CONFIGURATION > Configuration Tree > Box > Assigned Services > Firewall > Forwarding Rules.
- From the left menu, click Connections.
- Click Lock.
- Right-click the table and select New > NAT Table.
Enter a Name.
- (optional) Select Use Same Port to disable port address translation.
- (optional) Enter the connection Timeout in seconds. Default: 30 seconds
- Click + to add an entry to the NAT Table list:
- Original Network – Enter the source IP range or network.
- Translated Base IP – Enter the network that you want the source IP address or network to be rewritten to.
- Proxy ARP – Select the check box unless the destination network is connected by a layer 2 bridge to the source network.

- Original Network – Enter the source IP range or network.
- (optional) Use the up and down arrows to sort the entries in the NAT Table.
- Click OK.
- Click Send Changes and Activate.
Apply the NAT Table to an Access Rule
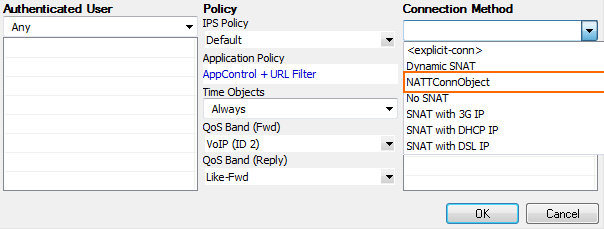
To apply a NAT Table object to an access rule, select the object from the Connection Method list in the access rule settings.