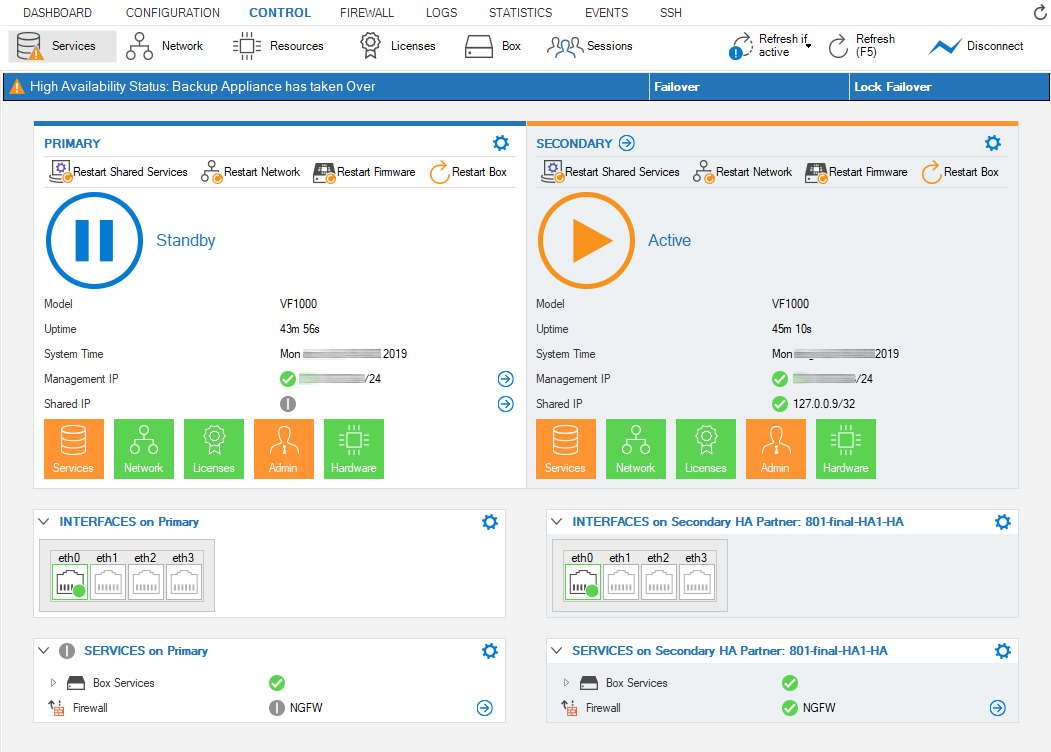
The functionality of stand-alone and managed high availability clusters are the same. However, the configuration differs. For a stand-alone HA cluster, the primary firewall downloads the licenses for both firewalls, and when the secondary firewall is joined to the HA cluster, the license for the secondary firewall is transferred over. The licenses are bound to the MAC addresses of the primary and secondary firewall. The primary firewall is also the configuration master for all configurations, except for the Network page. All configurations and session information are synced from the primary firewall to the secondary firewall. To protect against failure of network components, you can use a dedicated private link as a secondary HA connection.
Stand-Alone HA Cluster

Before You Begin
Connect the primary firewall and secondary firewall to a network switch.
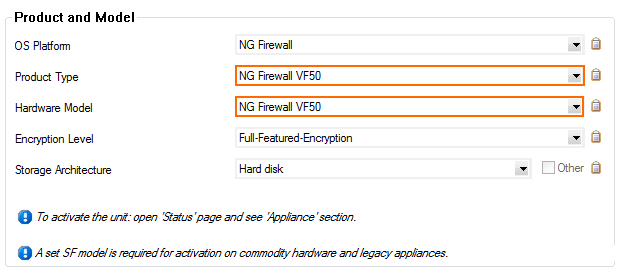
Step 1. (Virtual only) Verify the Product Type
Set the product type matching your license if you are using a virtual Barracuda CloudGen Firewall. This is not necessary on hardware appliances.
Go to CONFIGURATION > Configuration Tree > Box > Box Properties.
Click Lock.
Select the model from the Product Type list. E.g., CloudGen Firewall VF50
Select the model from the Hardware Model list.
Click Send Changes and Activate.
Step 2. Create the Secondary Firewall
On the primary firewall, create the configuration for the secondary HA firewall.
Go to CONFIGURATION > Configuration Tree > Box.
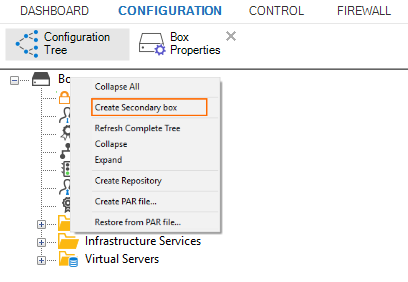
Right-click Box and select Create Secondary box.
The Box Properties and Network nodes are replaced by new a node, each suitable for an HA configuration.
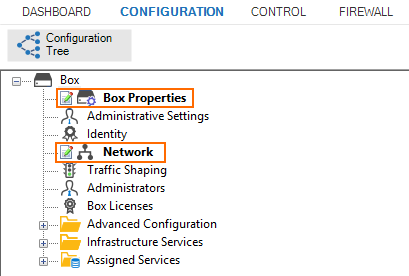
Open the Network page.
Enter the Management IP (MIP) for the secondary firewall. The MIPs of the HA pair must be in the same subnet.
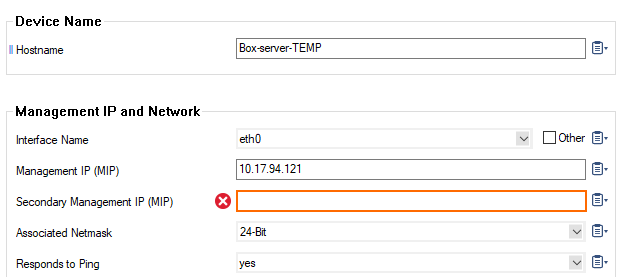
If you have configured networks using additional local IP addresses on the primary firewall,
Expand the Configuration Mode menu and select Switch to Advanced.
Scroll down to Additional Local IPs and edit each entry:
Enter an IP Address from the available network for the secondary firewall.
Click Send Changes and Activate.
Step 3. Create the PAR File for the Secondary Firewall
On the primary firewall, export the PAR file for the secondary firewall.
On the primary firewall, create the PAR file:
Go to CONFIGURATION > Configuration Tree > Box.
From the Config Tree, right-click Box and select Create PAR file for Secondary box.
Save the PAR file to your local hard disk drive.
Step 4. Import the PAR File on the Secondary Firewall
On the secondary firewall, import the boxha.par PAR file created on the primary firewall.
Go to CONFIGURATION > Configuration Tree > Box.
From the Config Tree, right-click Box and select Restore from PAR file.
Click OK.
Select the box_secondary.par file created in Step 3 and click OK.
Click Activate .
Step 5. Activate the New Network Configuration for the Secondary Firewall
On the secondary firewall, activate the network configuration.
Go to CONTROL > Box.
In the left navigation pane, expand Network and click Activate new network configuration.
Select Failsafe as the activation mode.
In the left menu, expand Operating System and click Reboot Box.
Step 6. Activate the New Network Configuration for the Primary Firewall
On the primary firewall, activate the network configuration.
Go to CONTROL > Box.
In the left navigation pane, expand Network and click Activate new network configuration.
Select Failsafe as the activation mode.
In the left menu, expand Operating System and click Reboot Box.
Step 6. Install Licenses
You must install licenses on both firewalls. For instructions, see How to Activate and License a Standalone High Availability Cluster.
Next Steps
Configure a Private Uplink
To avoid the switch connecting the primary and secondary firewall from becoming the single point of failure for the HA cluster, configure a private uplink for HA sync. Connect both firewalls with a crossover cable. Each firewall receives an additional management IP address in the /30 subnet used for the private uplink. The HA sync can use the private uplink as an alternative to the normal connection between the management IPs, or it can use both links simultaneously.
For more information, see How to Configure a Private Uplink for a High Availability Cluster.
Check the Service HA Status
Check the services' status on both HA firewalls to verify that they have been correctly assigned.
Go to CONTROL > Services.
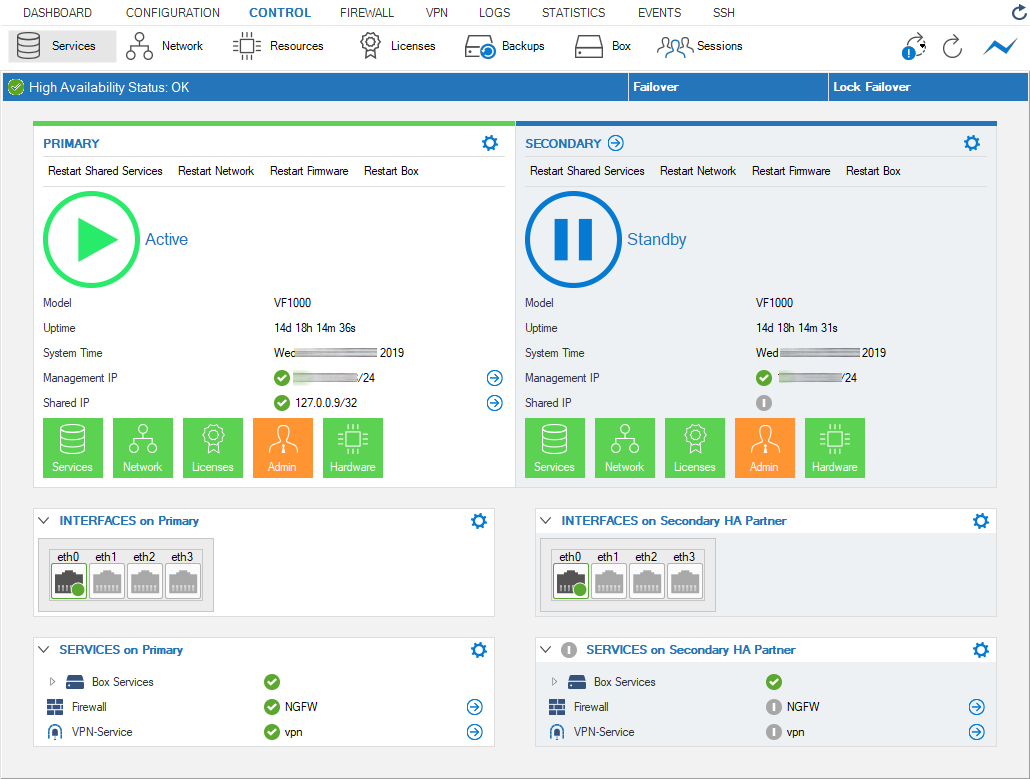
When the primary firewall goes down, the secondary firewall changes its status to Primary and replaces the primary firewall with all its functionalities. Immediately after the failover, the services on the primary are blocked:
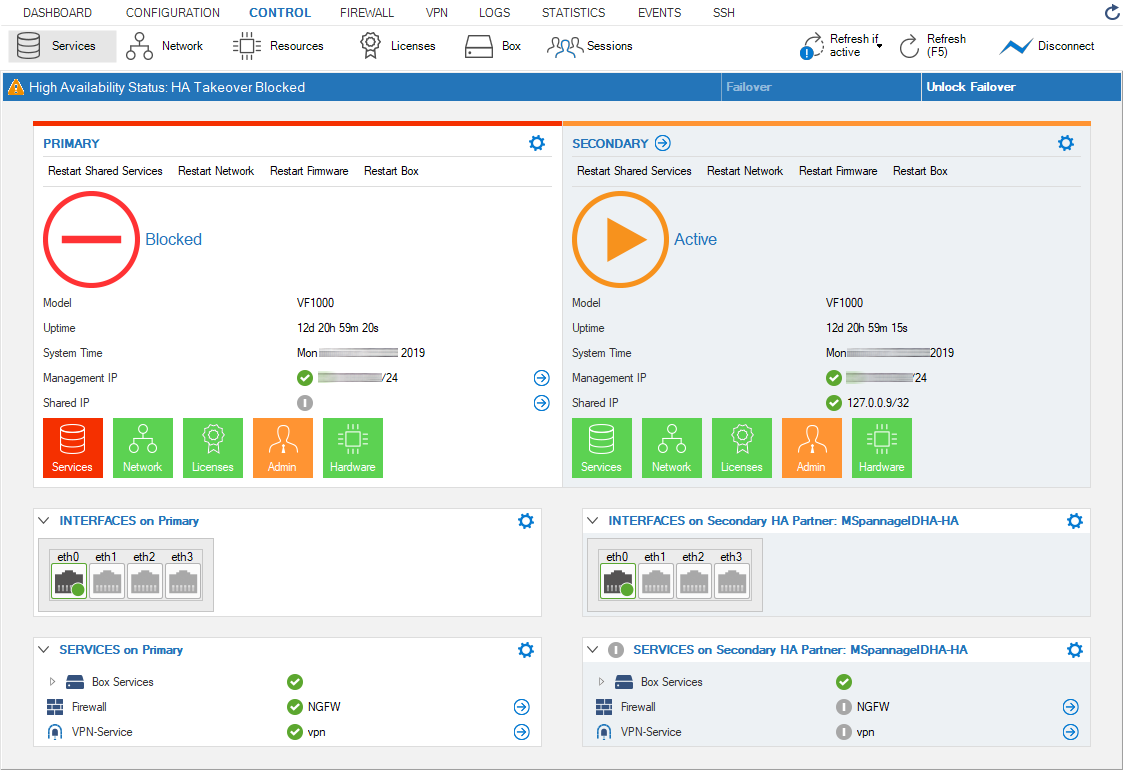
When clicking Unlock Failover, the services on the primary will be put into standby mode:
