The following troubleshooting tips may help correct some common errors.
The Barracuda Firewall Control Center cannot send configuration updates
If the Barracuda Firewall Control Center cannot send a configuration update to a Barracuda CloudGen Firewall, the gateway might be offline. In this case, the Control Center keeps attempting to send the update. The waiting period between attempts is increased after each update failure. After twenty failed attempts, the waiting period is increased to one hour. On the Control > Configuration Updates page, you can manually send the update. Right-click the CloudGen Firewall and select Update Now.
'Authentication Failed' message when logging into a Barracuda CloudGen Firewall
If you receive an 'Authentication Failed' message when you log directly into a CloudGen Firewall from the Control > Status Map page, you might need to change the root password. To change the root password, click the CONFIGURATION tab. In the Config Tree, navigate to the CloudGen Firewall, expand the box, and double-click Administrative Settings. In the Root Password section, change the root password. If the root password is linked from a repository, you must change the password in the repository object.
You have locked yourself out of the managed CloudGen Firewalls after changing the CC IP addresses or certificates
Authentication Levels for Control Center - Box Communication
As stated above, the Control Center-box trust relationship is governed by private/public key technology. Thus, in a working environment, the Control Center knows its boxes, and the boxes recognize the Control Center as their one and only authority. The default level of authentication is that a box and its Control Center identify themselves by their keys and IP addresses. This means that the Control Center does not send any configuration data to untrusted boxes, and no box accepts data from an untrusted source. If, however, the Control Center does not have a valid license (and, therefore, no certificate) or major migrations are made, it might be necessary to reduce the authentication level for a short period to establish a new trust relationship.
Depending on which component is the untrusted one, there are two options how the trust level can be lowered:
Option #1: Bypassing the Trust Level in the Control Center
- Log into the Control Center.
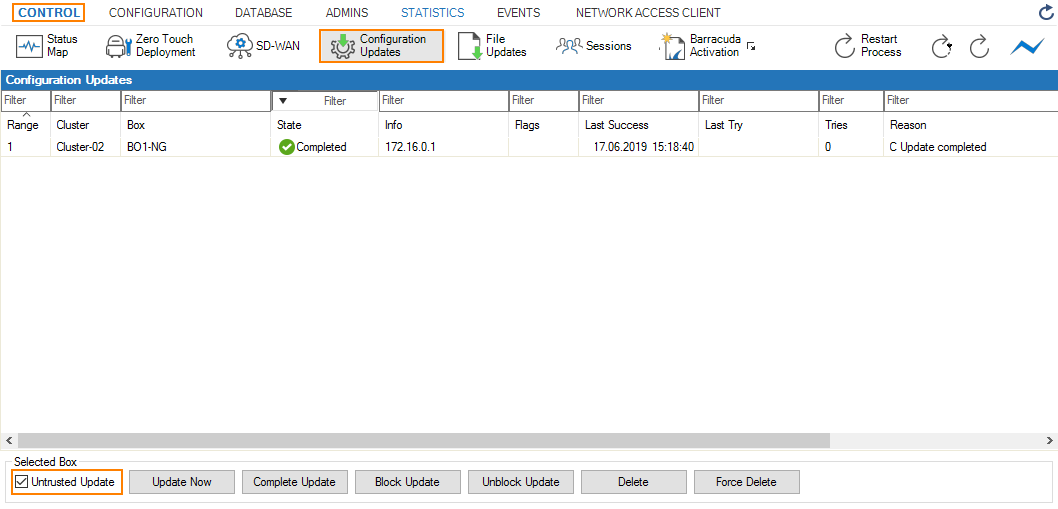
- Go to Control > Configuration Updates.
- Activate the check-box Untrusted Update.
- Click either Update Now or Complete Update.

Option #2: Lowering the Authentication Level on the Box Level of your Control Center.
To lower the authentication level, proceed as follows:
- Log into the box level of your Control Center.
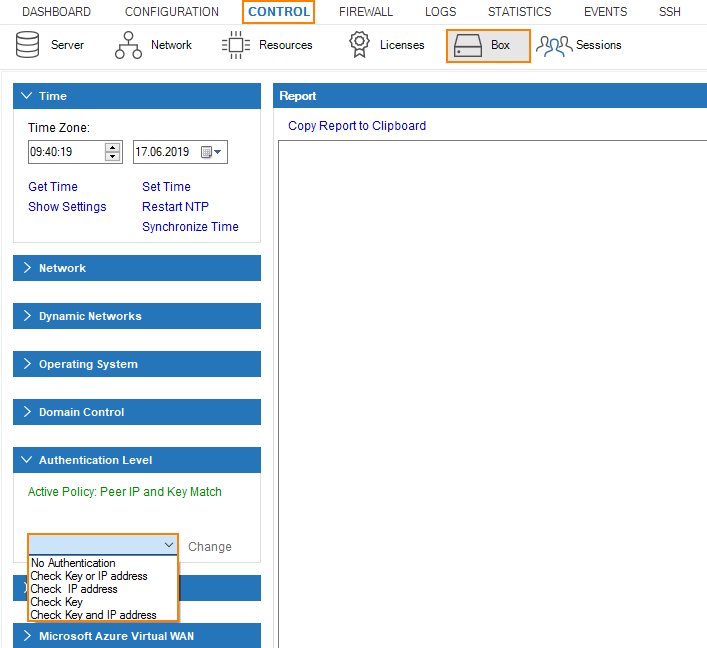
- Go to CONTROL > Box.
- In the left menu area, click Authentication Level to expand the section.
- From the list, select the required authentication level.

Setting | Level | Meaning and effect |
|---|---|---|
No Authentication | -1 | Anything goes. The system allows any attempt to send or retrieve configuration data. |
Check IP address or key | 0 | Login is accepted if either IP address or the key challenge is successful. (still quite insecure) |
Check IP address | 1 | Login is accepted if demanded IP address is at hand. (still quite insecure) |
Check key | 2 | Login is accepted if key challenge is successful. |
Check IP address and key | 3 | This is the default setting and should remain as such if there is no need to lower the security level temporarily. |
