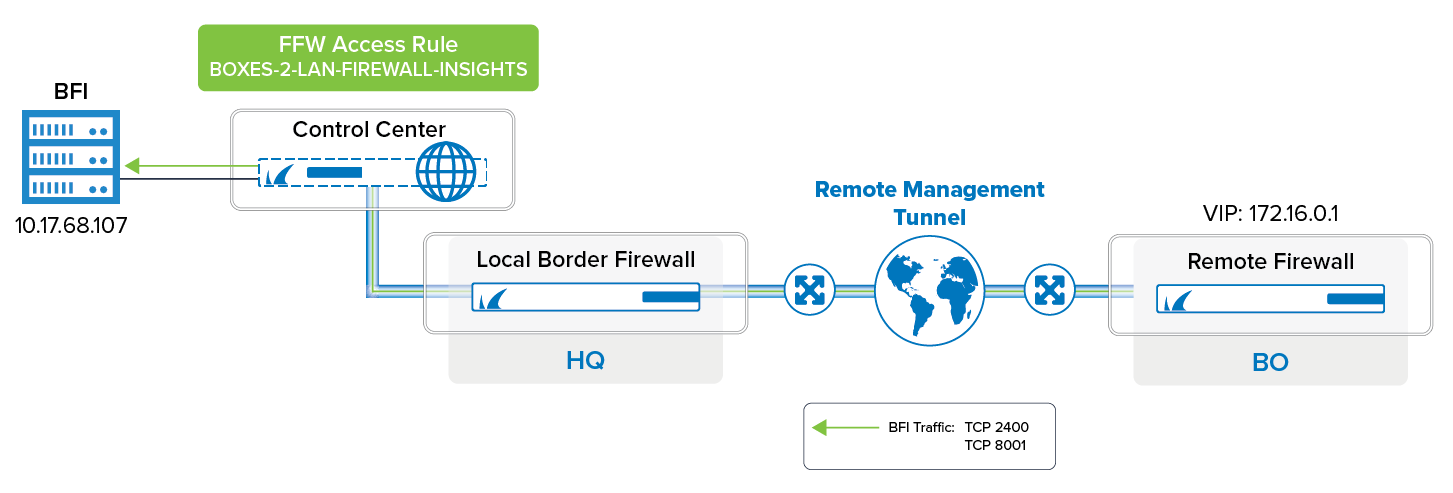
In certain cases it can be necessary to stream data from a remote firewall to a Barracuda Firewall Insights device that is located behind a local border firewall. In the following setup, streaming data is sent from a remote firewall through the remote management tunnel over the Internet and through the local border firewall to the Control Center, which forwards the traffic to Firewall Insights.
Before You Begin
- You must complete all necessary steps for Firewall Insights integration. For more information, see Barracuda Firewall Insights Integration.
- A remote management tunnel must be established. For more information, see How to Configure a Remote Management Tunnel for a CloudGen Firewall.
- If you deploy a Control Center with a default configuration set from firmware version 8.0.1, the service object 'FIREWALL-INSIGHTS', the network object 'Firewall Insights' and the forwarding access rule 'BOXES-2-LAN-FIREWALL-INSIGHTS' are already preconfigured. You can therefore skip those steps.
- If you migrate a Control Center to firmware version 8.0.1, these items are not preconfigured, and you must create them according to the following description.
Step 1. On the Remote Firewall, Add Firewall Insights to the Remote Network Addresses for Tunnels
You must add Firewall Insights to the remote network addresses list as a target in order to forward traffic through the management tunnel.
- Go to CONFIGURATION > Configuration Tree > Multi Range > your range > your cluster > Boxes > your remote box > Network.
- In the left navigation bar, click Management Access.
- Click Lock.
- In the Remote Management Tunnel section, click Edit... next to Tunnel Details.
- The Tunnel Details window is displayed.
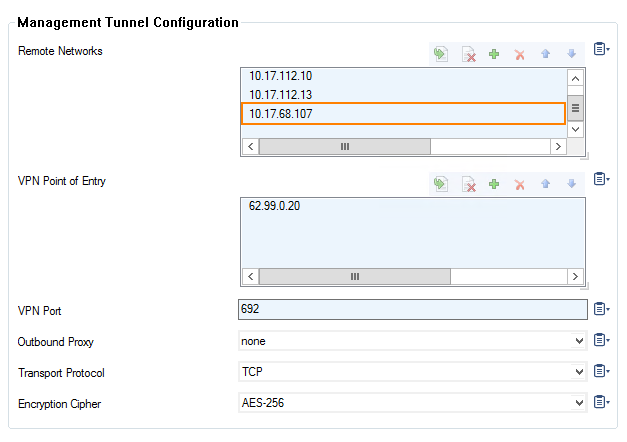
- Click + in the Remote Networks section.
- Enter the IP address of Firewall Insights to the list, e.g.,
10.17.68.107
- Click OK.
- Click Send Changes and Activate.
Step 2. (Optional, only if not preconfigured) On the Control Center, Create Service Object Firewall-Insights
- Log into your Control Center on box level.
- Go to CONFIGURATION > Configuration Tree > Box > Assigned Services > CCFW (Firewall) > Forwarding Rules
- In the left navigation bar, click Services
- Click Lock.
- In the right section where the services are displayed, right-click and select New.
- The Edit/Create Service Object window is displayed.
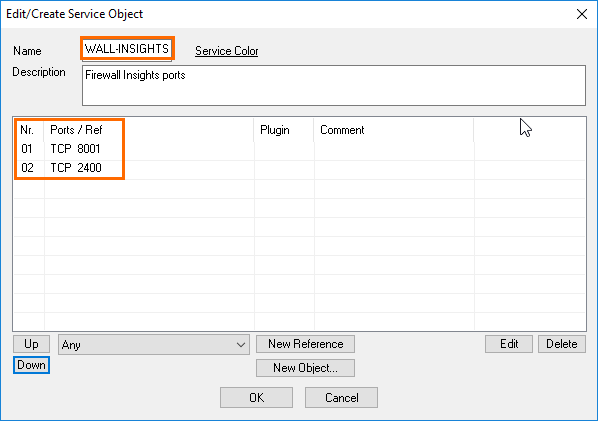
- Enter the Name for the service object, e.g.,
FIREWALL-INSIGHTS. - Enter
Firewall Insights portsfor Description. - Click New Object... .
- The Service Entry Parameters window is displayed.
- Verify that
006 TCPis selected for IP Protocol. - For Port Range, enter
2400. - Click OK.
- Click New Object... .
- The Service Entry Parameters window is displayed.
- Verify that
006 TCPis selected for IP Protocol. - For Port Range, enter
8001. - Click OK.
- Click Send Changes and Activate.
Step 3. (Optional, only if not preconfigured) On the Control Center, Create Network Object Firewall Insights
- Log into your Control Center on box level.
- Go to CONFIGURATION > Configuration Tree > Box > Assigned Services > CCFW (Firewall) > Forwarding Rules
- In the left navigation bar, click Networks.
- Click Lock.
- In the right section where the networks are displayed, right-click and select New.
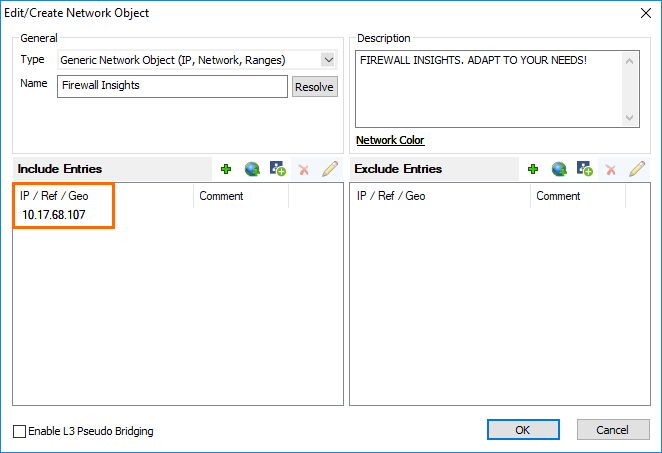
- The Edit/Create Network Object window is displayed.
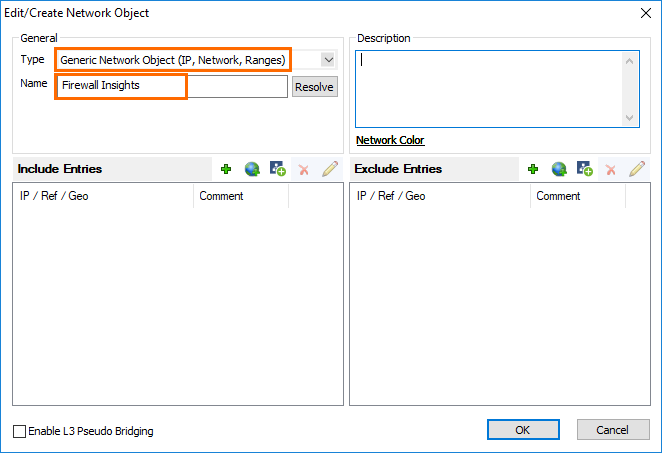
- For Type select Generic Network Object (IP, Network, Ranges).
- Enter
Firewall Insightsfor the name. - Click OK.
- Click Send Changes and Activate.
Step 4. On the Control Center, Enter the IP Address of Firewall Insights in the Network Object Firewall Insights
- Log into your Control Center on box level.
- Go to CONFIGURATION > Configuration Tree > Box > Assigned Services > CCFW (Firewall) > Forwarding Rules
- In the left navigation bar, click Networks.
- Click Lock.
- In the right section where the networks are displayed, double-click Firewall Insights.
- The Edit/Create Network Object window is displayed.
- If the IP address 0.0.0.0 is entered, click the x to remove it.
- Click + to enter the IP address of your Firewall Insights device, e.g.,
10.17.68.107. - Click Insert and Close.
- Click OK.
- Click Send Changes and Activate.
Step 5. (Optional, only if not preconfigured) On the Control Center, Allow Firewall Insights Traffic to Firewall Insights by an Access Rule
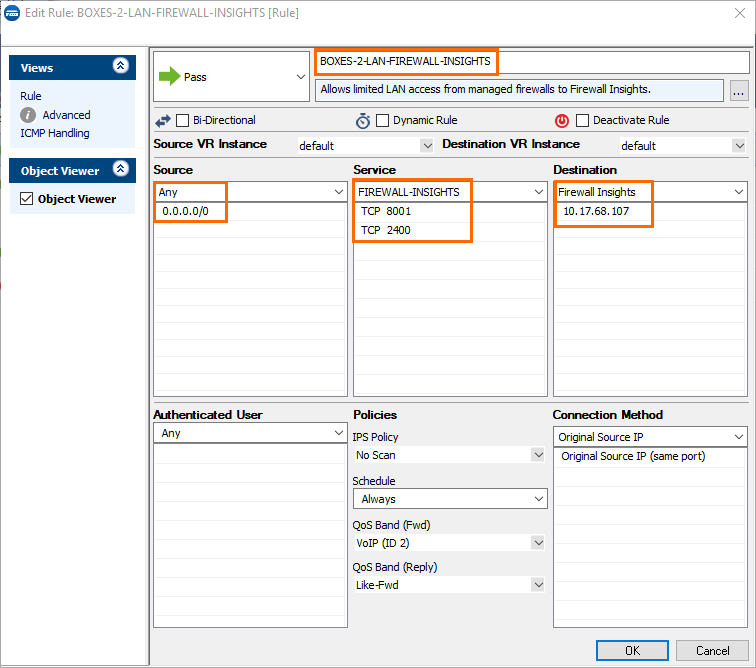
To forward Firewall Insights traffic from the Control Center to Firewall Insights, you must create the following access rule:
- Log into your Control Center on box level.
- Go to CONFIGURATION > Configuration Tree > Multi Range > Assigned Services > CCFW (Firewall) > Forwarding Rules
- Click Lock.
- Click +.
- Enter the following values for the rule:
- Connection Type –
Pass. - Name –
BOXES-2-LAN-FIREWALL-INSIGHTS. - Source – Select
anyfrom the drop-down menu. - Service – Select
FIREWALL-INSIGHTSfrom the drop-down menu. - Destination – Select
Firewall-Insightsfrom the drop-down menu. - Connection Method – Select
Original Source IPfrom the drop-down menu.
- Connection Type –
- Click OK.
- Click Send Changes and Activate.
The remote firewall can now stream data to Firewall Insights via the remote management tunnel.
