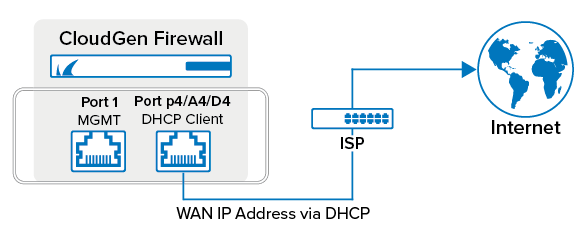
All CloudGen Firewall F-Series hardware models support rapid deployment via Zero Touch Deployment (ZTD). ZTD is designed to connect your firewall to your Control Center simply by plugging the new firewall in directly at the location. When the firewall arrives on-site, connect it to the network with the port preconfigured as the DHCP client port. The firewall must be able to receive the IP address via DHCP and connect to the Internet.
- F12 - F800 – DHCP client listens on port p4.
- F93 ruggedized – DHCP client listens on port p2.
- F183R ruggedized – DHCP client listens on port p4.
- F900 – DHCP client listens on port A4.
- F1000 – DHCP client listens on port D4.
- Secure Connector – DHCP client listens on port WAN.
Before You Begin
Configure your Control Center to connect to the ZTD portal, then claim and configure the firewall. For more information, see Zero Touch Deployment and How to Configure a Firewall for Zero Touch Deployment.
Step 1. (Optional) Install the CloudGen Firewall F-Series in a Rack
The desktop-sized firewall models can be mounted with a rack mount kit; the larger appliances are mounted directly in standard-sized racks.
For more information, see Rack Installation for Barracuda Appliances.
Step 2. Connect the Firewall to the Network
Connect the DHCP client port to the network. This port varies depending on the firewall model. The firewall must be able to reach a DHCP server and the Internet over this port.

Step 3. Power on the Firewall
The firewall starts up and automatically self-provisions. In a two-step process, the firewall fetches a basic configuration from the ZTD portal, and then, after connecting to the Control Center, receives the full configuration.The firewall is now active on the CONTROL > Status Map page of the Control Center.
