The Barracuda Secure Connector devices use a single site-to-site VPN tunnel to connect to the Secure Access Controller. The VPN tunnel is used for both user and management traffic and runs on ports TCP/UDP 692. To be able to have both managed CloudGen Firewalls and Secure Connector devices connect to an Access Controller and Control Center behind the same border firewall, you must use either two public IP addresses or configure the VPN connection to use another, free port.
Configure VPN to Use the Secure Connector Web Interface
You can use the web interface of the Secure Connector to configure the VPN in override mode.
- Log into the web interface.
- Click the VPN tab.
- Click Retrieve Lock.

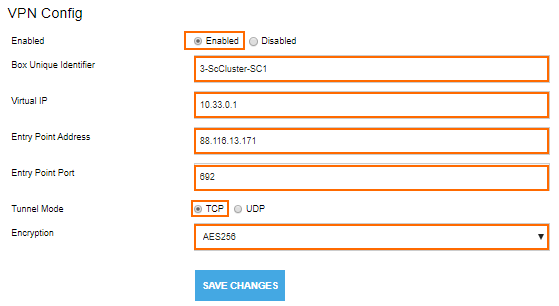
- Select Enabled.
- Enter the Box Unique Identifier. Use the following format: RANGENUMBER-CLUSTERNAME-SECURE CONNECTOR NAME. E.g., 3-myScCluster-SC1.
- Enter the Virtual IP. The IP address must be the first IP address of the subnet assigned to the SC by the Control Center.
- Enter the Entry Point Address. Typically, this is the public IP of your Access Controller, or the public IP address of the border firewall in front of your Access Controller.
- Enter
692as the Entry Point Port. - (optional) Select the Tunnel Mode.
- (optional) Select the Encryption.

- Click Save Changes.
- On the top of the page, click Activate Configs.
- Click Release Lock.
The SC connects via VPN to the Access Controller and authenticates using the deployment password. Once connected, the Control Center pushes the configuration stored for the device to the SC.
Configure VPN in the Secure Connector Editor
To configure the VPN settings to connect to the Access Controller, you must use the Secure Connector Editor.
- Go to your cluster > Cluster Settings > Secure Connector Editor.
- Click Lock.
- Double-click to edit the device or SC template.
- In the left menu, click VPN Settings.
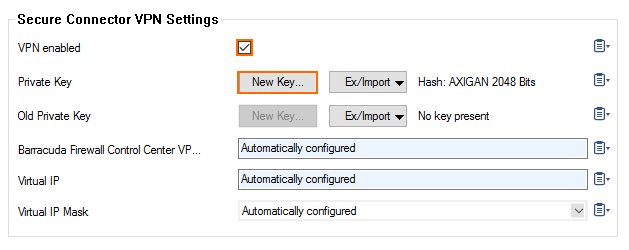
- Select the VPN enabled check box.
- Click New Key to create a new Private Key.

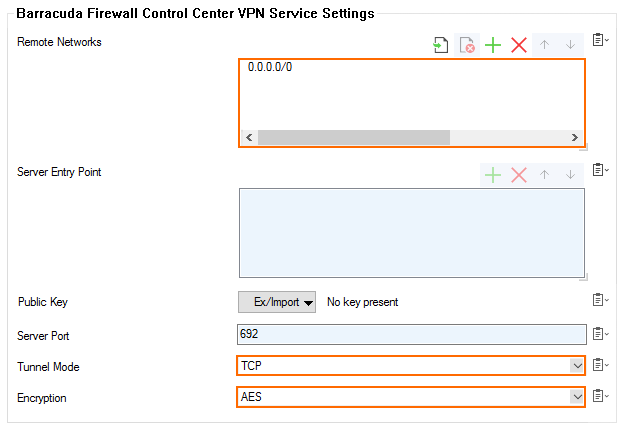
- Click + and enter the Remote Networks you want to route through the VPN tunnel. Enter
0.0.0.0/0to send all traffic through the VPN tunnel and to allow the devices behind the SC to access the Internet. - From the Tunnel Mode drop-down list, select TCP or UDP. Use UDP for response-optimized tunnels; use TCP for greater stability when using unstable Internet connections.
- From the Encryption drop-down list, select one of the encryption algorithms: DES, 3DES, CAST, Blowfish, AES, or AES256.

- Click OK and Activate.
