

Redeem the license/install from the Barracuda XDR Dashboard
Part of the onboarding process includes getting you access to the Barracuda XDR Dashboard. If you have not been granted access, reach out to your enablement team or account manager.
- Sign in to the Barracuda XDR Dashboard.
- Click Setup > Integrations.
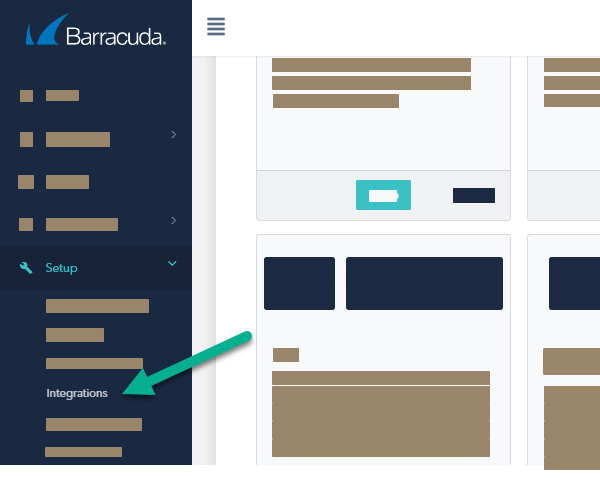
- In the Inky card, click Setup.
You'll see some more information on the license status on this page. For example:

- Click Install Email Protection to get started on the Inky email installation process.
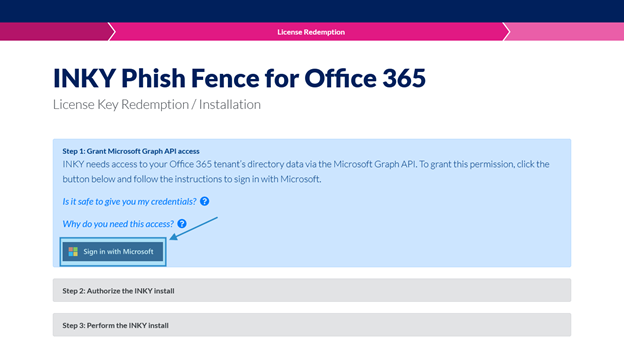
Graph API Access to INKY
Inky uses the Microsoft Graph API to access information about the tenant before installation begins. This access allows INKY to:
- Obtain the Global Company Admin group identifier value for the Customer, which will be used in authentication to the INKY Dashboard.
- Query the number of Mailboxes on the tenant to confirm that the Tier of Service allowed by the License Key aligns properly.
- The Default Domain for the tenant, which is used during installation to suggest a Team Label that the MSP and INKY will use to identify the new INKY team being created.
The Installer is asked to authenticate as a Global Company Administrator on the tenant and grant INKY access. The Admin user that performs this task is also automatically added to INKY as an Administrator for Dashboard purposes.
- Sign with Microsoft using a global admin user:
Authorize the Inky Installation
INKY installation requires Global Admin access to your Office 365 tenant; this allows INKY to run PowerShell commands on your behalf to create Exchange mail flow rules and install the service for you. INKY does not retain this access beyond this one-time installation, and INKY servers never see or store your credentials.
- Click Copy Code to Clipboard.
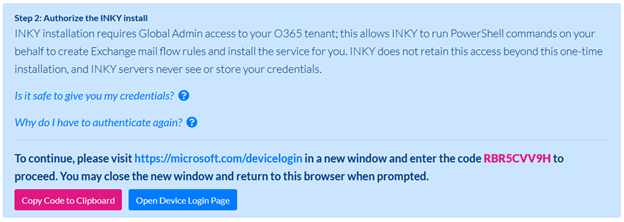
- Click Open Device Login Page.
- Paste the code and click Next.
- Sign in with the global admin user.
Install Email Protection
The installation steps will guide you through creating a team label as well as do some pre-install checks to get you started with the email installation.
- Set up your Team Label.
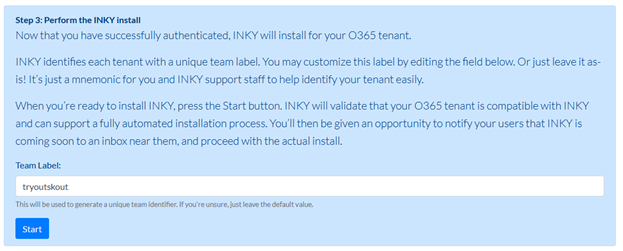
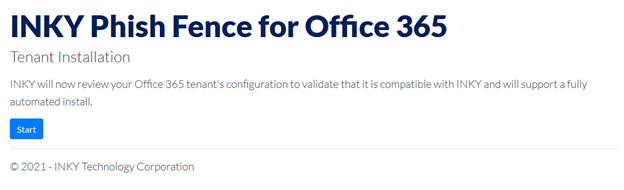
- Click Start.
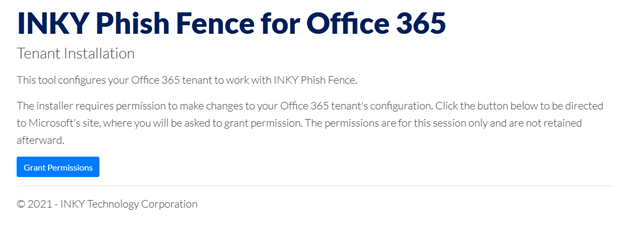
- Click Grant Permissions.
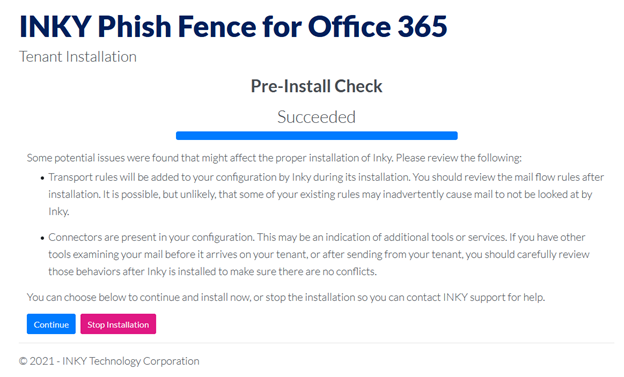
- Click Start to start the preinstallation check.
You may receive some alerts or more information on multiple MX records, multiple domains, transport rules, and connectors. Unless any alerts come up in red, review them and click continue.
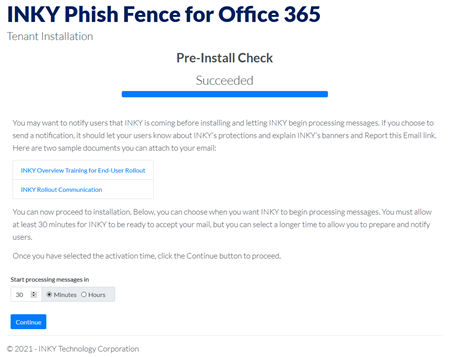
- Pick a timeout period (The minimum is 30 minutes) and click Continue to begin the installation.
Enable Protection
To enable the Email Protection for your user, you move them into the IPW-Group that was created during the installation. You ensure the timeout period has elapsed to err on the side of caution and not cause any unwanted disruptions to email flow.
Sign in to your Exchange Admin Center.
Do one of the following:
- If you are using the new Exchange Admin Center, click Mail Enabled Groups.
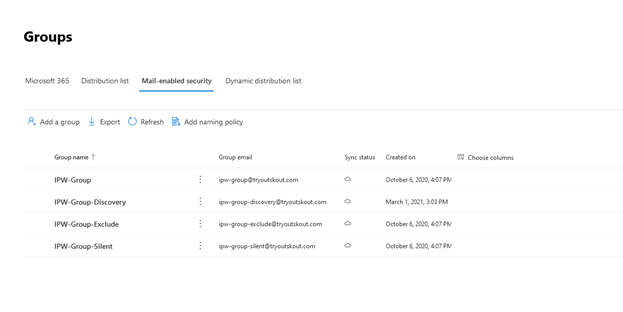
Click Groups.
Search for
IPWto find the IPW-Groups.
- Open the IPW-Group.
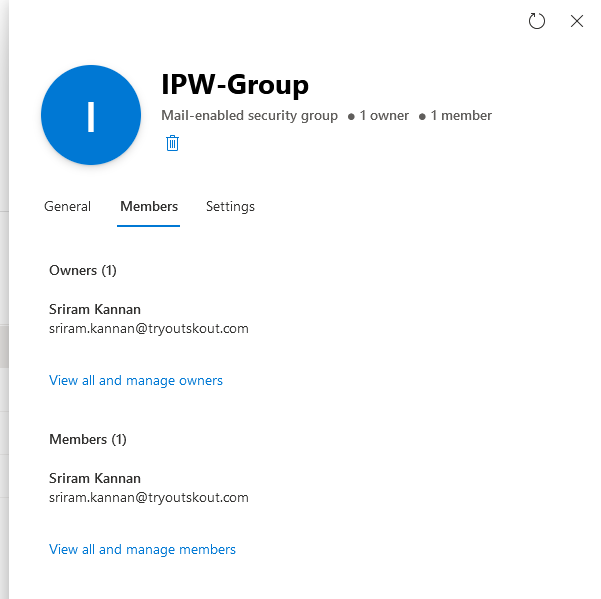
- Click Members.
- Click View all and manage members.
- Click Add Members.
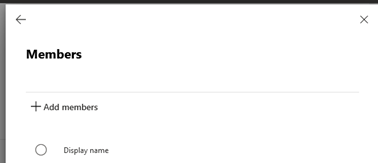
- Search for one of the following:
- The user(s) you want to add
- IPW-Dynamic-All to add all active users with a mailbox and mailbox groups).
- Click Save.
Test
Once you have completed the above steps, send a test email to one of the users and confirm they are seeing banners. Let your partner enablement team know once you have confirmed this.