

Integrating Google Workspace involves performing the following procedures:
- To set up the Google Workspace Project
- To set up Barracuda XDR Dashboard
Setting up the Google Workspace Project
When integrating Google Workspace, you must add a user to a role that has the privileges in the table below, or use Super Admin :
| Administrator Console Privileges |
|
| Admin API Privileges |
|
To set up the Google Workspace Project
Log in to Google Admin Console.
Click Add a User and populate the user information.
Add that new user to either Super Admin or create a Custom Role that has Access to the Admin API Privileges as outlined in the table above.
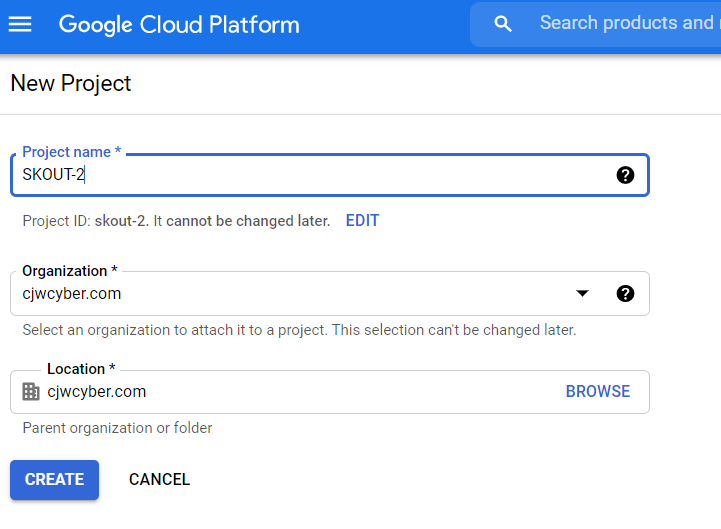
Create a new Google Workspace Project.
Enter a Project Name and select the Parent Organization.
- Navigate to Google Cloud Platform and click Go to Project Settings.
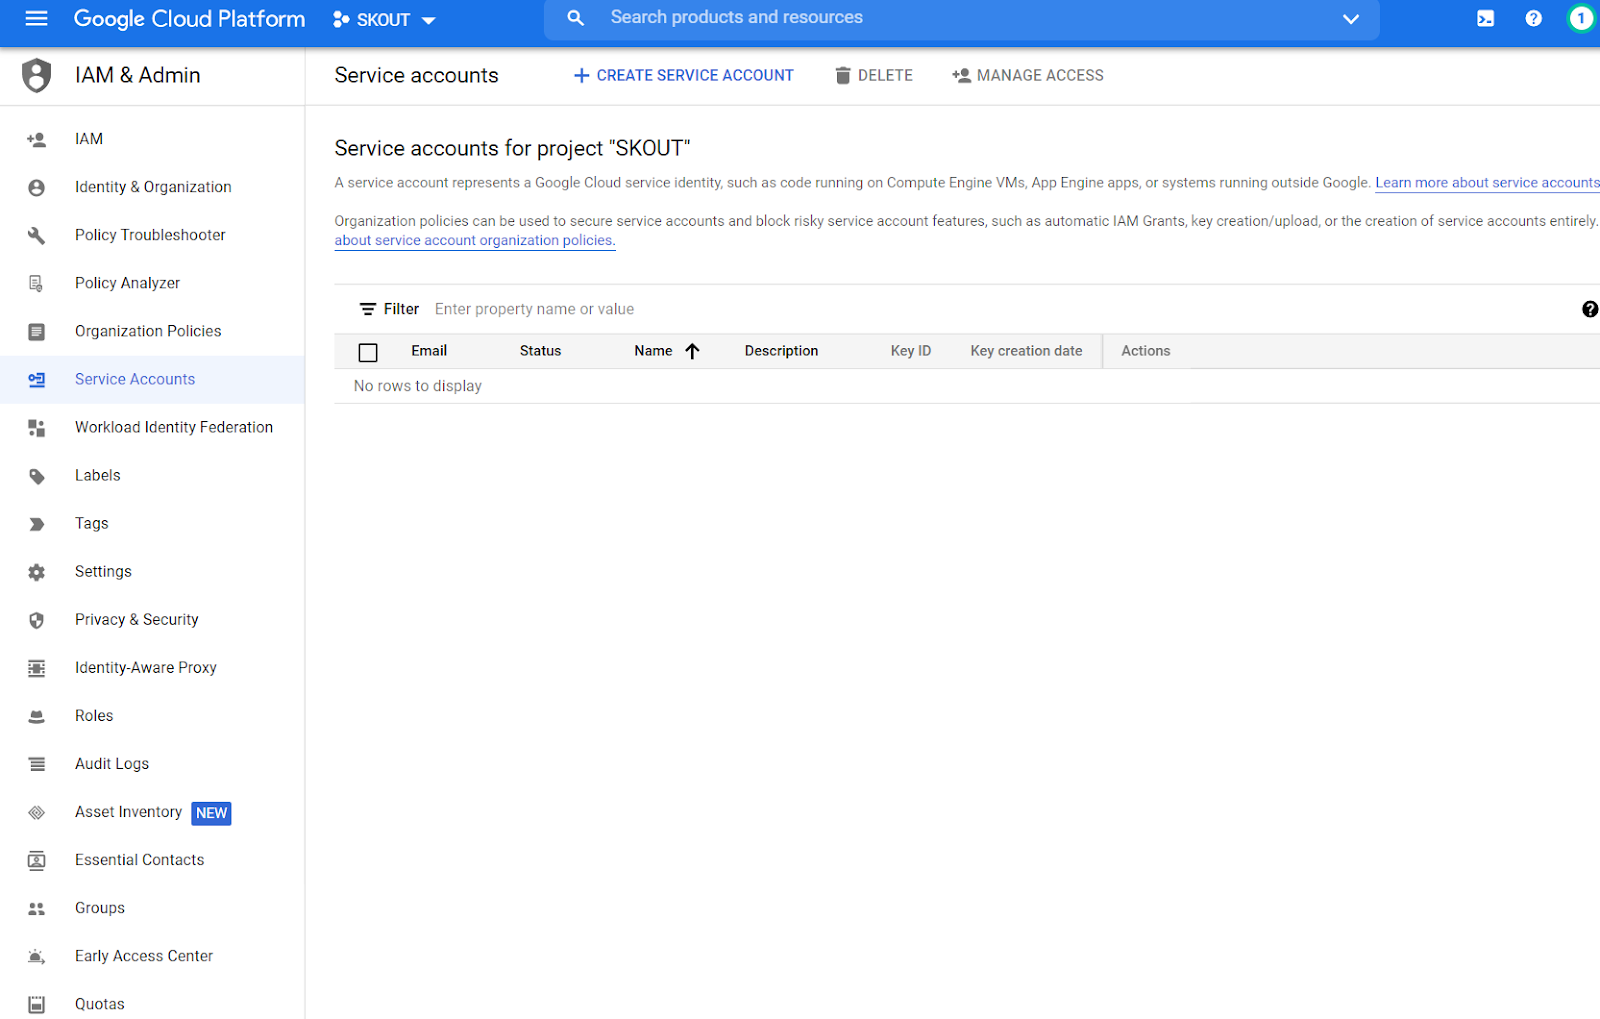
- On the Left Navigation, click IAM & Admin > Service Accounts .
- At the top of the screen, click Create Service Account.
- Enter the Service account name and Description. The Service account id is generated. Click Create and Continue.
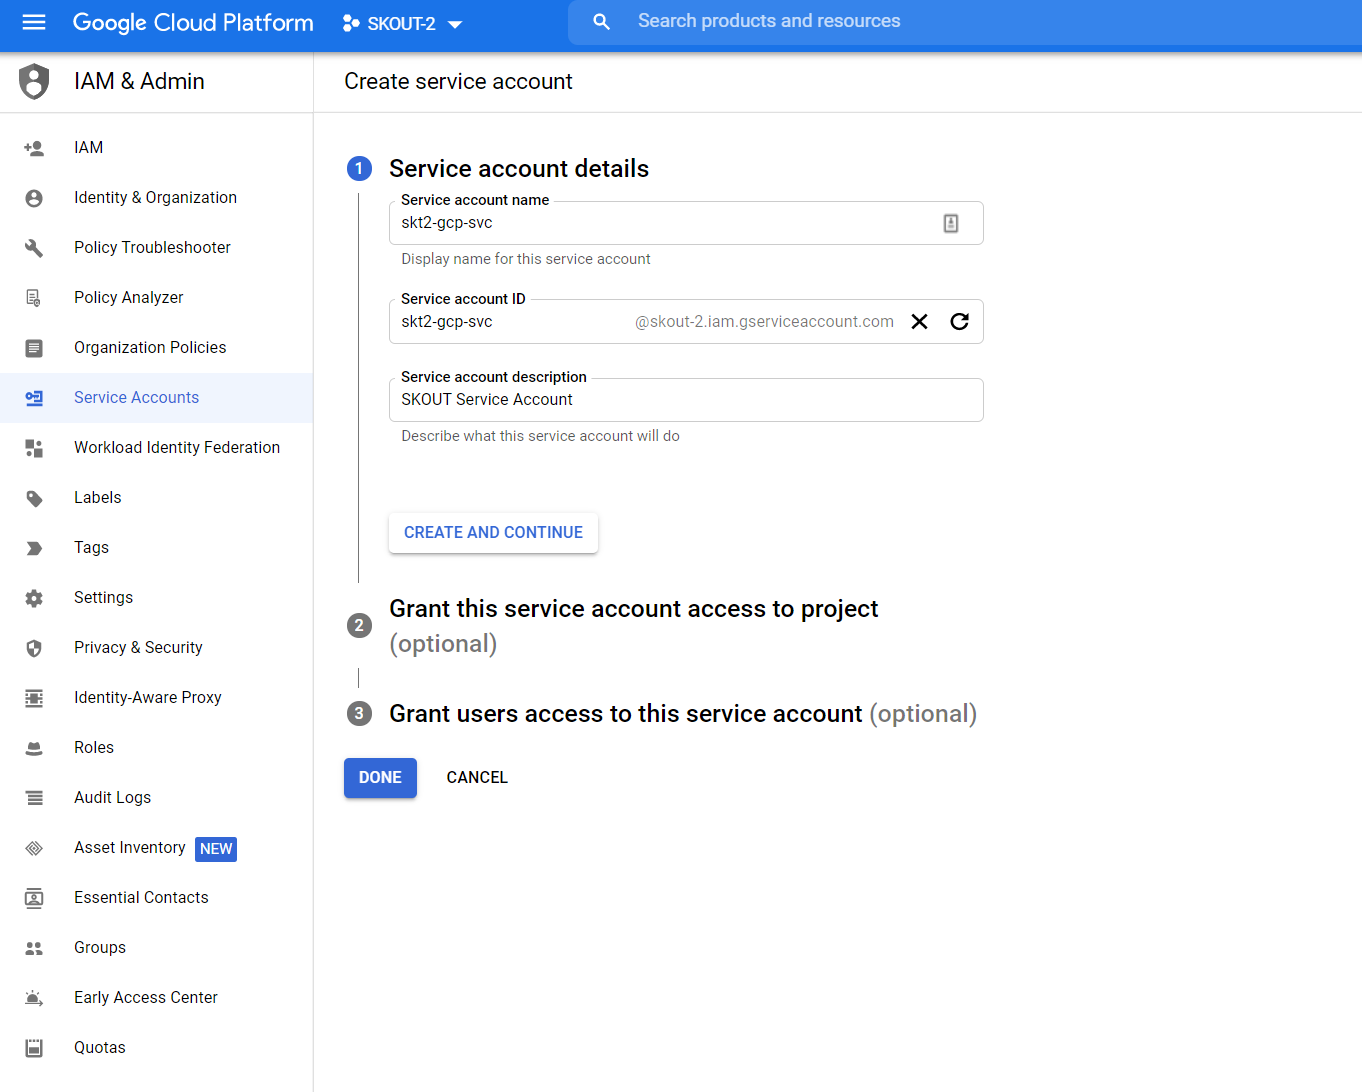
- Click Continue.
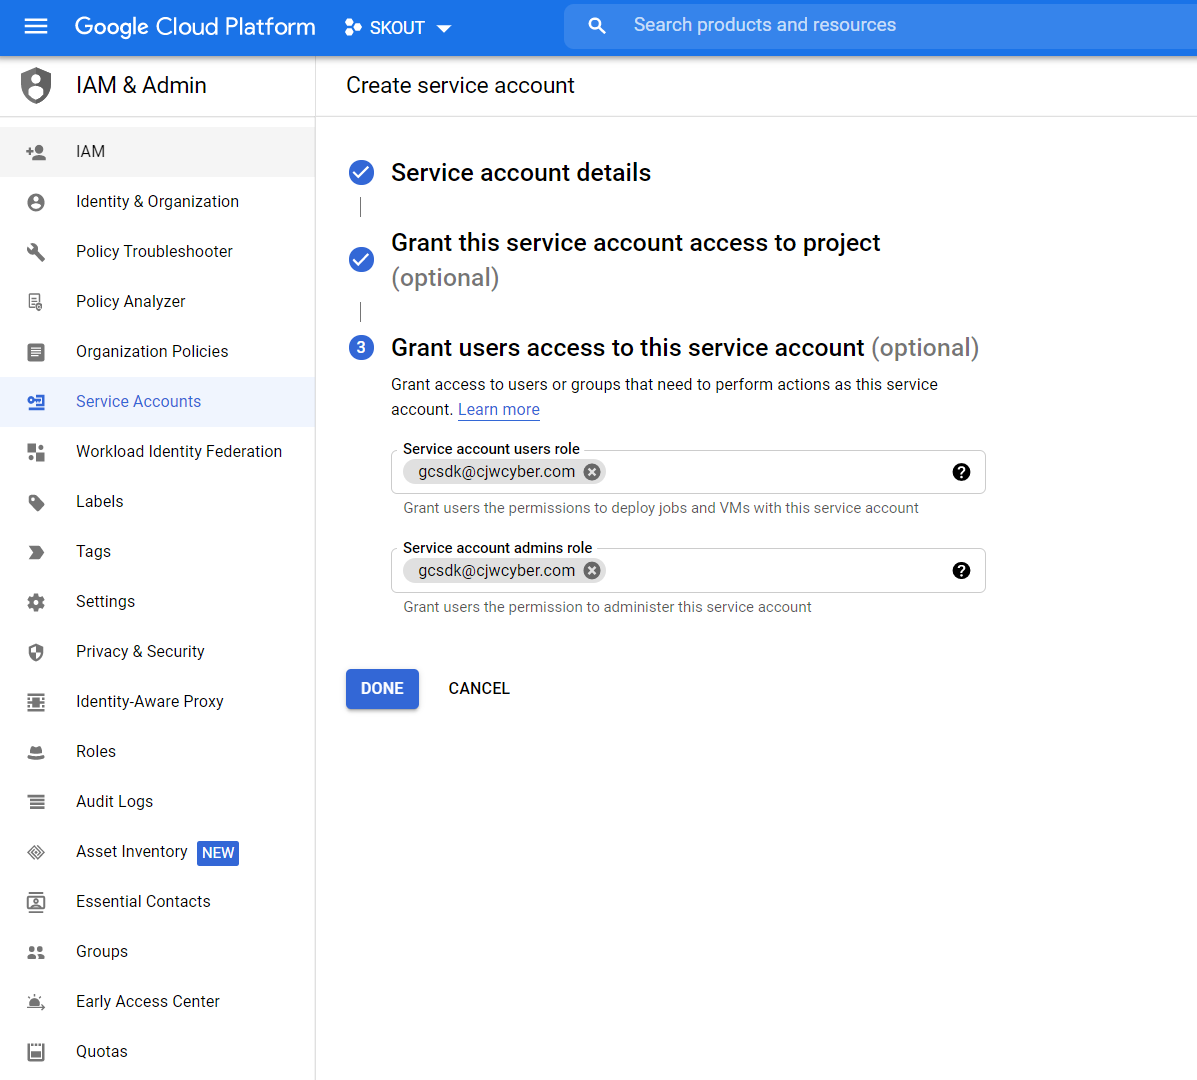
- In Service Account Users Role, enter the user account you created in Step 1, then click Done.
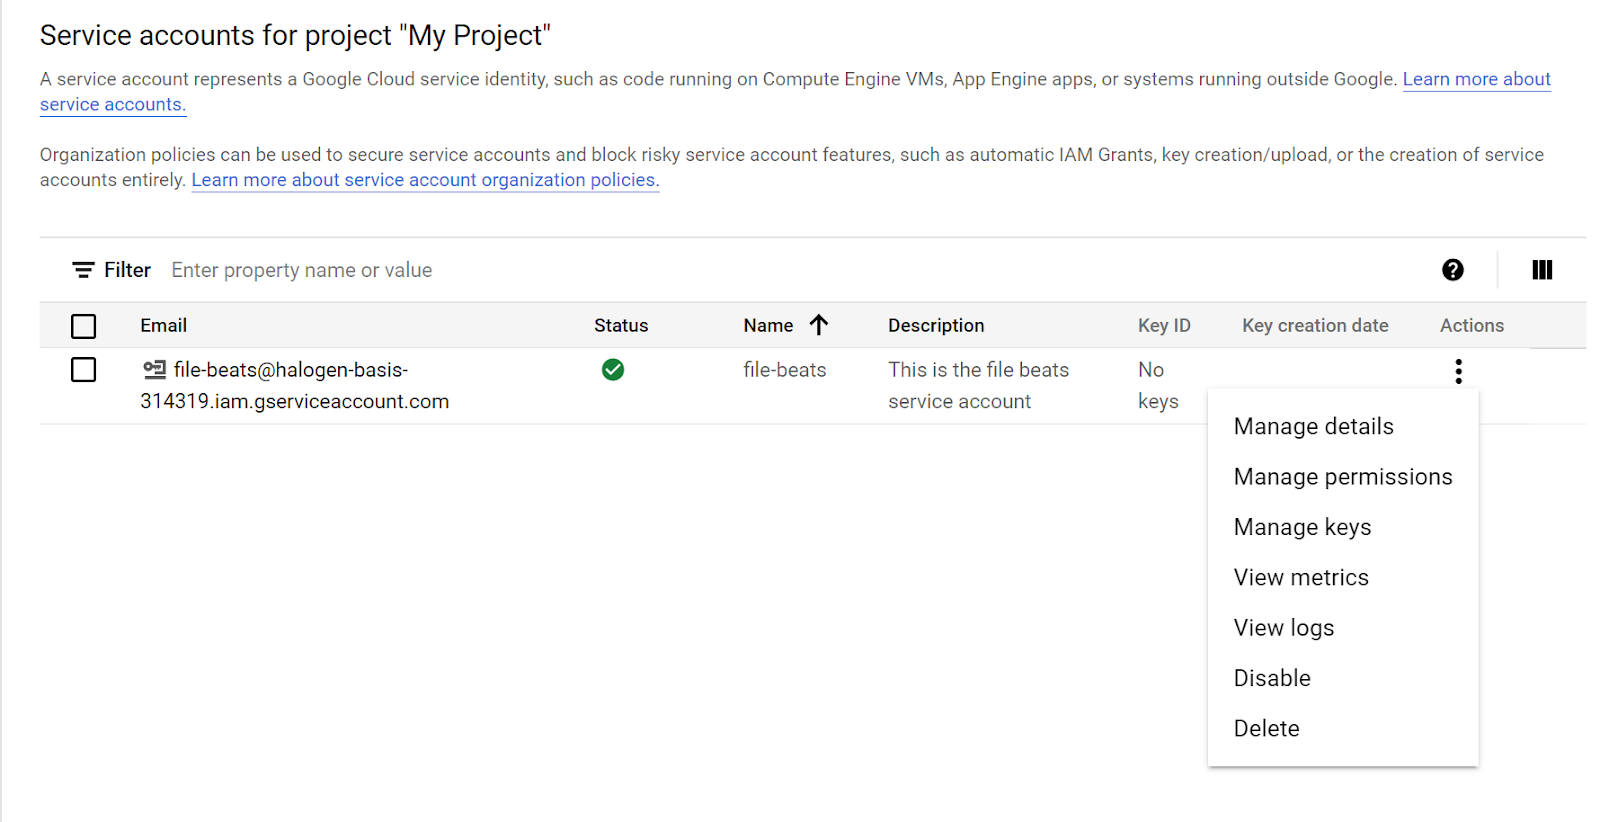
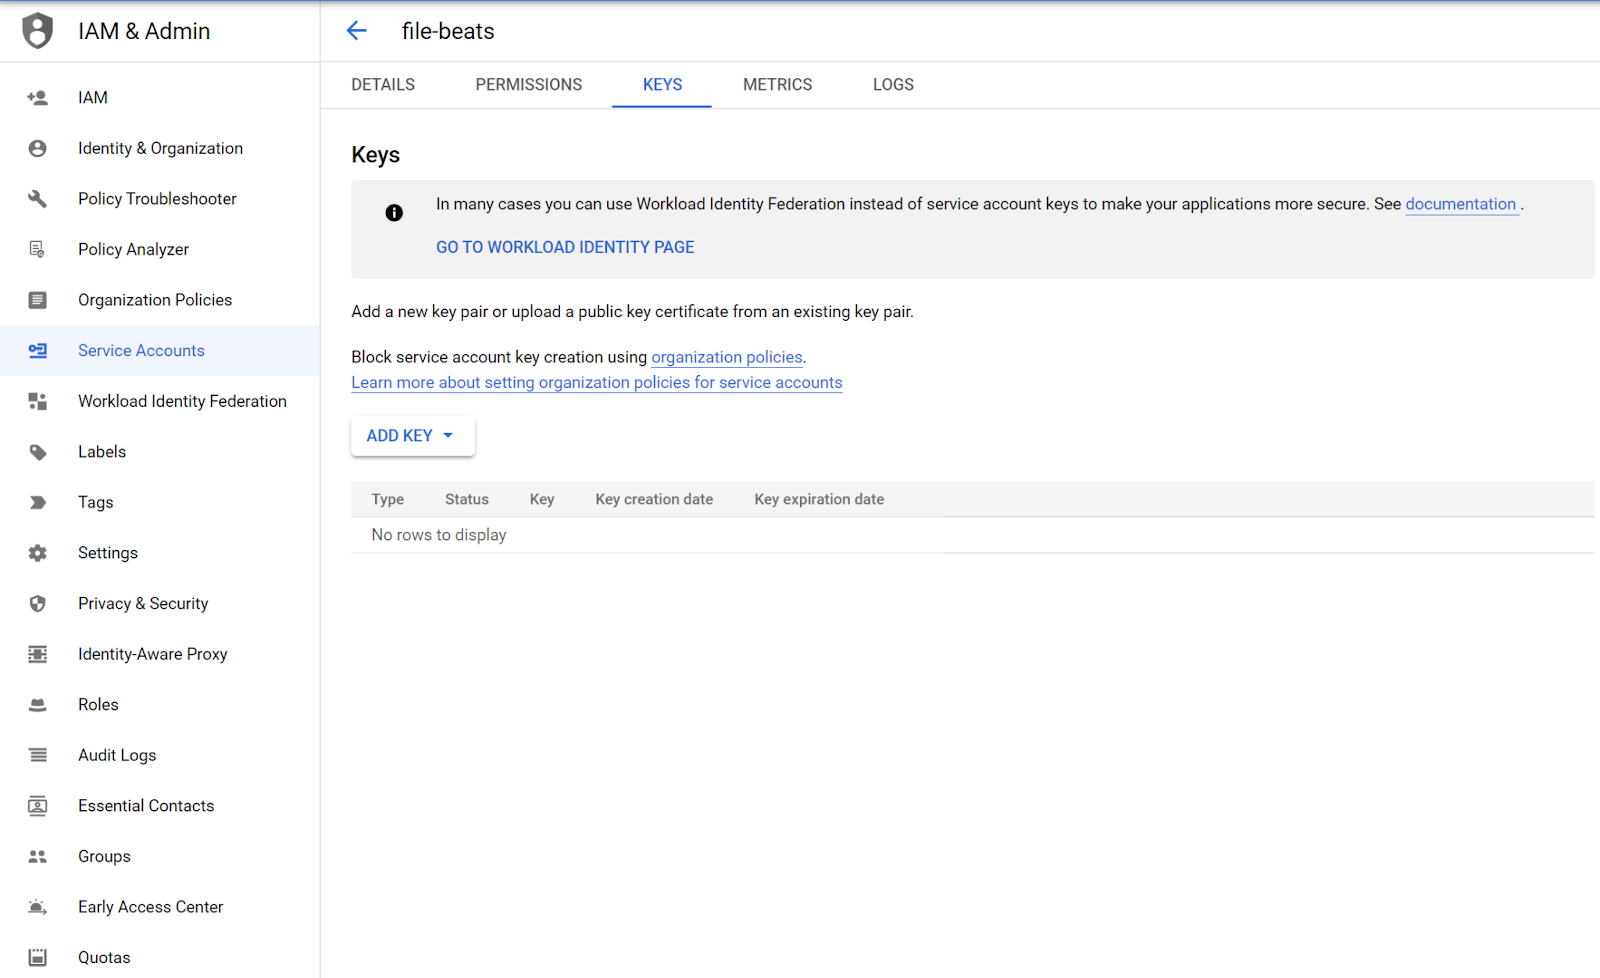
You will be brought to the project home page and you will see the service account you created. - To create a key, click the three dots under Action and click Manage Keys.
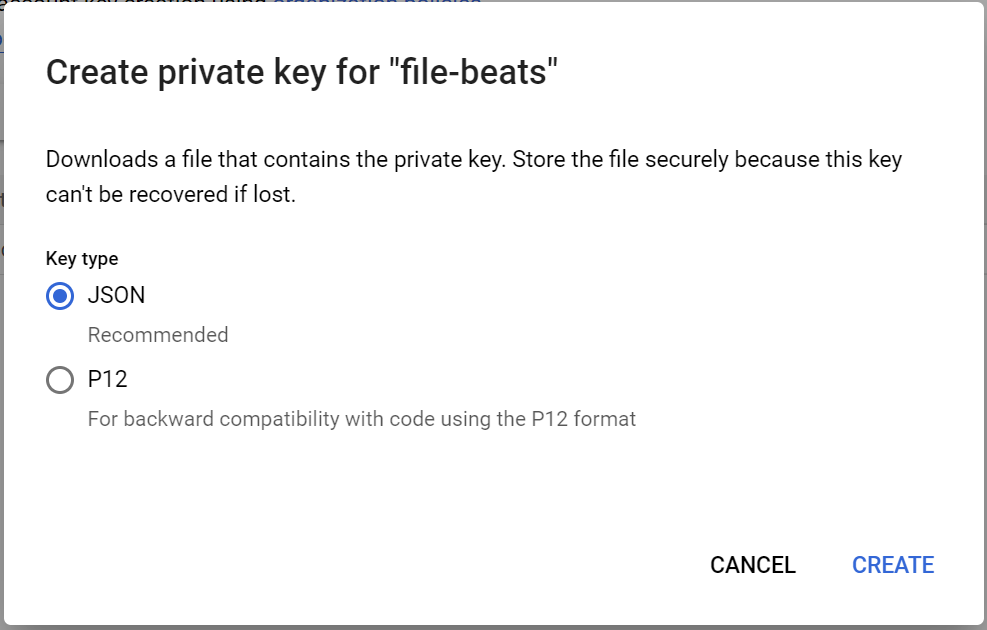
- Click Add Key > Create new key .
Select JSON.
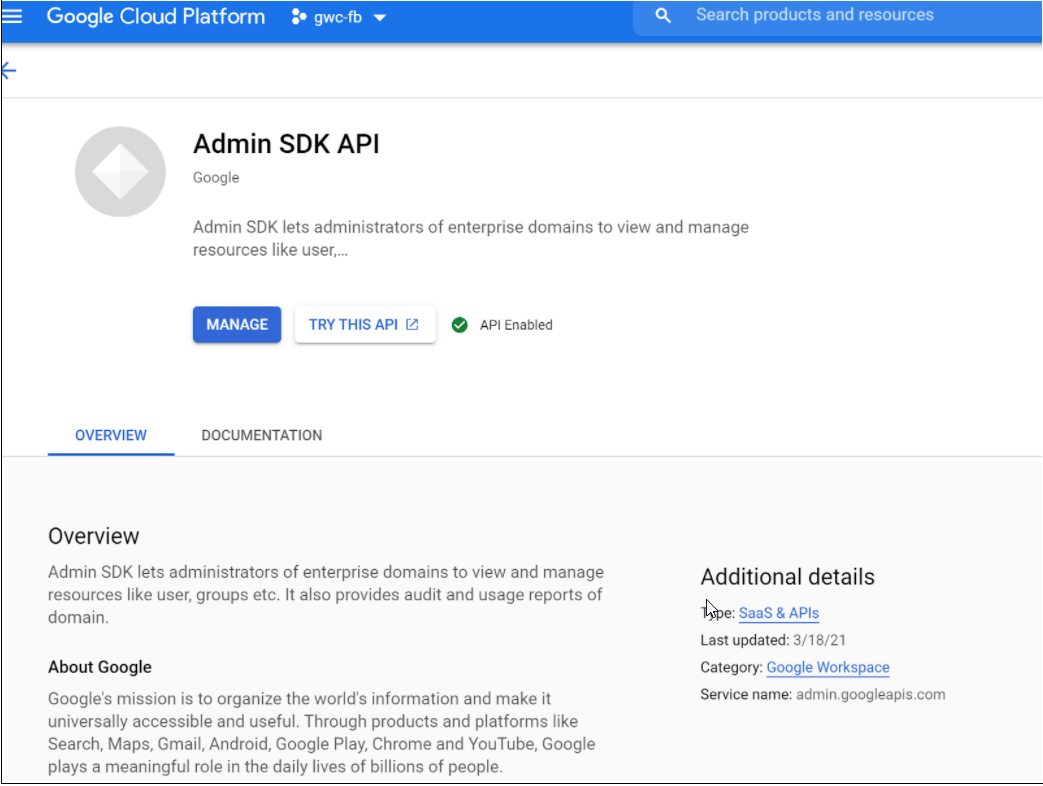
- Navigate to https://console.cloud.google.com/apis/library. Ensure your project is selected. Search for Admin SDK API and click it.
- If it is not enabled, enable it. When it is enabled, validate it.
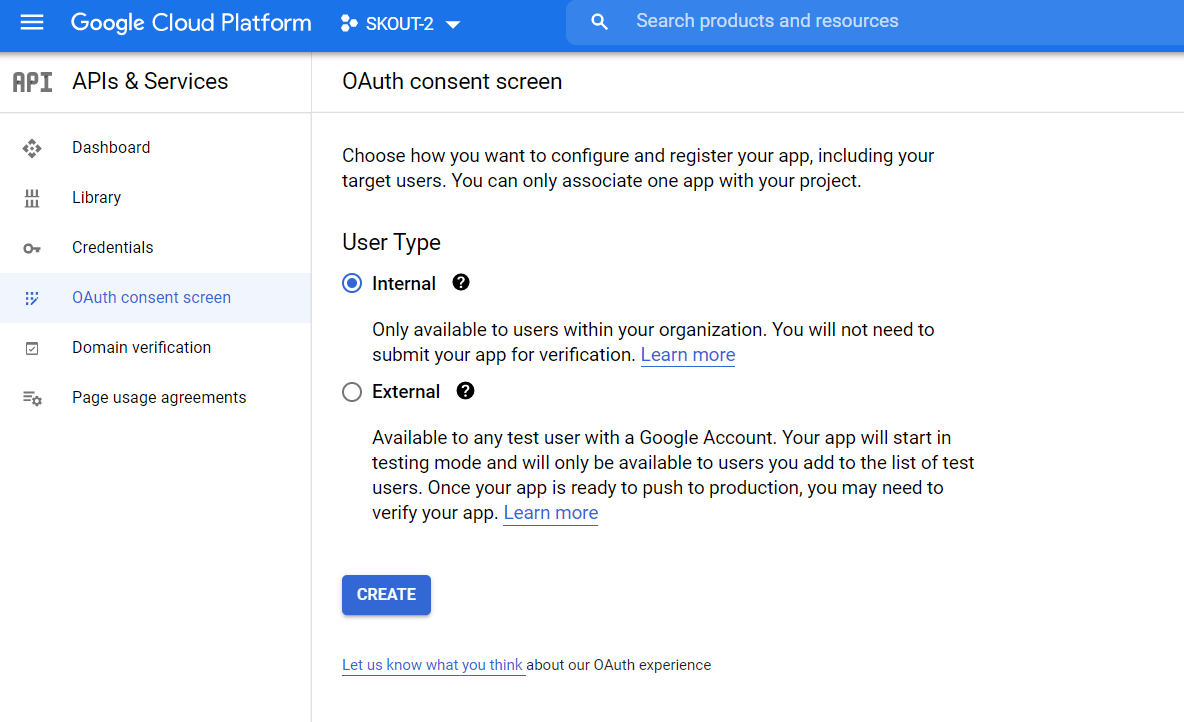
- Navigate to APIs & Services > OAuth consent screen. In User Type, select Internal and click Create.
- Enter an appropriate application name, such as
skt-gcp-monitor. Enter the User support email and, in the Developer contact information section, type the Email address of any admin user. Slick Save And Continue.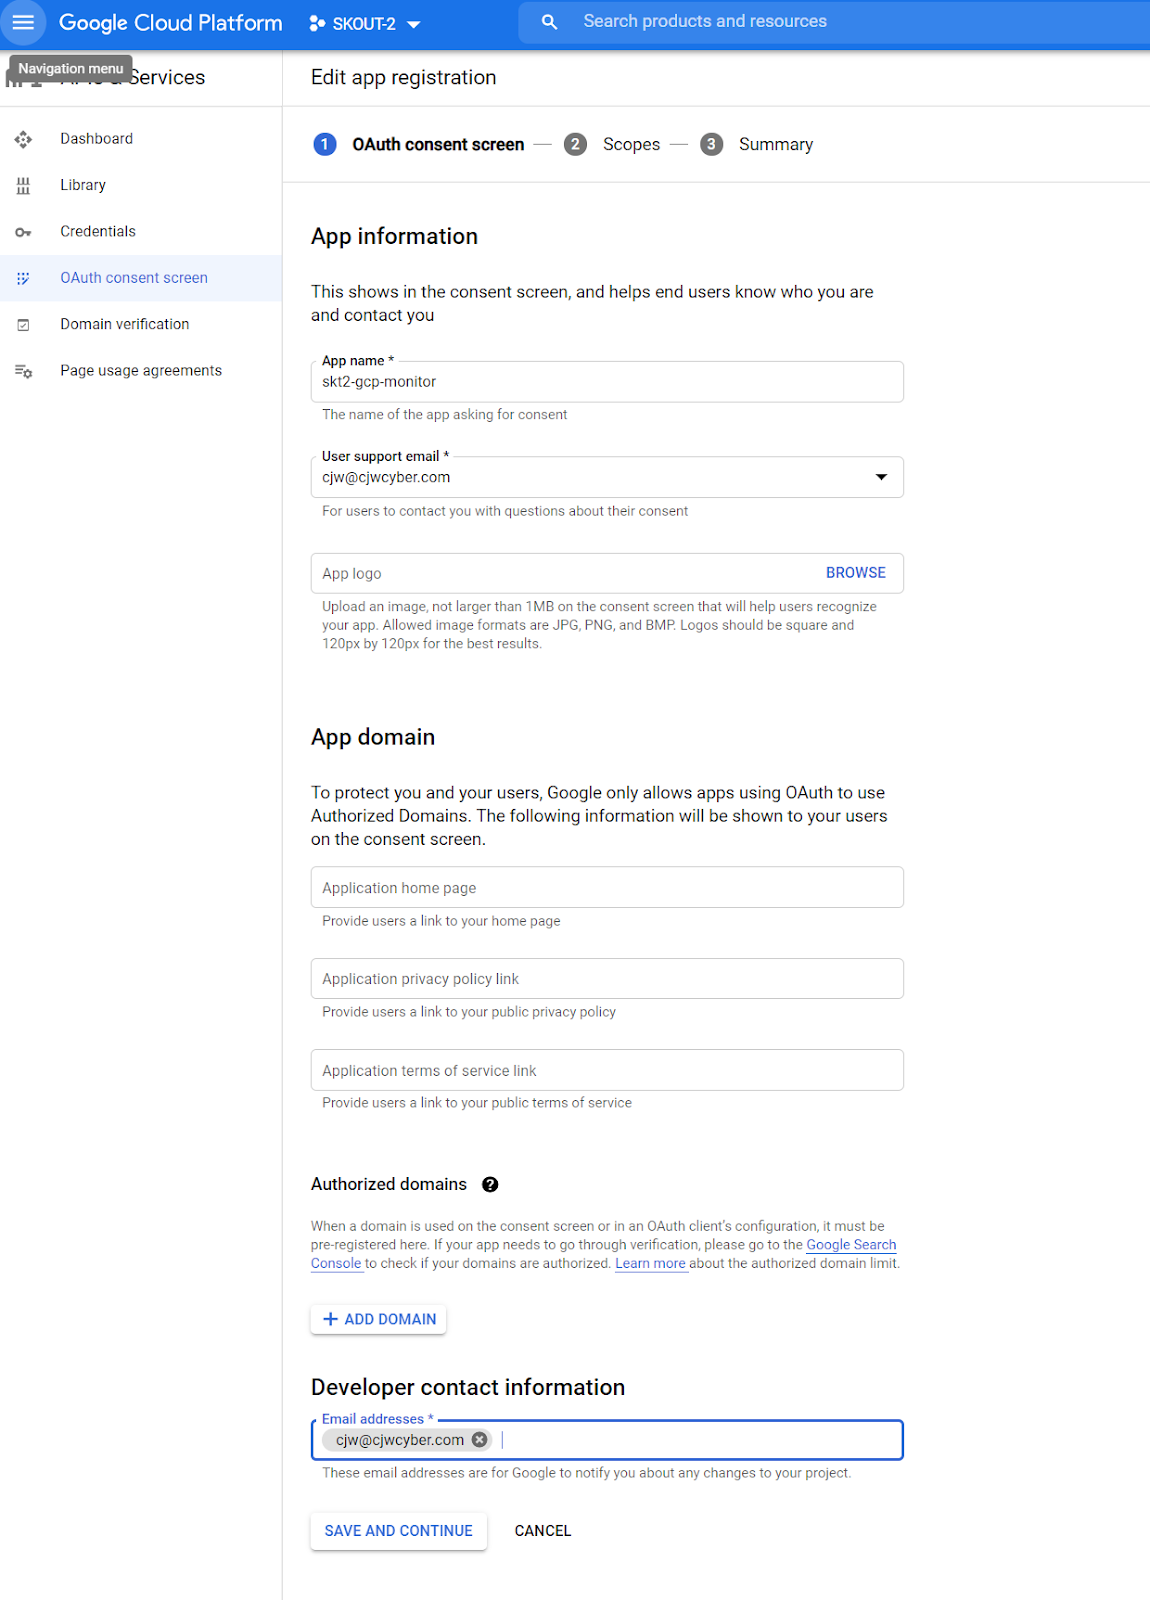
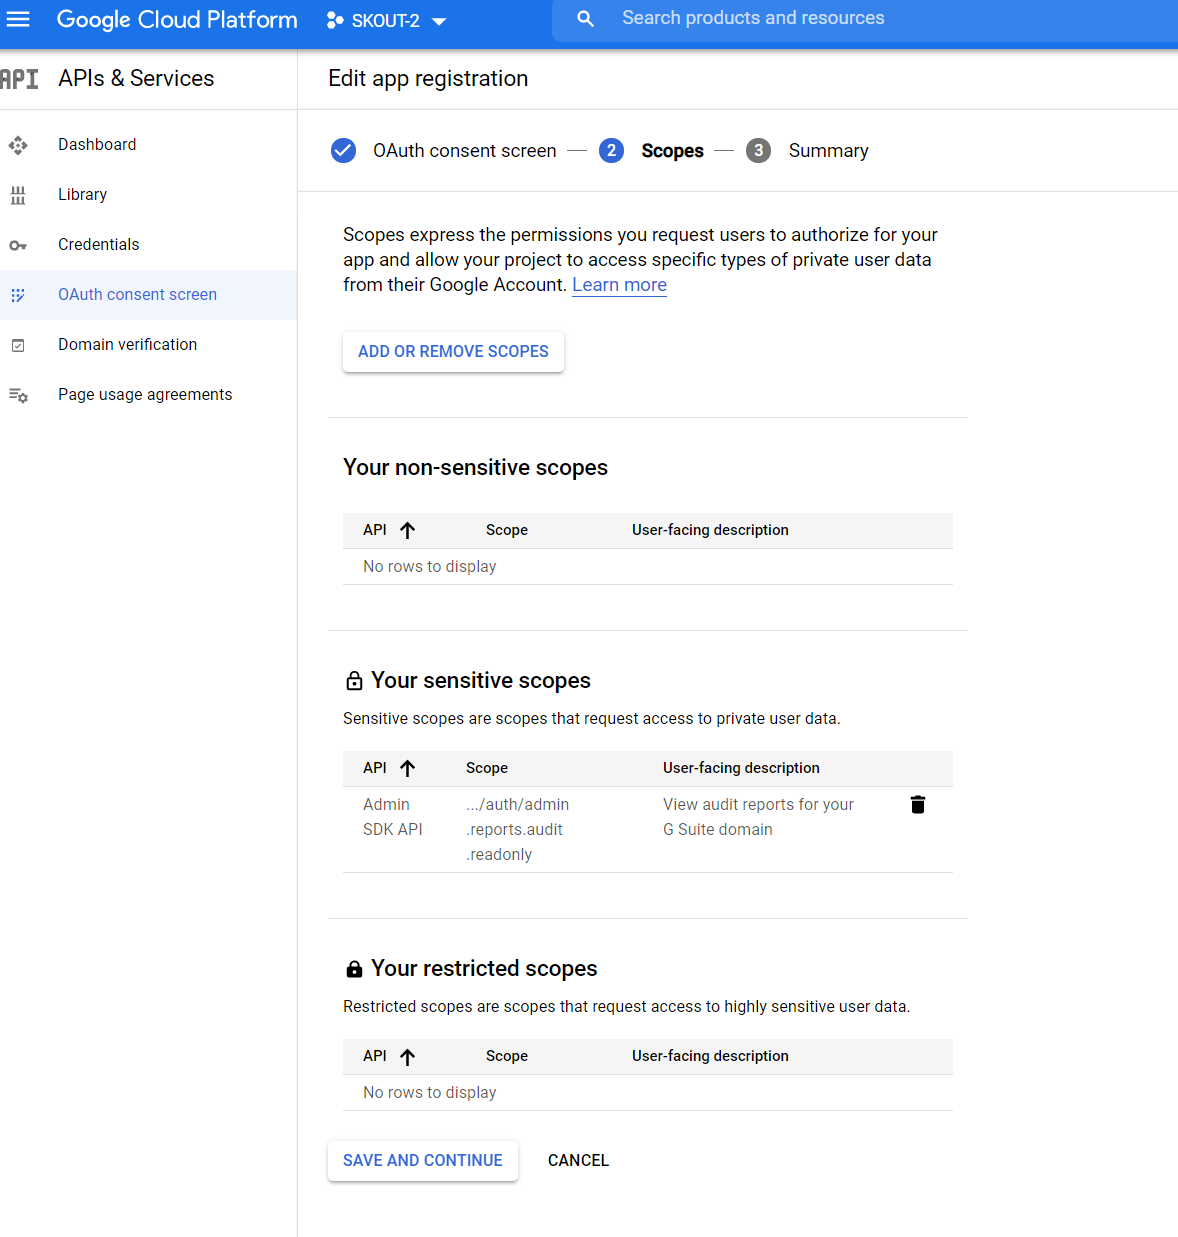
- On the Scopes page, click Add or Remove Scopes. Search for https://www.googleapis.com/auth/admin.reports.audit.readonly and add it. Click Update > Save & Continue.
On the left navigation bar, click Credentials.
Click the associated Service account in the Service Accounts Table.
Click Show Advanced Settings.
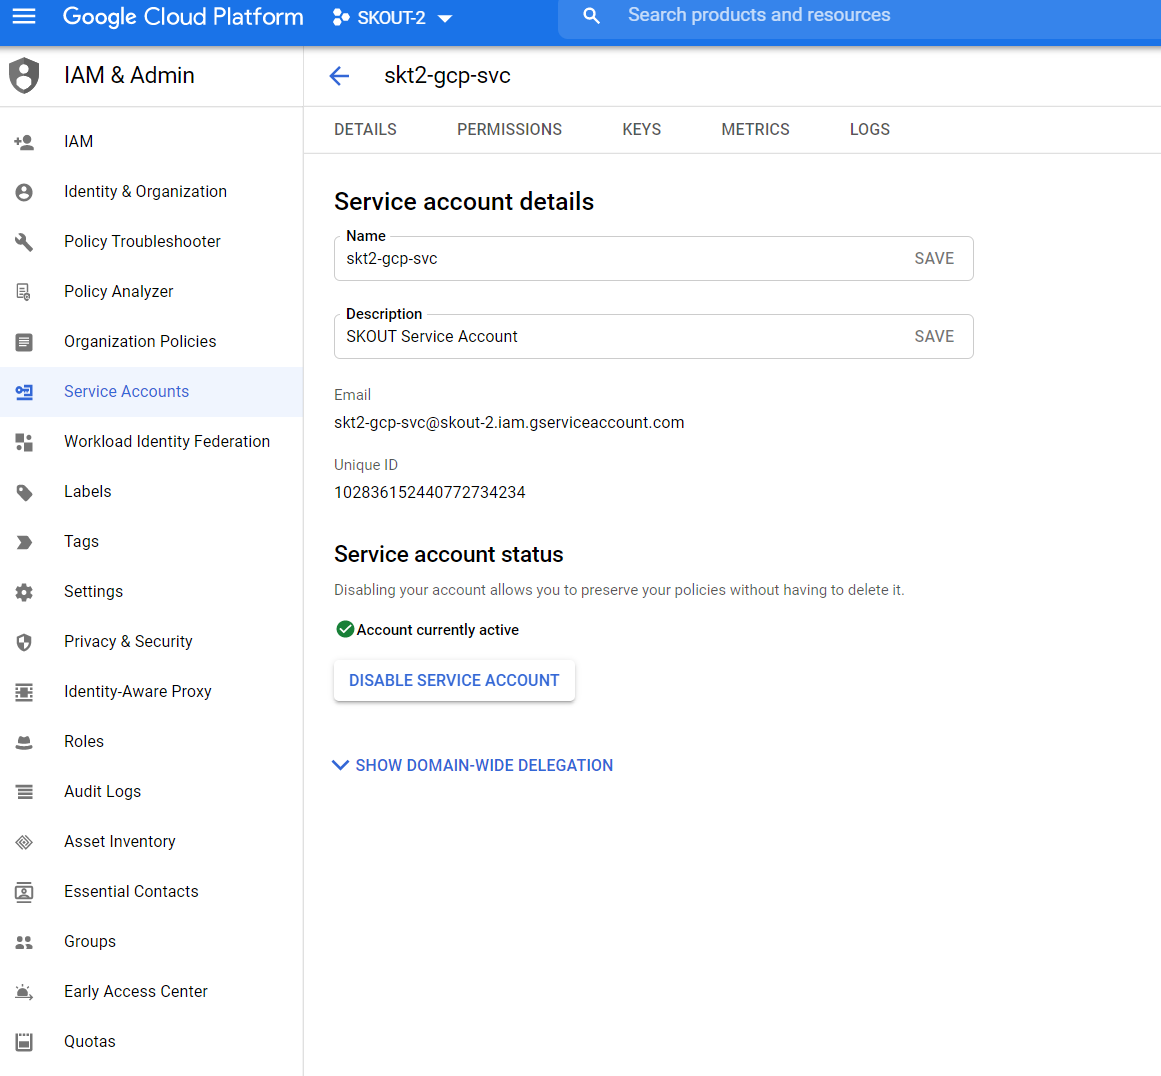
On the Service Account page, in the Domain-wide Delegation section, copy the Client ID .
Navigate to Domain-wide Delegation (google.com) Click Add New and paste the Client ID you just copied into its associated field.
Add https://www.googleapis.com/auth/admin.reports.audit.readonly into OAuth Scopes and click Authorize.
To set up Barracuda XDR Dashboard
- In Barracuda XDR Dashboard, click Administration > Integrations
- On the Google Workspace card, click Setup.
- Add the Credentials .JSON file that was generated/downloaded earlier, and the email for the user you granted the sufficient privileges.
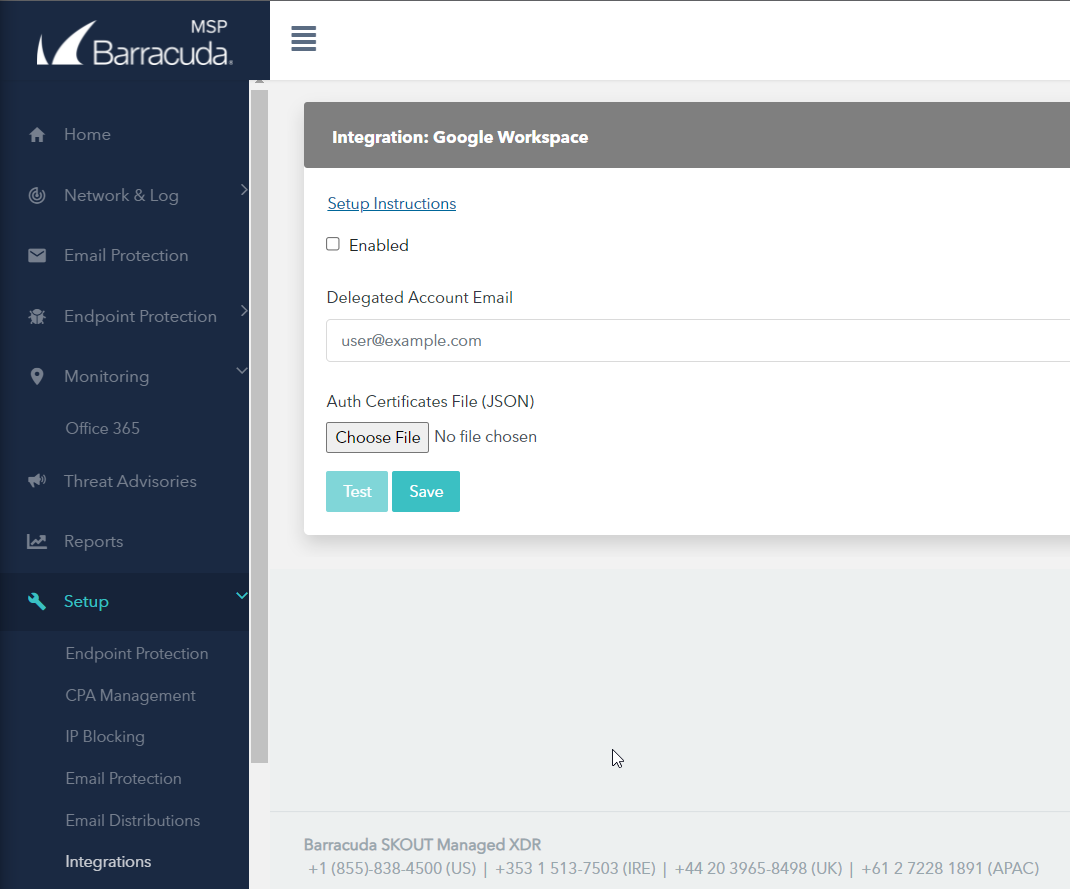
- Click Test and Save.