

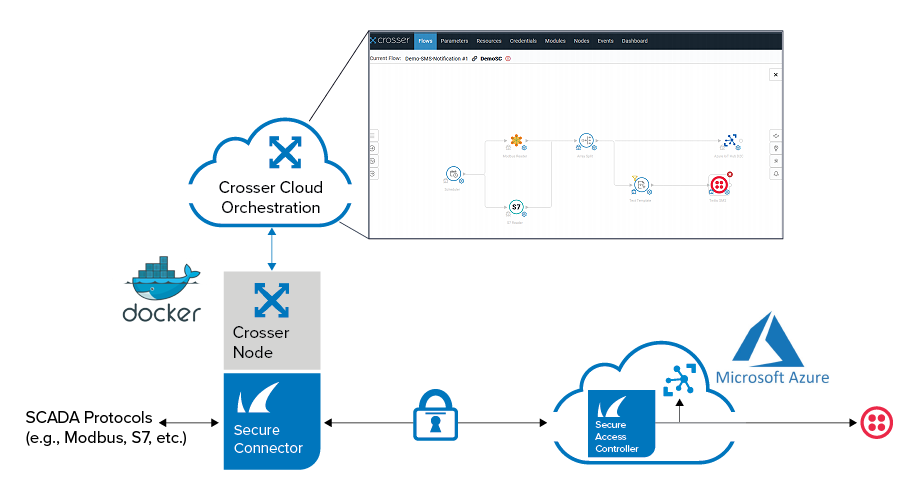
The Barracuda Secure Connector allows you to run Crosser IoT Edge Streaming Analytics in a container. The data collected at the edge can be aggregated, combined, and prefiltered to reduce the cost for storage and intermittent transmission, and to enable effective processing of useful data in an on-premises or cloud analytics platform. When utilizing Crosser, users obtain scalable connectivity to accommodate large and dispersed networks of industrial and IoT devices.
Barracuda Crosser Integration Architecture
For the deployment of Crosser IoT Edge Streaming Analytics on the Secure Connector, you can use one of the following options:
- Option 1: As Docker Container by predefined LXC script.
- Option 2: Via Azure IoT Edge
Deployment as Docker Container by Predefined LXC Script
Set the custom variables in the crosser_container.tgz file, add the Crosser Node on the platform, and install a Secure Connector container.
Step 1. Adjust the Custom Variables
In the crosser_container.tgz file, modify the custom variables in the doit file with your information. The information is available within your Crosser portal https://cloud.crosser.io.
#########Custom Input Variables##################
#Docker Credentials

DOCKER_USER="YOUR-USERNAME"
DOCKER_PASS="YOUR-PWD"
DOCKER_HOST=https://docker.crosser.io

####Please use either individual or global key####

#####Individual Key######

ID_CROSSER="ENTER-YOUR-NODE-ID-HERE"
KEY_CROSSER="ENTER-YOUR-NODE-KEY-HERE"

#####Global Key######

GLOBAL_KEY="ENTER-YOUR-GLOBAL-HERE"
##################################################
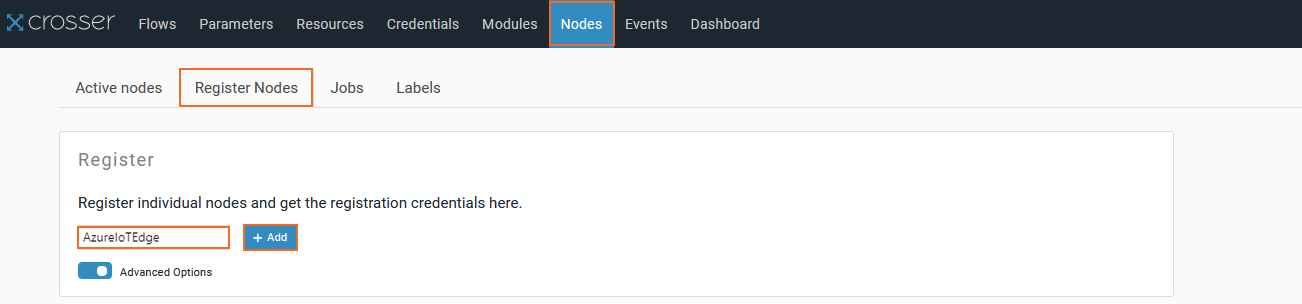
Step 2. Register the Crosser Node
- Log into the Crosser Portal.
- Go to Nodes and click the Register Nodes tab.
- In the Register field, enter the name of the node you wish to register, and click ADD.
A confirmation window opens, stating that you have successfully added the node. - Click Show Credentials to display ID and access key of the node.
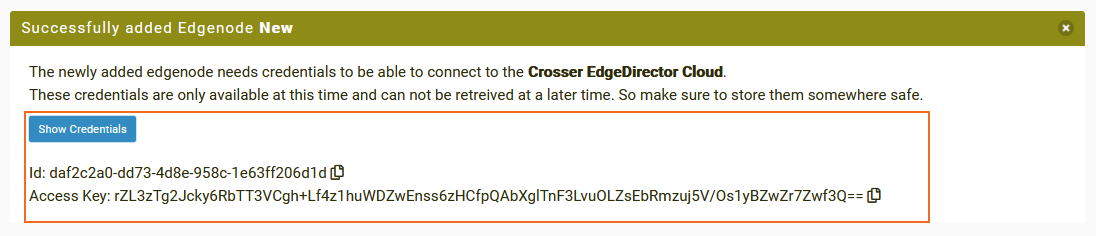
- Copy the credentials to a doit file and compress the doit file including all deb packages to <name>_container.tgz.
Step 3. Install a Container via Firmware Update in Barracuda Firewall Admin
Containers are installed just like Secure Connector firmware updates. Copy the container.tgz file to the Control Center and distribute it just like a firmware update. When the archive is on the Secure Connector, the deb packages are installed, and the installation scripts executed. For more information, see Secure Connector Firmware Updates.
Deployment via Azure IoT Edge
Configure Microsoft IoT Edge on the Secure Connector, and configure Crosser IoT Edge Streaming Analytics as an IoT Edge module. For details on how to enable Azure IoT Edge runtime on a Secure Connector, see How to Enable Microsoft IoT Edge and Docker on a Secure Connector.
- Log into the Azure portal: https://portal.azure.com
- Enable IoT Edge on the Barracuda Secure Connector. For more information, see Configure Azure IoT Edge in How to Enable Microsoft IoT Edge and Docker on a Secure Connector.
- In the Azure portal, navigate to the IoT Edge device that has been linked with your Secure Connector.
- Click the Set modules tab.
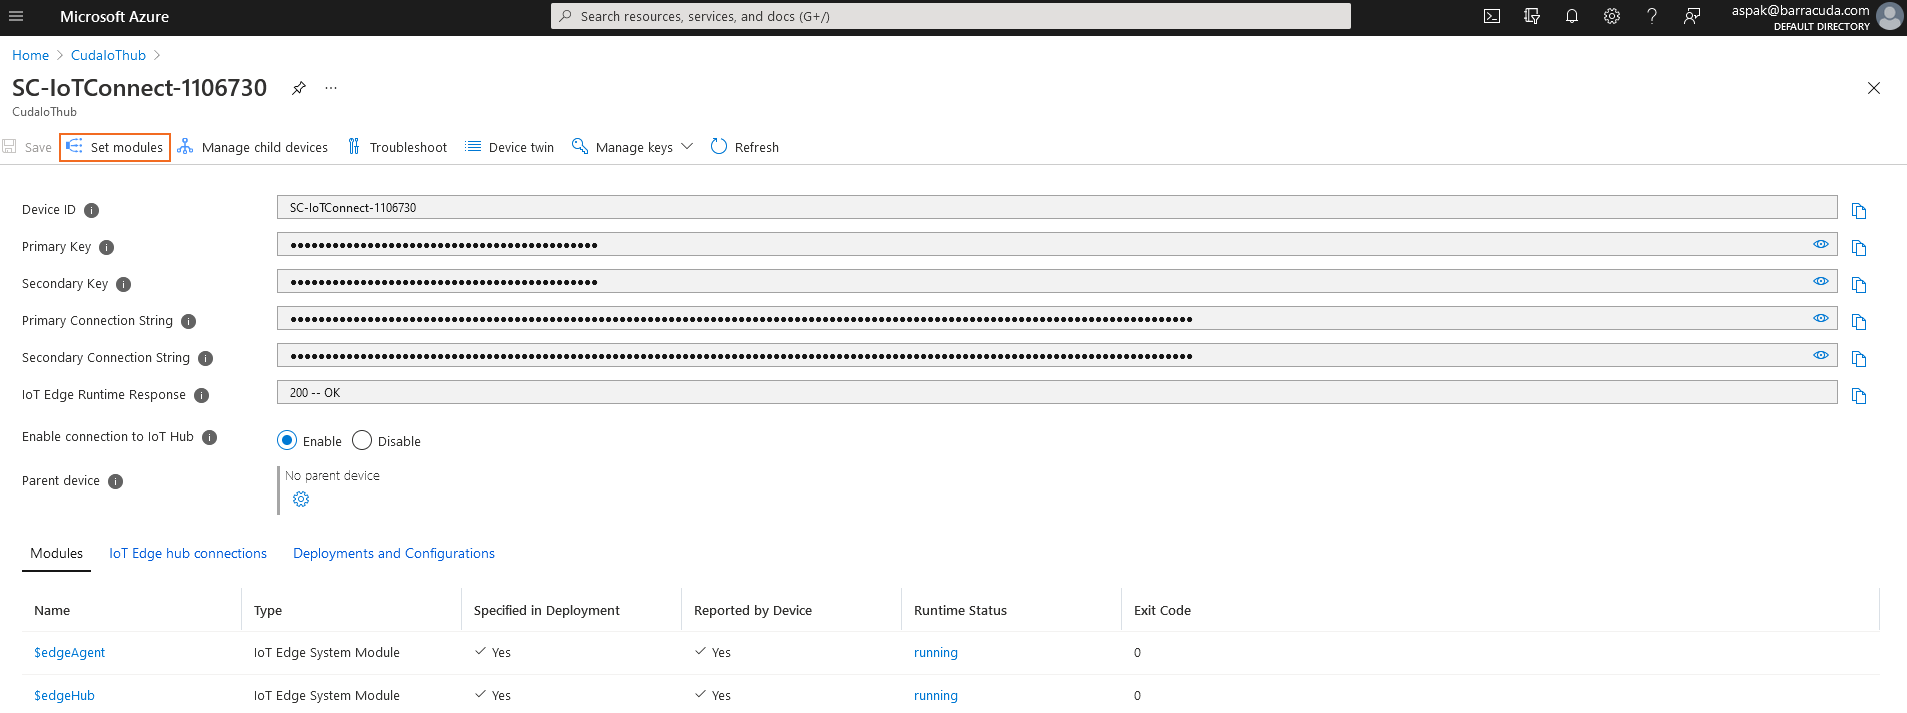
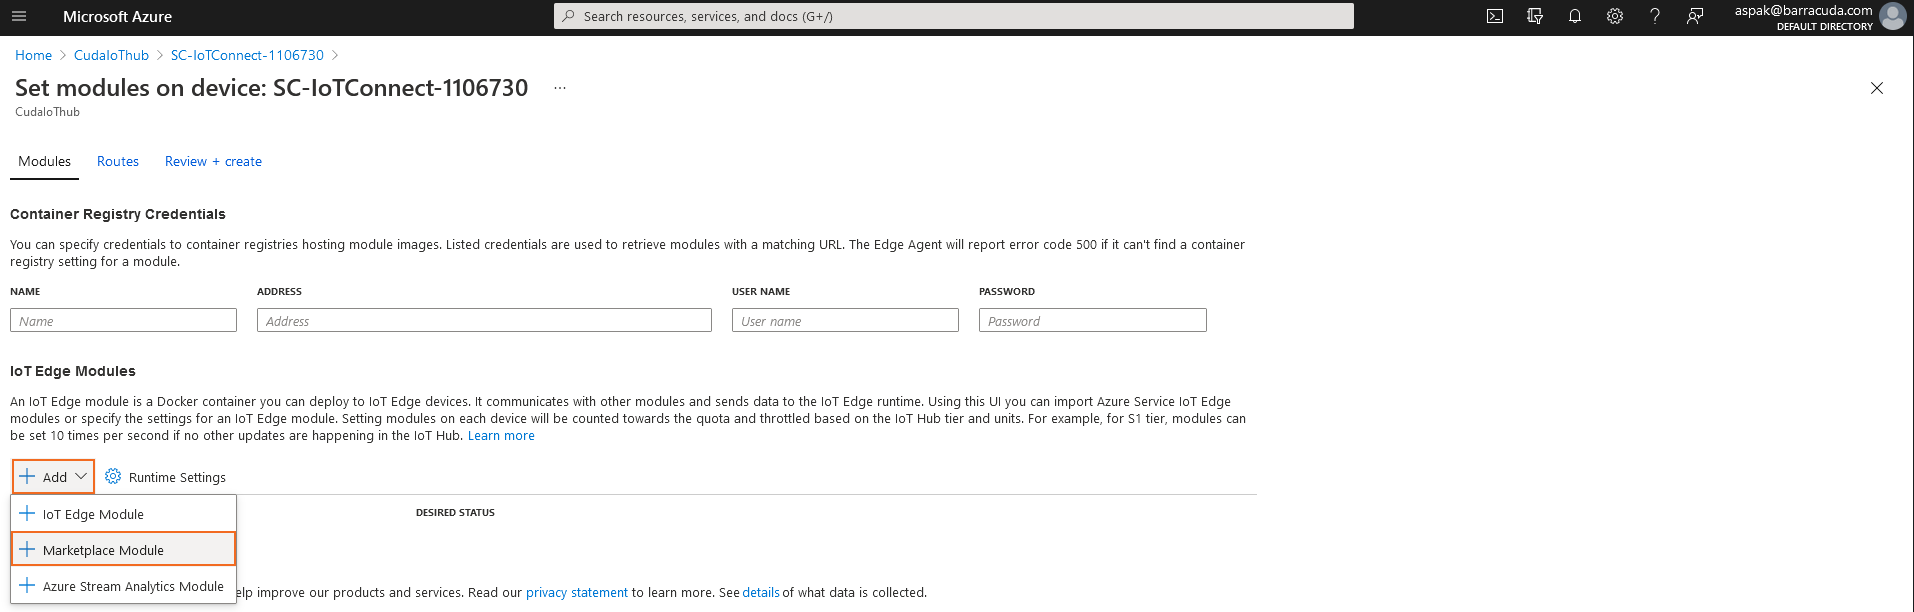
- In the IoT Edge Modules section, click ADD.
- Select Marketplace Module.
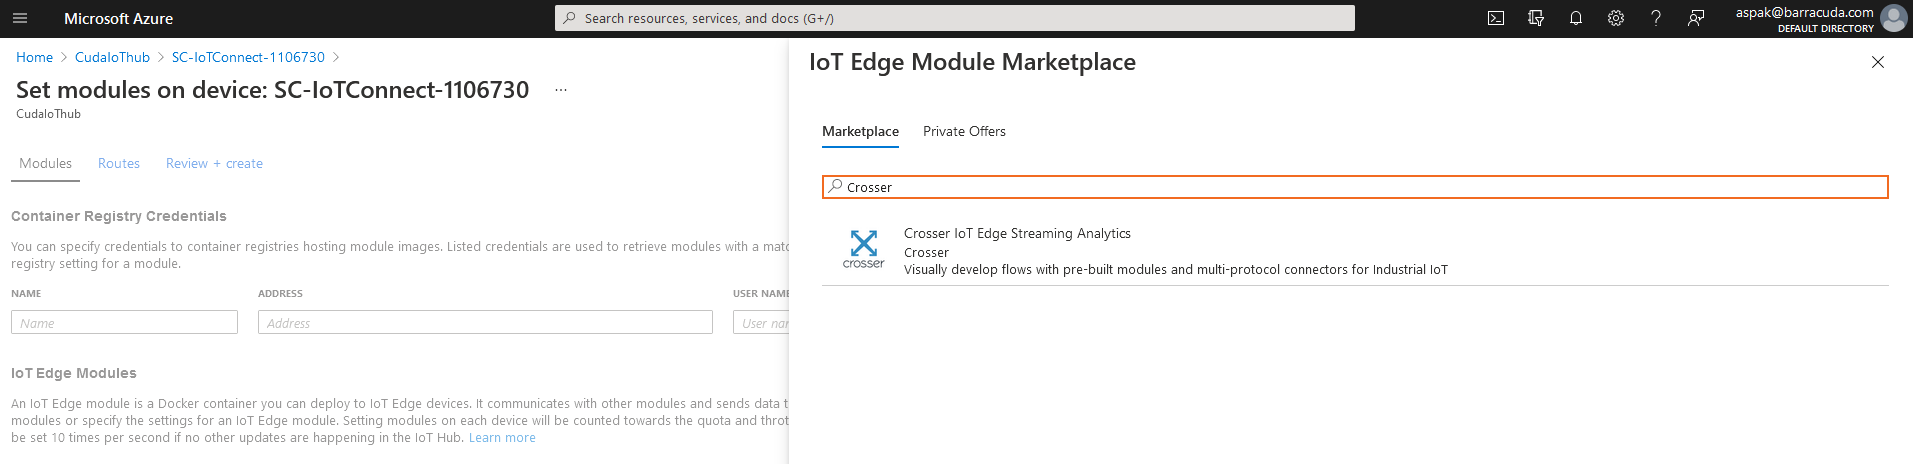
- Search for Crosser and select Crosser IoT Edge Streaming Analytics.
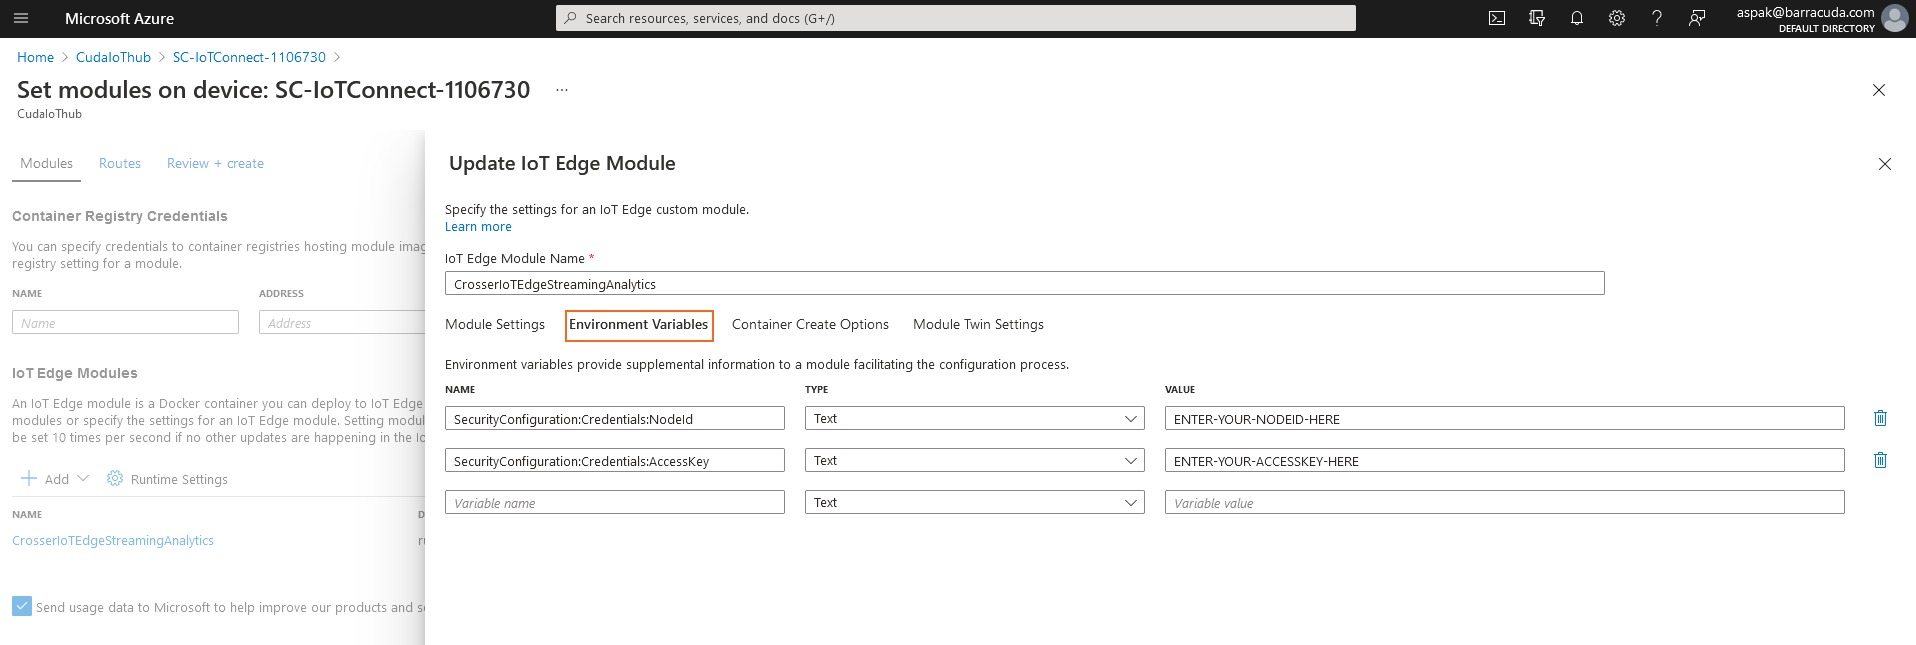
- Open the Environmental Variables tab.
- Configure the variables using the information provided during the Crosser Node registration in the step 2.4.
- Review your information and create the module.
The deployment should be completed within a couple of minutes.
For more information and use cases on Crosser and Barracuda, watch this Video.