

The Elastic Load Balancer (ELB) is a managed layer 4 load balancer by AWS. The ELB can be deployed as a public-facing load balancer or internally in your VPC. Instances are added either manually or, if associated with an Auto Scaling group, automatically. The load balancer continuously checks the health of the instances and takes unhealthy instances out of rotation.
AWS Reference Architectures
This article is used in the following AWS reference architectures:
Create an AWS Network Load Balancer
- Log into the AWS console.
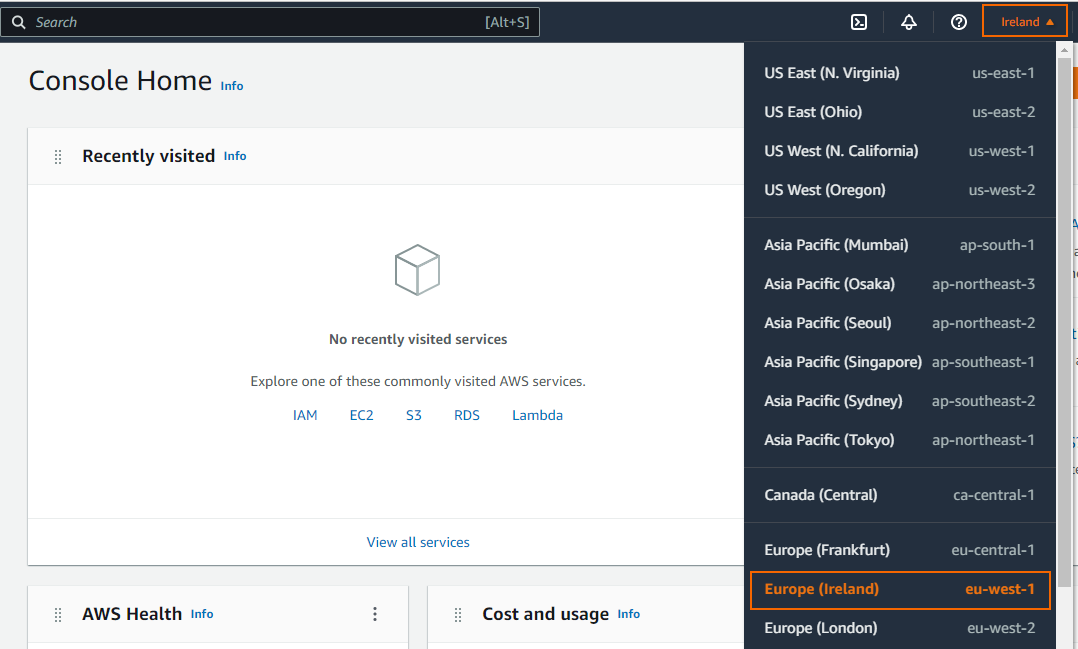
- In the upper right, click on the datacenter location, and select the datacenter you want to deploy to from the list.
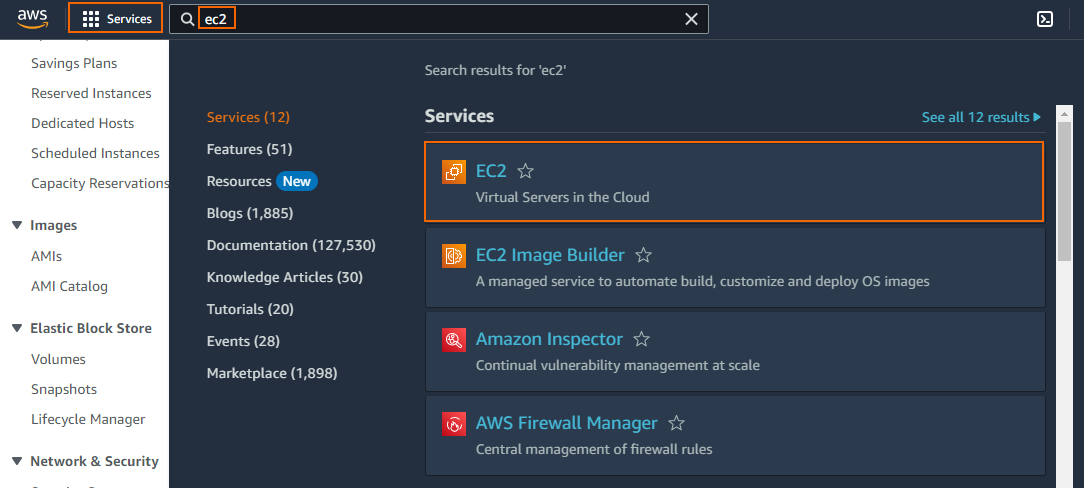
- Expand Services and select EC2.
- In the left menu, expand Load Balancing and select Load Balancers.
- The Load balancers window opens. Click Create load balancer.

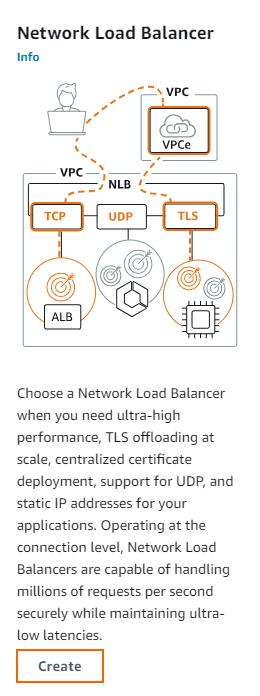
- Under Network Load Balancer click Create.
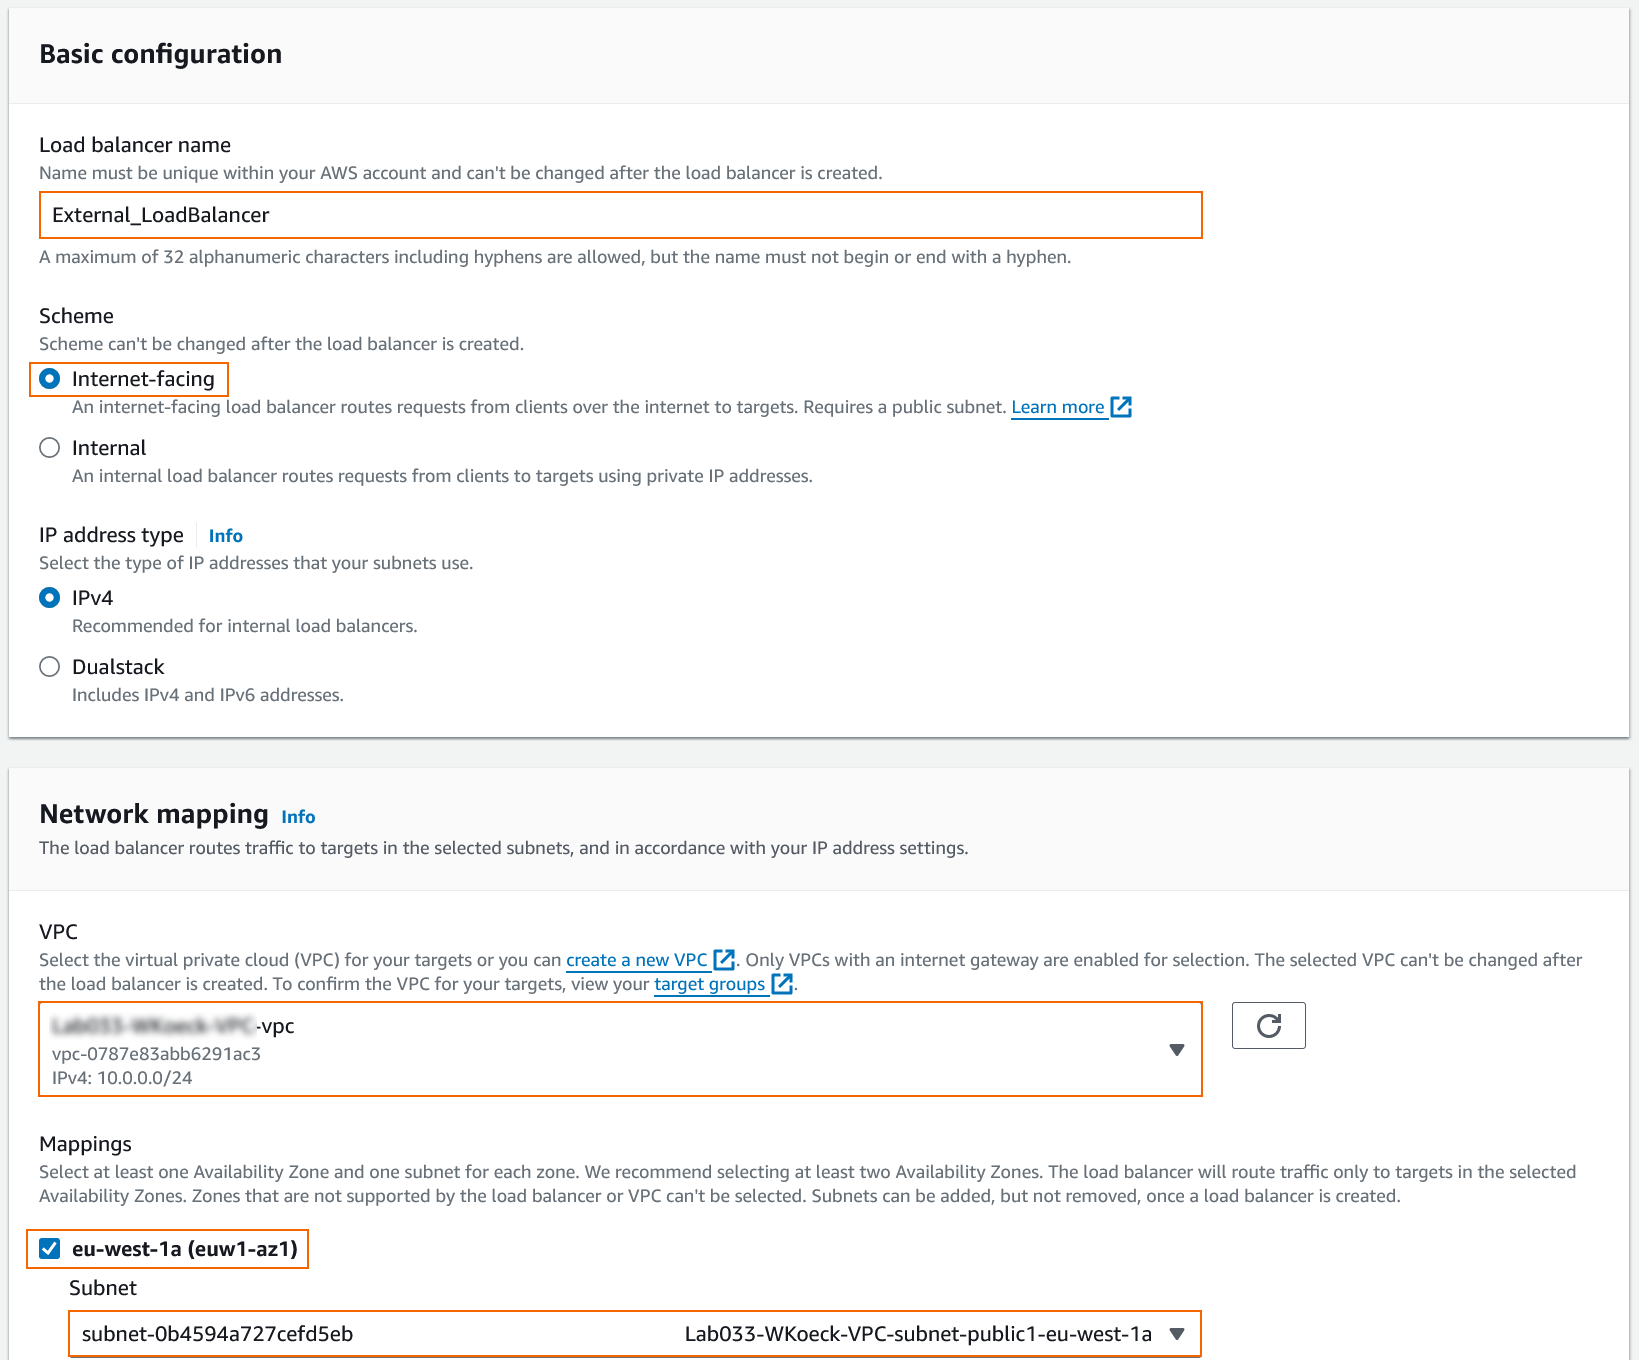
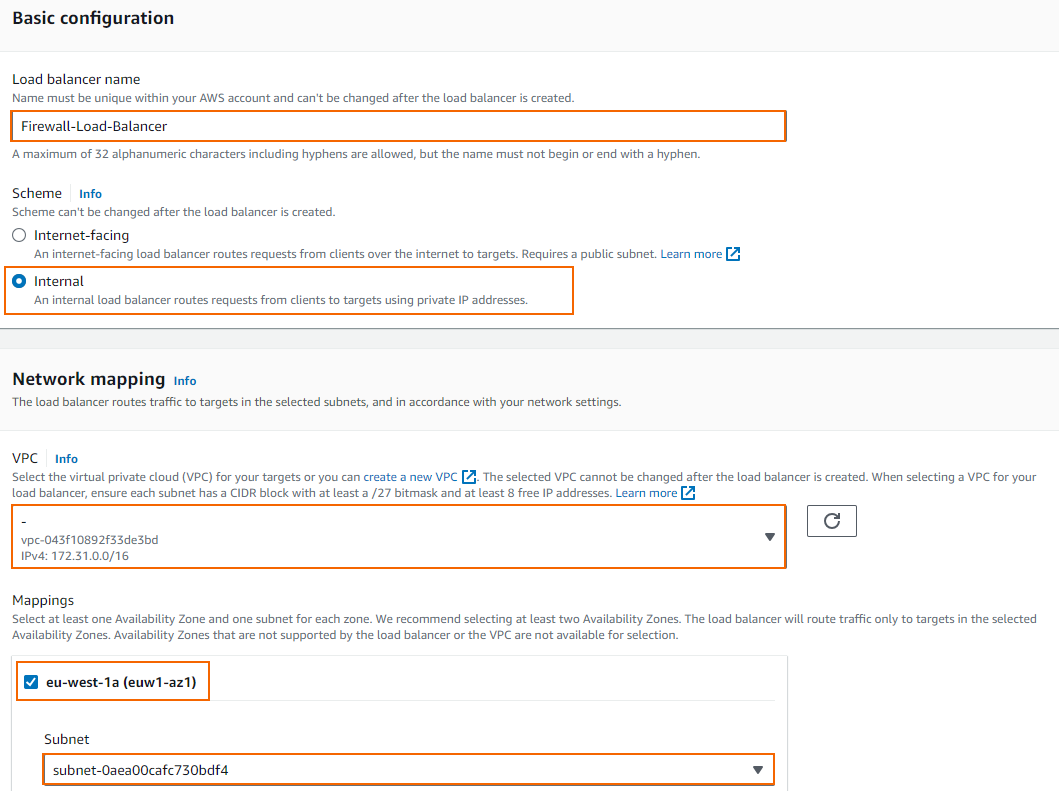
- The Basic configuration window opens. Enter a unique Load balancer name.
Select a Scheme for your load balancer. For the external load balancer, select Internet-Facing.
- Select the VPC the firewalls are deployed to from the list.
- In the Mappings section, select one or more availability zones and define subnets for each zone from the Subnet selection menu.
- Select one or more Security groups for your load balancer.
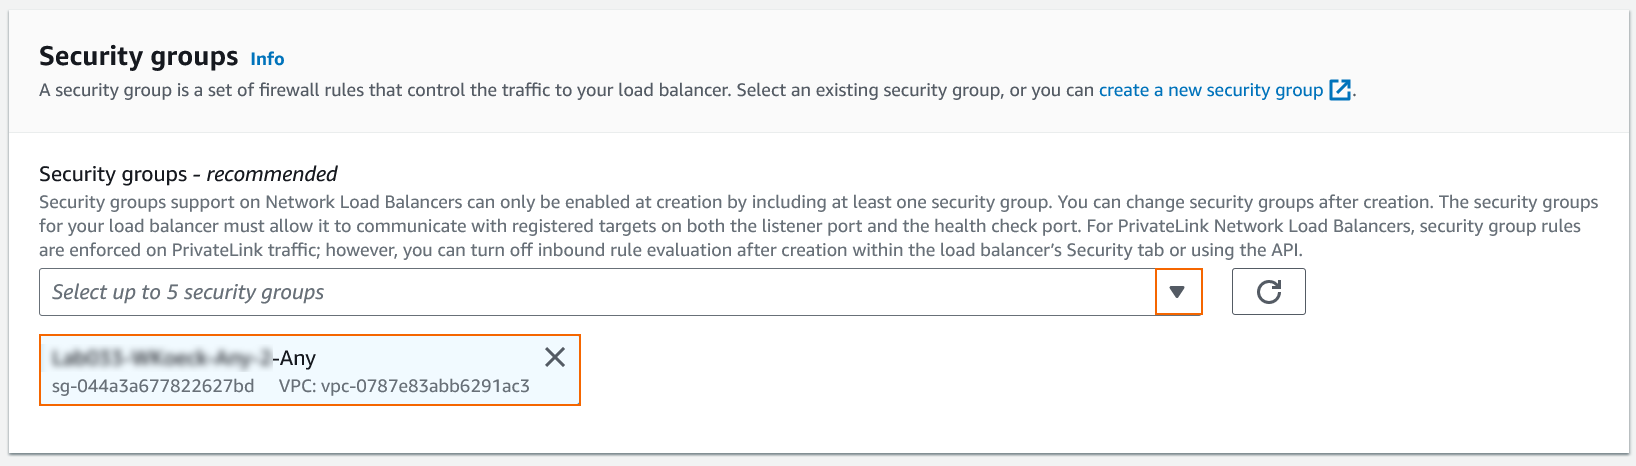
If you wish to create a security group, click create a new security group and define the following settings:- Enter a Security group name.
- Click Add rule for each additional security group rule required.
- Type / Protocol – Select the protocol or type of traffic. E.g., Custom TCP for TCP, or HTTPS for TLS-encrypted web traffic.
- Port range – Enter the port. E.g., 691 for TINA VPN
- Source – Select the source of the traffic. For Internet traffic, select Anywhere and enter
0.0.0.0/0.
- Click Create security group.
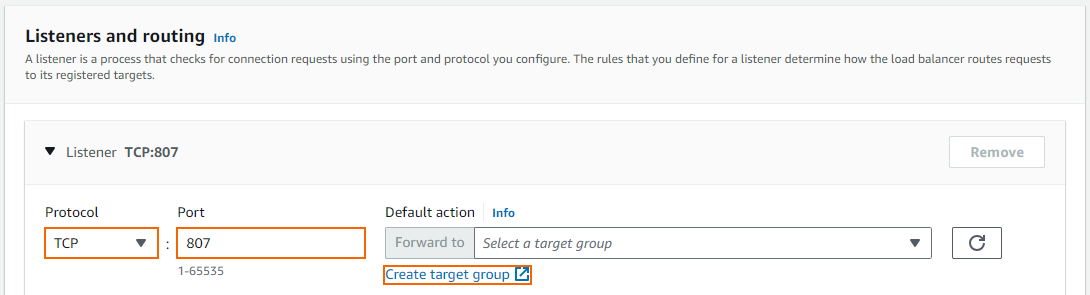
In the Listener and routing section, select TCP, and enter
807in the Port field. Port 807 is used for Firewall Admin access.- Click the Create target group link.
- The Specify group details window opens. Specify the following settings:
- Select IP addresses as target type. (When selecting Instances, you must select instances as targets instead of IP addresses later.)

- Enter a Target group name, for example:
FWAdmin From the Protocol : Port list, select TCP 807.

- Select the VPC the firewalls are deployed to from the list.
- Select IP addresses as target type. (When selecting Instances, you must select instances as targets instead of IP addresses later.)
- In the Health checks section, expand Advanced health check settings and configure the following parameters:
- Health check protocol – select TCP.
- Health check port – select Override and enter
691. This is the VPN port on the firewall and will be used for probing.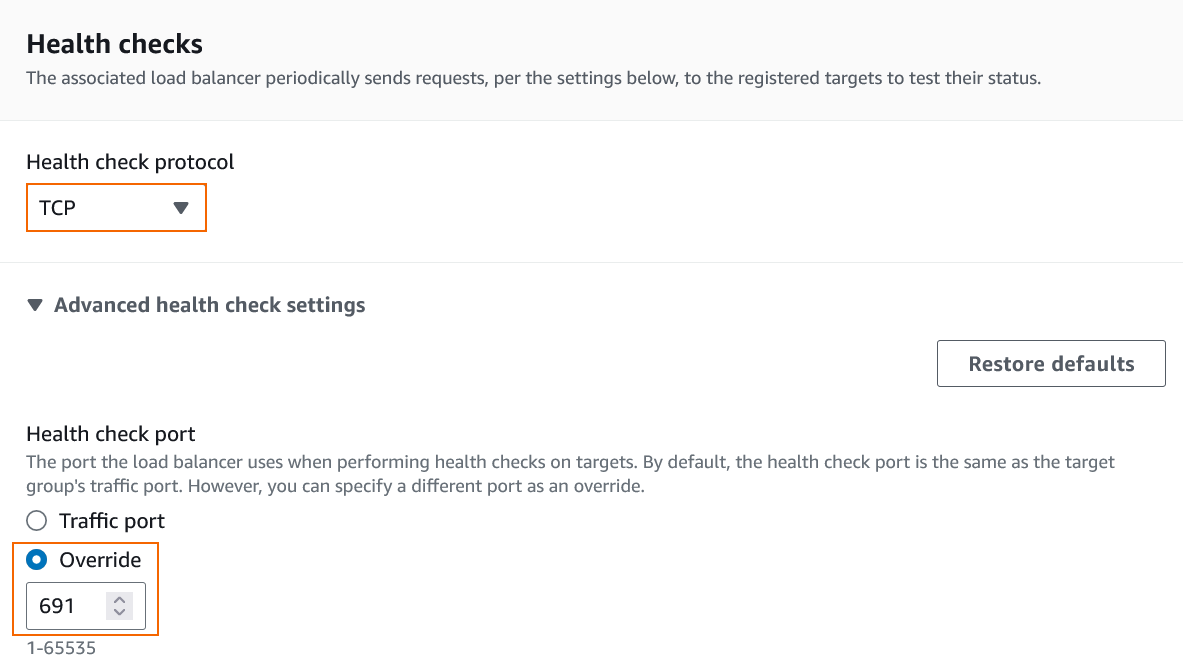
- Leave the other settings as default.
- Click Next.
- The Register targets window opens. Specify the following settings:
- Network – Select the VPC the firewalls are deployed to from the list.
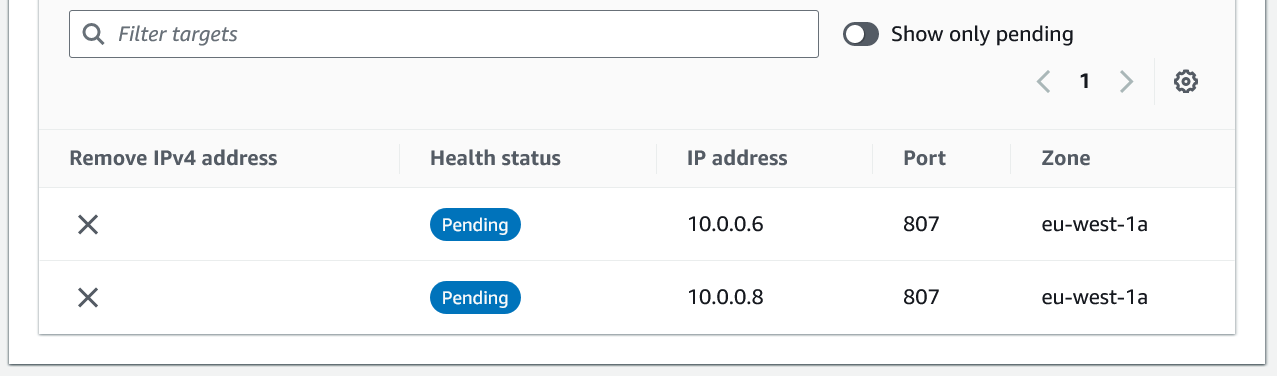
- Define subnet IP addresses that should be used as probing targets. For example, enter
10.0.0.6and10.0.0.8for a 10.0.0.0/24 network. (If you have selected Instances, select the instances used as targets.) - Ports – Enter the port used for probing. In this case, enter
807for Firewall Admin.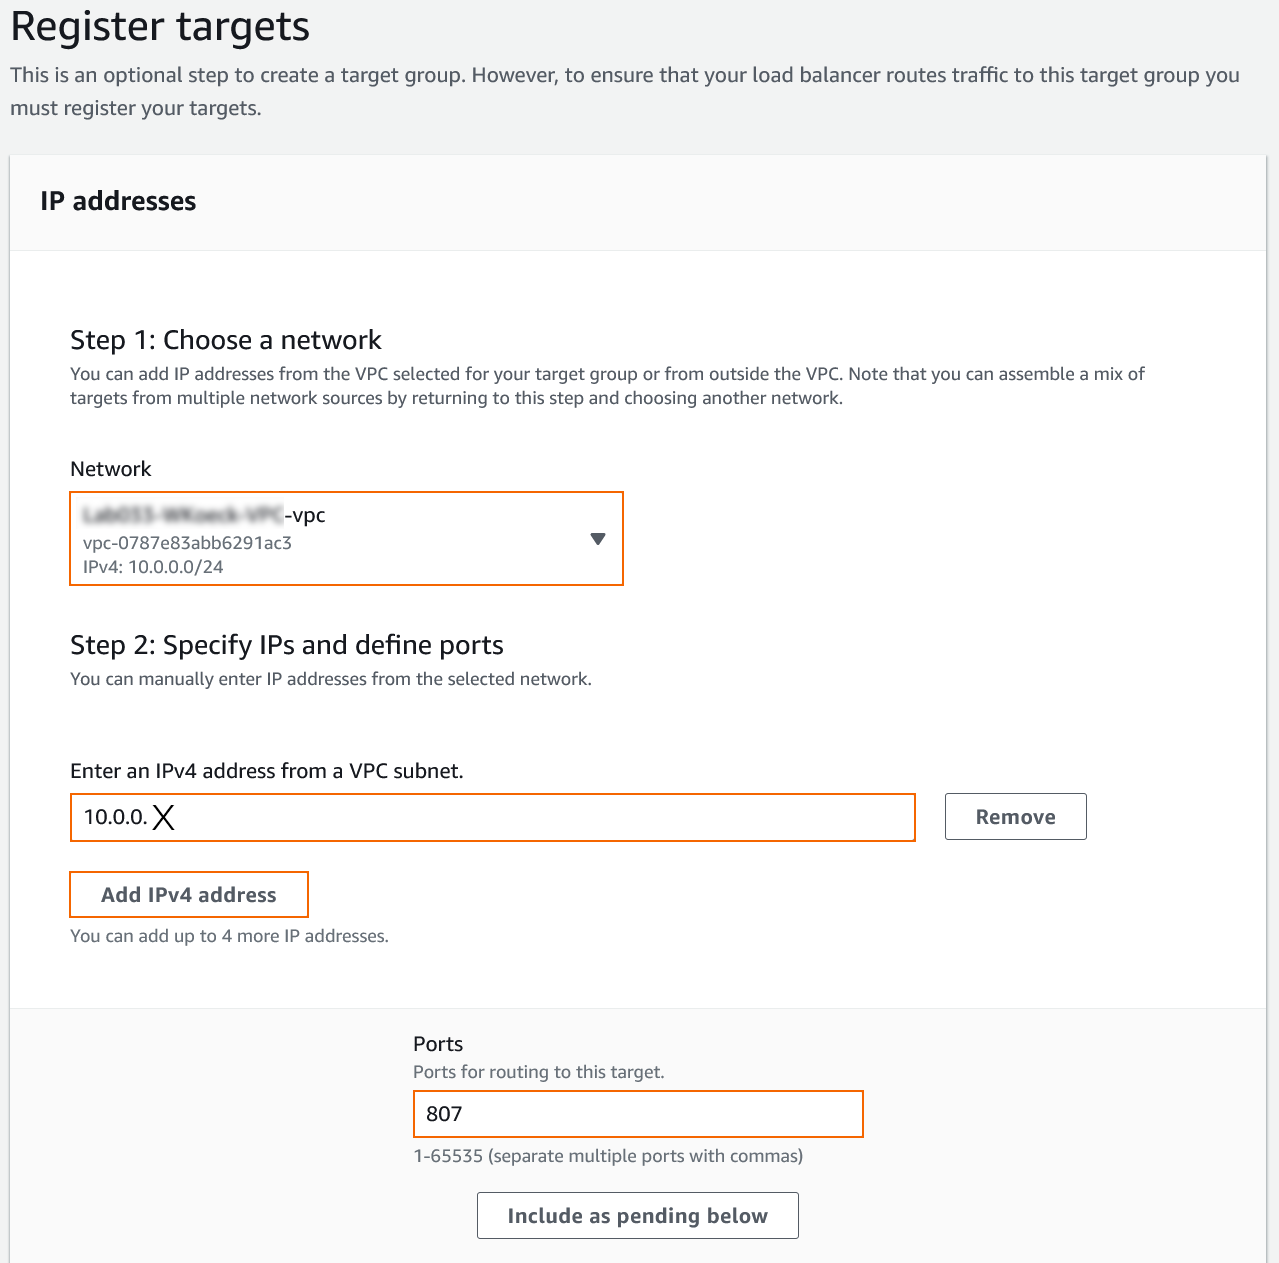
- Click Include as pending below to add your targets. IP addresses (or instances) and port are then listed in the lower section with Health status shown as Pending.
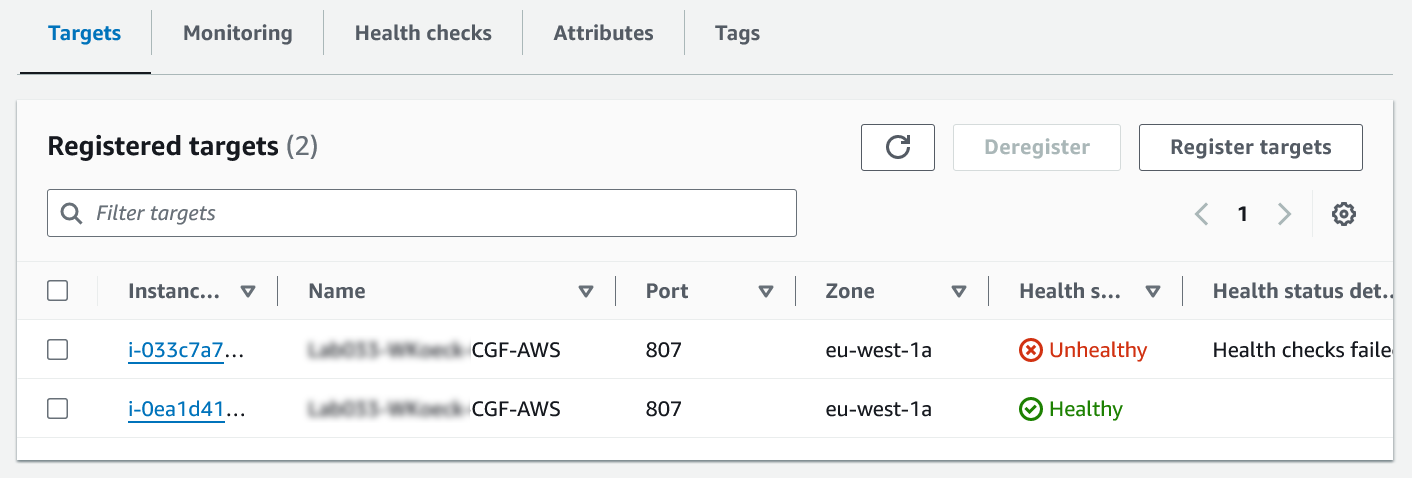
- Review the targets and click Create target group.
The target group is now is now deployed with the network load balancer and ready for use.
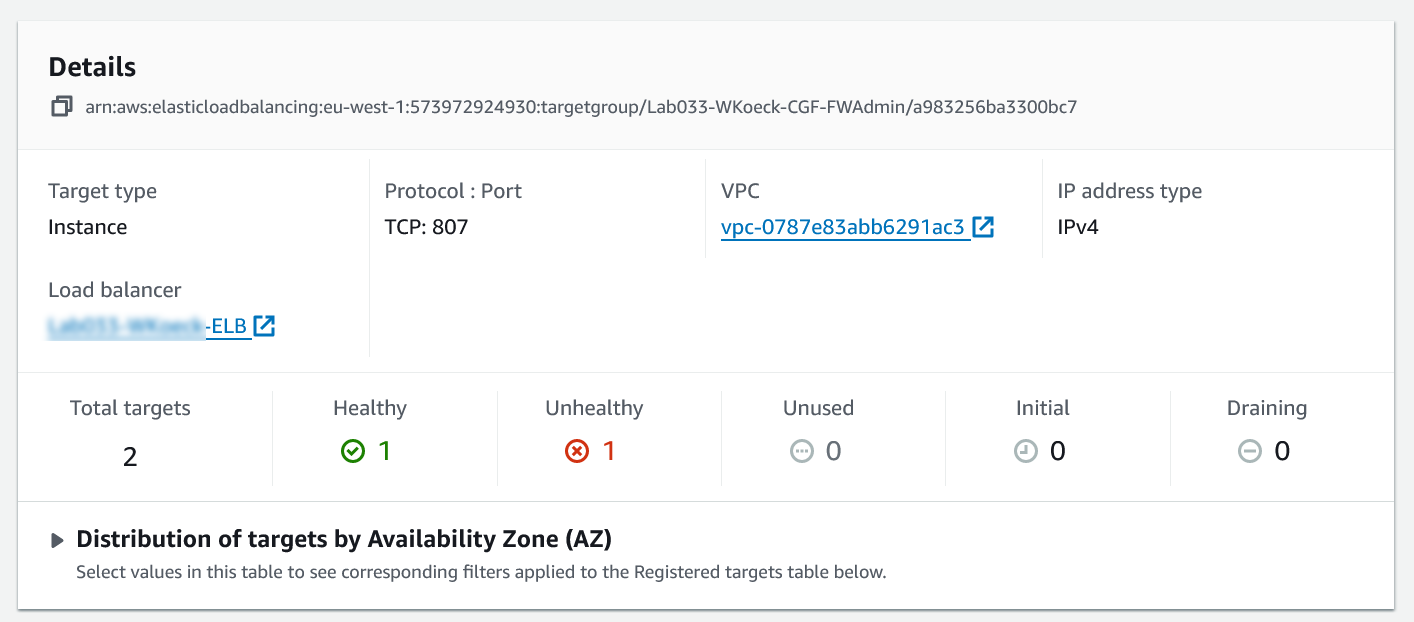
When a health check is performed in a HA setup, the active unit is reachable via probing and shown as healthy. As soon as a failover happens and the unit goes down, the secondary unit becomes reachable and shows up as healthy in the Targets list.
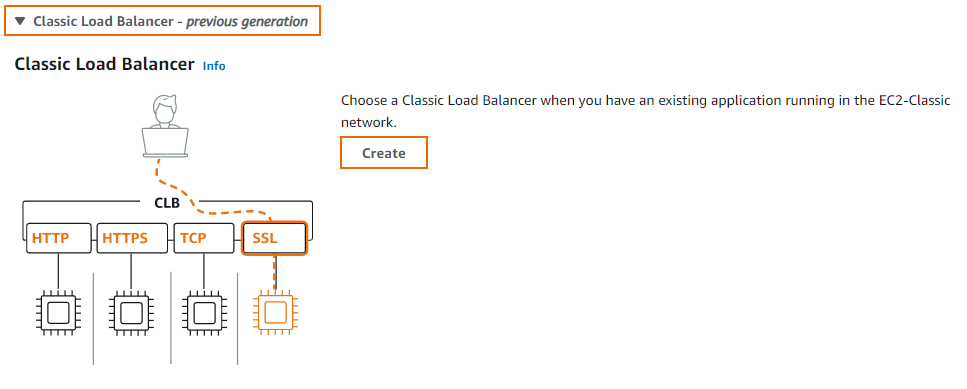
Create an AWS Classic Load Balancer
If your setup requires a legacy load balancer configuration, for example, when you have an existing application running in an EC2-Classic network, you can create a classic load balancer. The classic load balancer can be deployed as an external or internal load balancer. By enabling cross-zone loadbalancing, the load balancer spreads out the load evenly over multiple availability zones.
- Log into the AWS console.
- In the upper right, click on the datacenter location, and select the datacenter you want to deploy to from the list.
- Expand Services and select EC2.
- In the left menu, expand Load Balancing and select Load Balancers. The Load balancers window opens.
- Click Create load balancer.
- Expand Classic Load Balancer and click Create.
- Enter the Basic configuration settings:
- Load balancer name – Enter name for the load balancer.
Select a Scheme for your load balancer.
- VPC – Select the VPC the firewalls are deployed to from the list.
- Select one or more Availability Zones and define subnet for each zone from the Subnet selection menu.
- in the Security groups section, select one or more security groups for your load balancer, or
click Create a new security group to create a group:- Enter a Security group name.
- Click Add rule for each additional security group rule required.
- Type / Protocol – Select the protocol or type of traffic. E.g., Custom TCP for TCP, or HTTPS for TLS-encrypted web traffic.
- Port range – Enter the port. E.g., 691 for TINA VPN
- Source – Select the source of the traffic. For Internet traffic, select Anywhere and enter
0.0.0.0/0.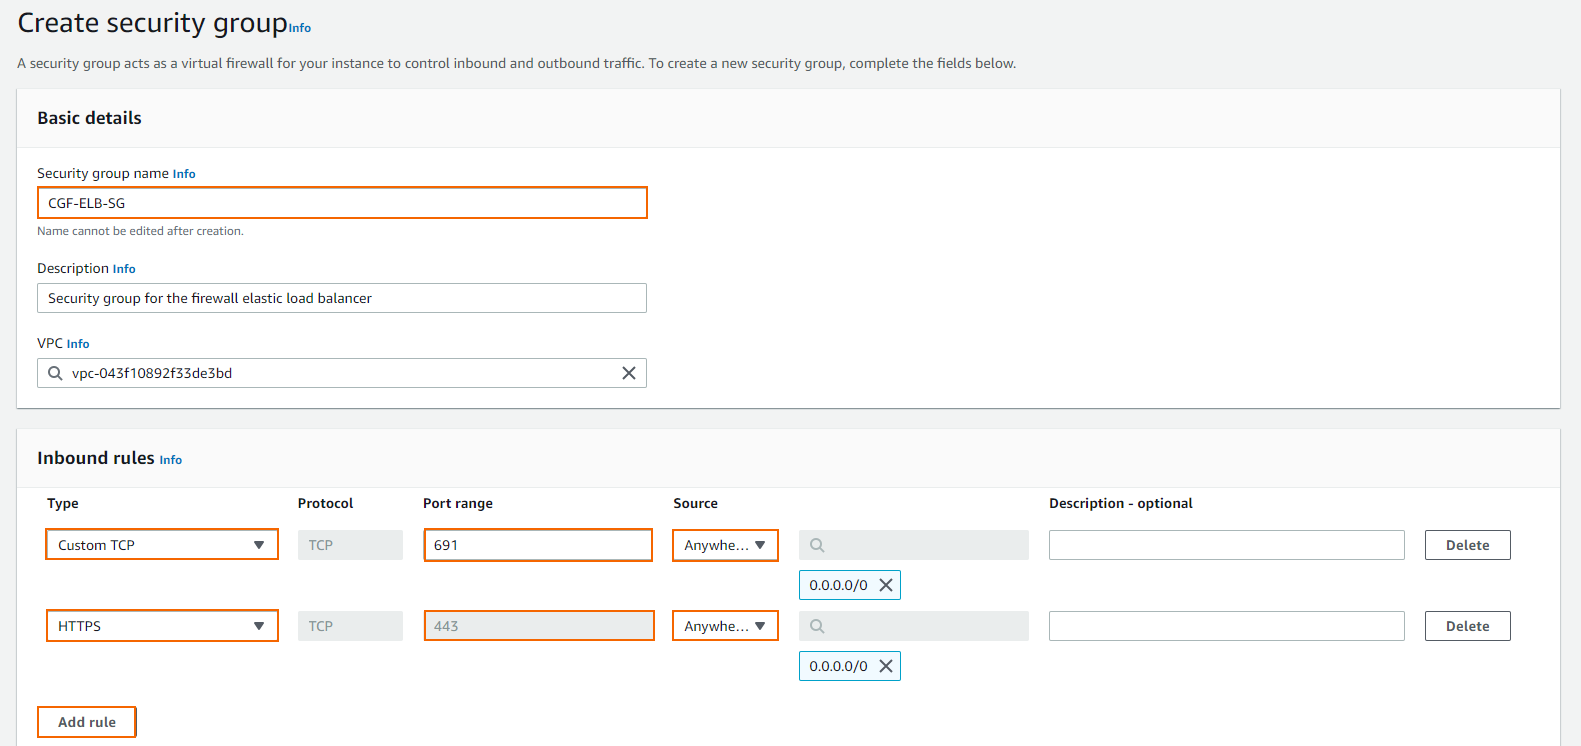
- Click Create security group.
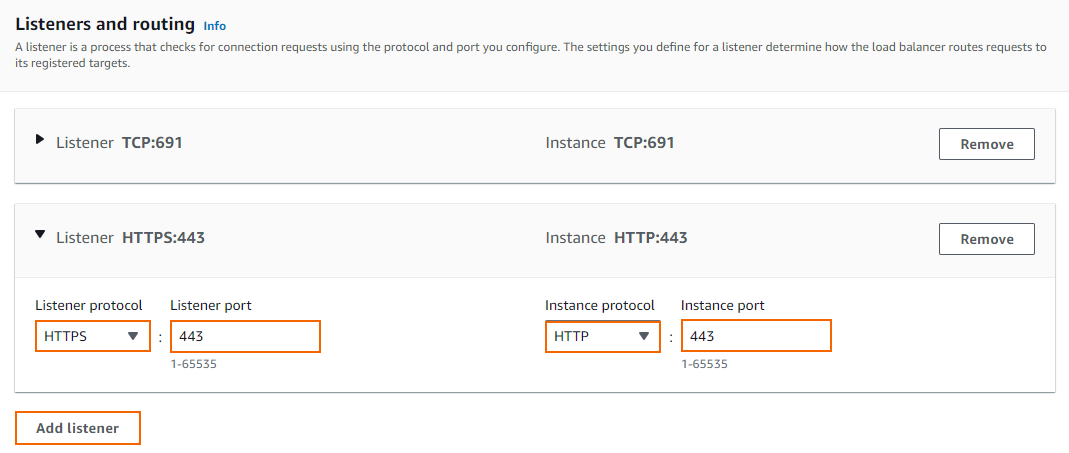
- For each load balancer listener, click Add listener and enter:
- Listener protocol – Select the protocol from the list. Supported protocols: HTTP, HTTPS, TCP, TLS (Secure TCP).
- Listener port – Enter the external port.
- Instance protocol – Enter the protocol. In most cases, this is the same protocol as the Load Balancer Protocol. To offload TLS encryption to the ELB, different protocols can be selected (e.g, HTTPS to HTTP).
- Instance port – Enter the port number of the service on the instance.
- Define a Security policy for the load balancer listeners, create a Rule.
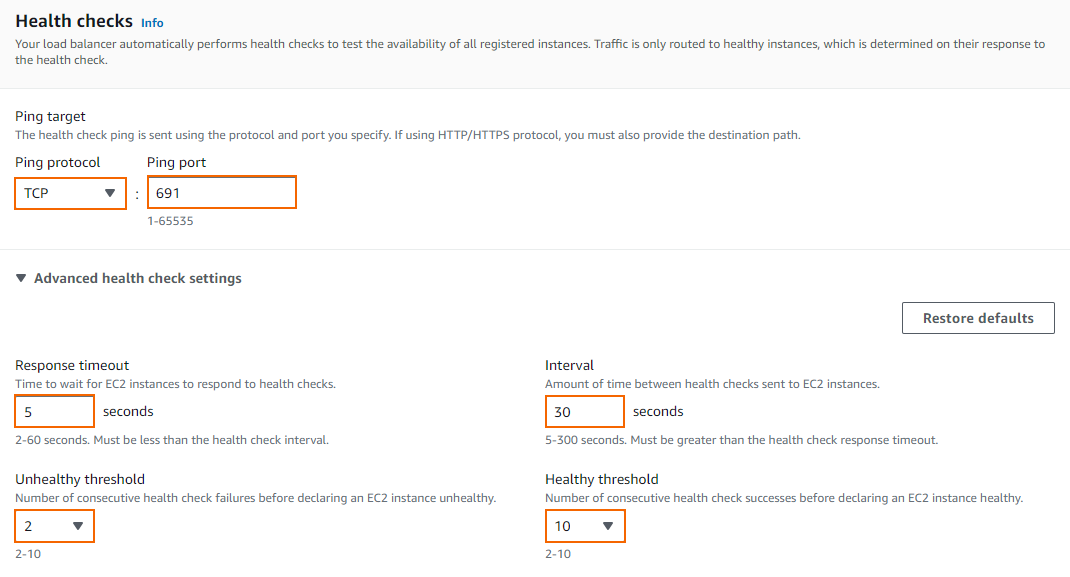
- Configure the Health checks:
- Ping protocol – Select the protocol from the list. When using HTTP/HTTPS, enter a Ping path for the destination
- Ping port – Enter the port. E.g, 691 for TINA VPN, or 443 for HTTPS
- Response Timeout – Enter the number of seconds the probe waits for an answer.
- Interval – Enter the number of seconds between two probes.
- Unhealthy threshold – Enter the number of failed heath checks for the instance to be considered unhealthy. Unhealthy health checks are taken out of rotation until healthy again.
- Healthy threshold – Enter the the number of successful heath checks for the instance to be considered healthy.
- Ping protocol – Select the protocol from the list. When using HTTP/HTTPS, enter a Ping path for the destination
- (optional) If the firewall EC2 instances are already deployed, select the EC2 instances. To add EC2 instances, click Add instances.
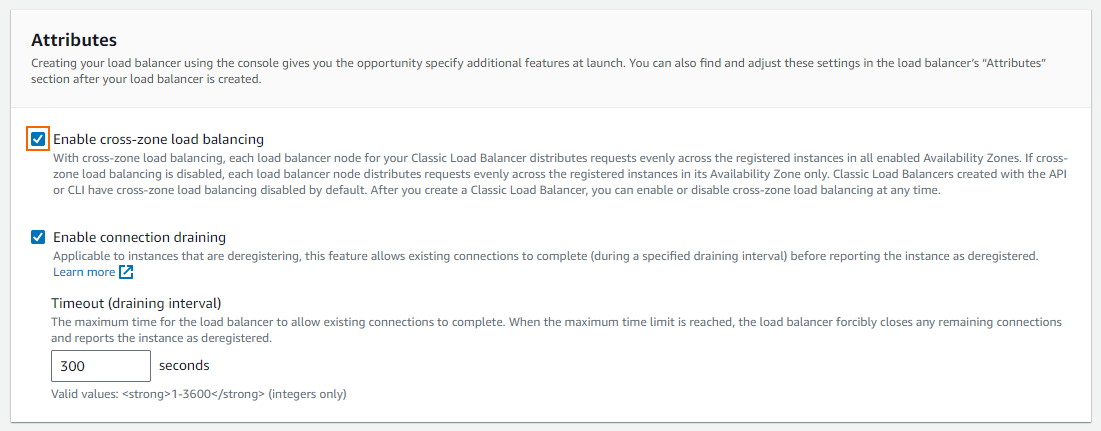
- Select Enable Cross-Zone Load Balancing.
- (optional) Add Key / Value tags to the resource. Click Create Add new tag to add additional tags.
- Review your settings and click Create load balancer.
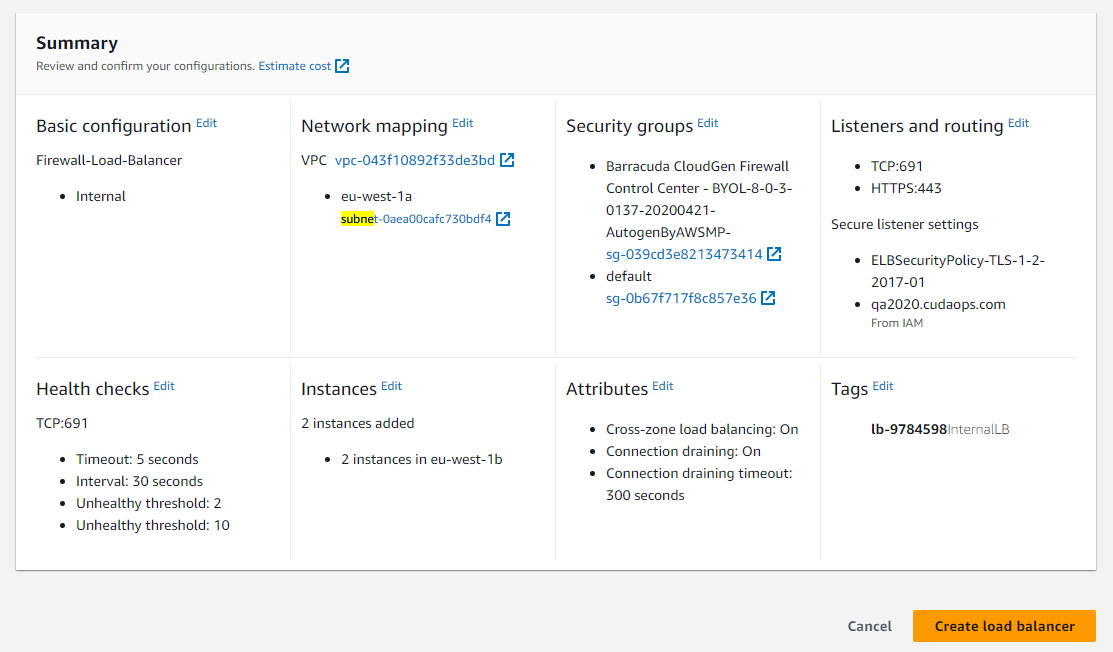
- Review the settings and click Create load balancer.
The classic load balancer is now deployed and ready for use.
