

To make traffic between subnets visible in the firewall, you must add one network interface per subnet. The number of network interfaces you can add to your instance is limited by the instance type. Firewall instances with multiple network interfaces cannot be deployed in a high availability configuration.
AWS Reference Architectures
This article is used in the following AWS reference architectures:
Before You Begin
- Deploy a firewall instance in the public subnet of the VPC. For more information, see How to Deploy a CloudGen Firewall in AWS via AWS Console.
- Verify that the Elastic IP address is associated with the elastic network interface (ENI) of the firewall instance and not with the instance itself.
- Stop the firewall instance. Additional network interfaces cannot be attached to a running system.
Step 1. Add an Elastic Network Interface
Create an elastic network interface. This interface will then be attached to the instance later.
- Log into the AWS console.
- Click Services and select EC2.
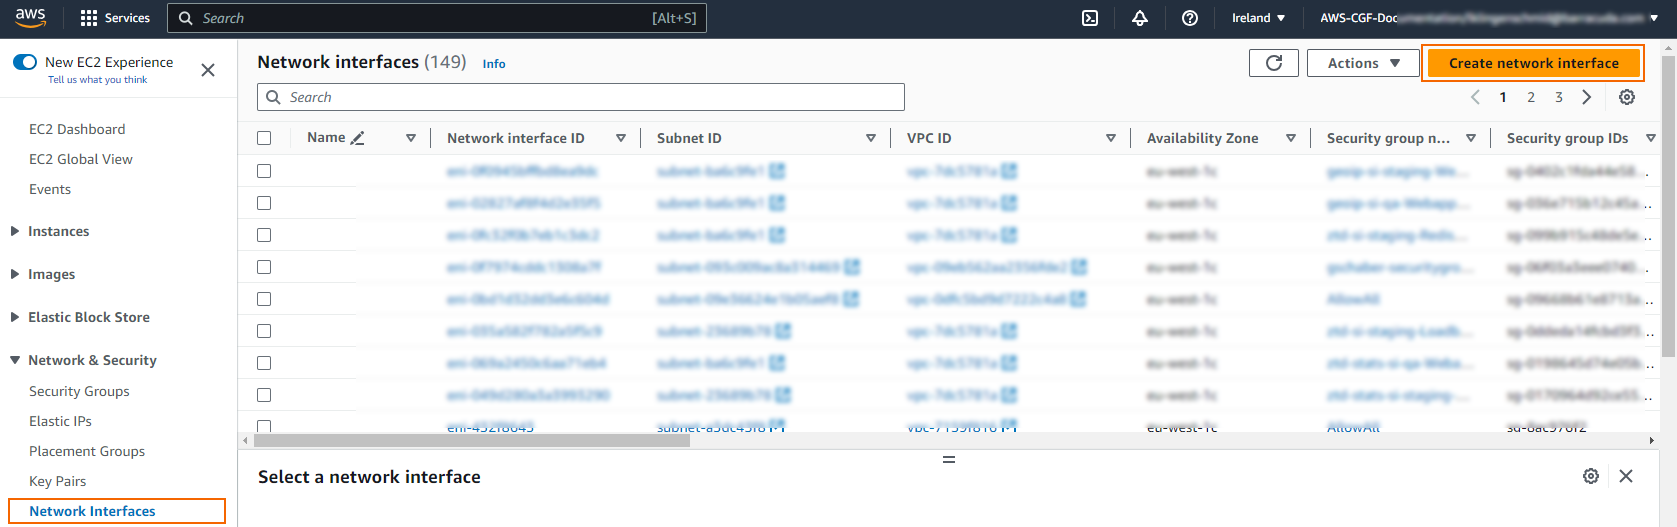
- In the Network & Services section of the left menu, click Network Interfaces.
- Click Create network interface.
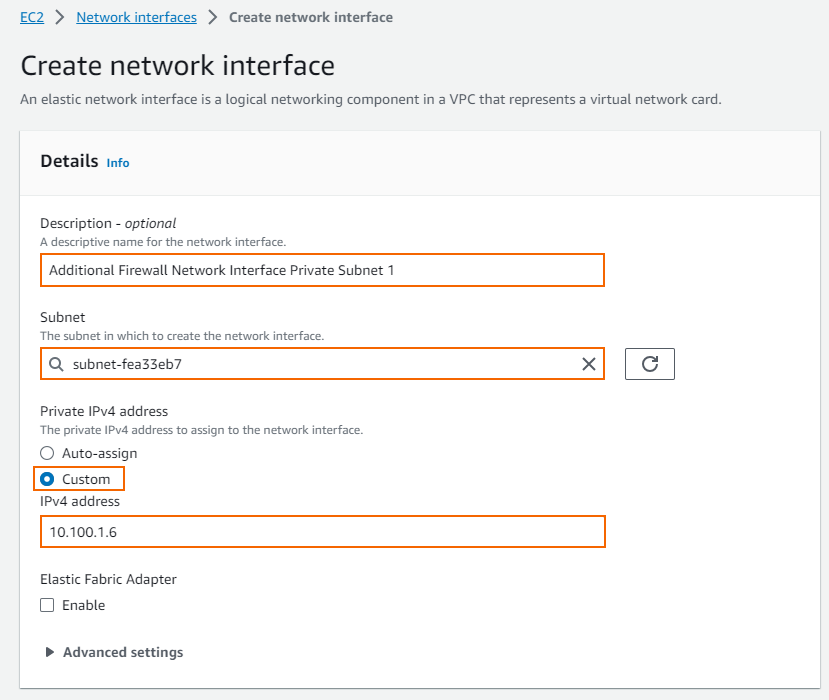
- The Create network interface window opens. Configure the network interface:
- Description – Enter a description for the network interface.
- Subnet – Select the private subnet in the VPC for the network interface. The subnet must be in the same Availability Zone as the firewall instance.
- Private IP – Select Custom and enter a free IP address in the subnet. The first three IP addresses in the subnet are reserved by AWS.
- Security groups – Select the security group assigned to the firewall instance.
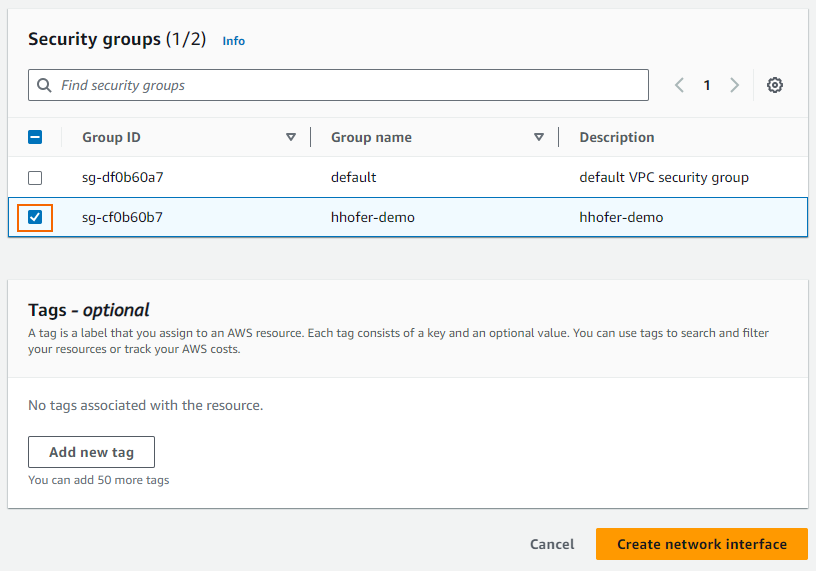
- Click Create network interface.
The elastic network interface is now listed with the Status column showing Available.

Step 2. Disable Source/Destination Check
To be able to perform NAT operations, the source/destination check must be disabled.
- Log into the AWS console.
- Click Services and select EC2.
- In the Network & Services section of the left menu, click Network Interfaces.
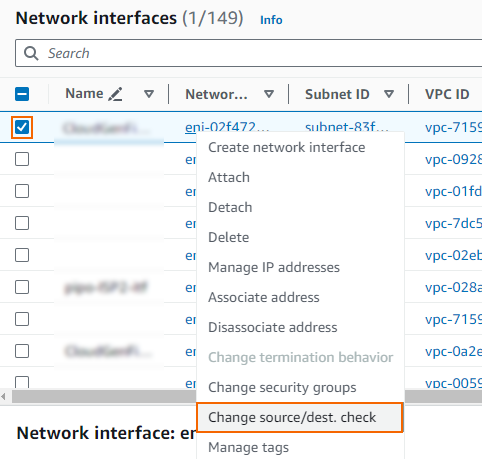
Right-click on the network interface created in Step 1 and click Change source/dest. check.
- The Change source/dest. check window opens. Clear the Enable check box to disable the interface.
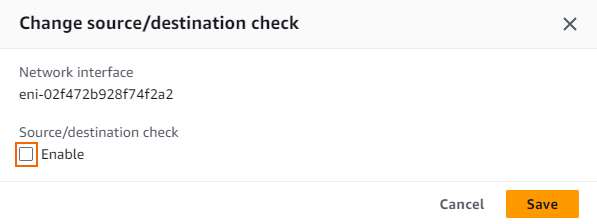
- Click Save.
The network interface is now able to handle traffic with destination IP addresses that do not match its own private IP address.
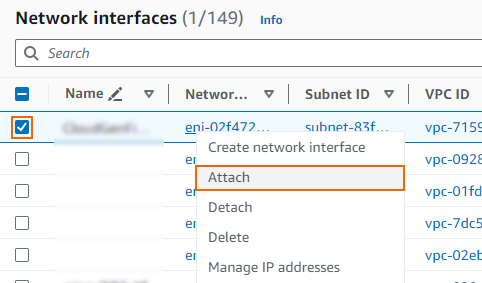
Step 4. Attach the Network Instance to the Firewall Instance
Verify that the firewall instance is shut down, and then add the network interface to the instance.
- Log into the AWS console.
- Click Services and select EC2.
- In the Network & Services section of the left menu, click Network Interfaces.
Right-click on the network interface created in Step 1 and click Attach.
- The Attach Network Interface window opens. In the Instance ID list, select the firewall instance.
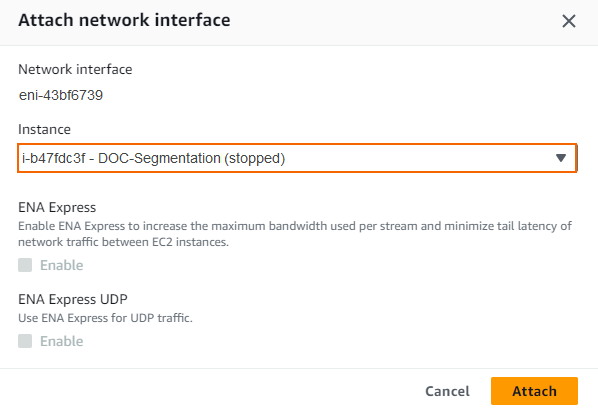
- Click Attach.
Step 5. Start the Firewall Instance
- Log into the AWS console.
- Click Services and select EC2.
- In the Instances section of the left menu, click Instances.
- Select the firewall instance, expand Instance State, and click Start instance.

Wait for the firewall instance to start. - Log into the Barracuda CloudGen Firewall using Firewall Admin.
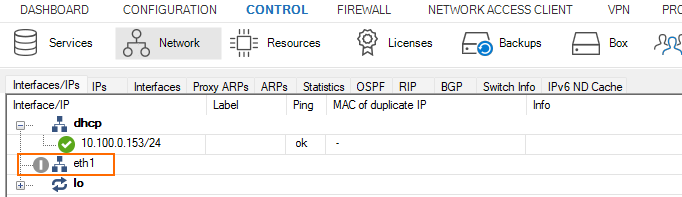
- Go to CONTROL > Network.
- Verify that the network interface you attached in Step 4 is listed.
Step 6. Add the Network Interface in the Firewall Configuration
The network interface must be added and configured in the firewall configuration.
Step 6.1. Add the Network Interface
- Log into the Barracuda CloudGen Firewall using Firewall Admin.
- Go to CONFIGURATION > Configuration Tree > Box > Network.
- Click Lock.
- In the left menu, click Interfaces.
- In the Network Interface Cards table, double-click the 10dynmod entry.
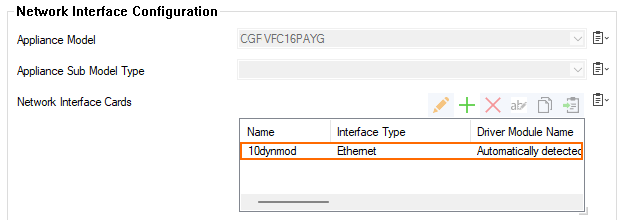
- The Network Interface Cards: 10dynmod window opens. From the Number of Interfaces, select the number of network interfaces attached to the firewall instance.
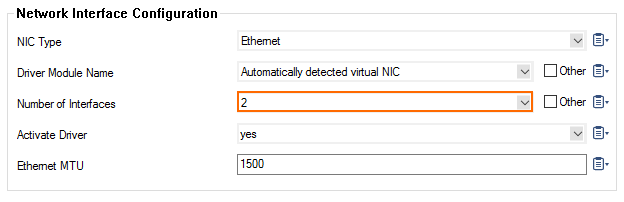
- Click OK.
- Click Send Changes and Activate.
Step 6.2. Add a Shared IP for the Network Interface
- Go to CONFIGURATION > Configuration Tree > Box > Network.
- Click Lock.
- In the left menu, click IP Configuration.
- In the Shared Networks and IPs section, click +.
- Enter a name for the shared IP address, and click OK....
- The Shared Networks and IPs window opens.
- Interface – Select the interface used to connect to the network. E.g, eth1.
- Network Address – Enter the network of the subnet in CIDR format.
- Shared IPs in the Network – The Shared IPs in this Network window opens.
- IP Address – Enter the private IP address configured for the network interface in Step 1.
- Alias for this IP – Select None.
- Responds to Ping – Select yes .
- Click OK to save this settings.
- Trust Level – Select Trusted.

- Interface – Select the interface used to connect to the network. E.g, eth1.
- Click OK.
- Click Send Changes and Activate.
Step 6.3 Activate the Network Configuration
- Go to CONTROL > Box.
- In the Network section of the left menu, click Activate new network configuration.
- The Network Activation window opens. Click Failsafe.
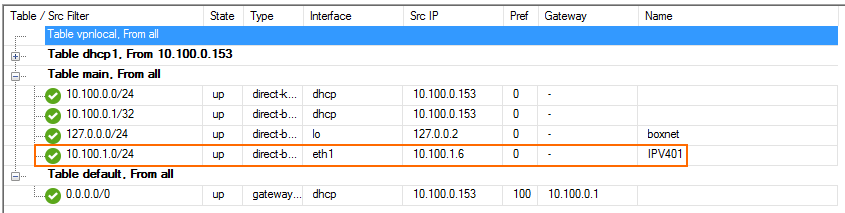
The route is now active and the shared IP is reachable for all clients in the subnet.
Next Steps
- Configure the AWS route table to use the network interface as the default route for all clients in this subnet.
- To send traffic between two subnets over the firewall, the firewall must have a network interface in each subnet. A gateway route must be added on the clients with the private IP address of the firewall used as the gateway. For more information, see AWS Reference Architecture - Segmentation Firewall for Single AZ VPCs.