AWS supports IPv6 in selected regions for EC2 instances running in VPCs. IPv6 must be enabled for the VPC, the subnets, and the ENI attached to the firewall instance. The firewall can then retrieve the IPv6 IP address via SLAAC and DHCPv6 from AWS.
Before You Begin
- Deploy a CloudGen Firewall in an AWS region with IPv6 VPC support. E.g., us-east-2 (OHIO)
Step 1. Enable and Assign IPv6 to VPC
- Log into the AWS console.
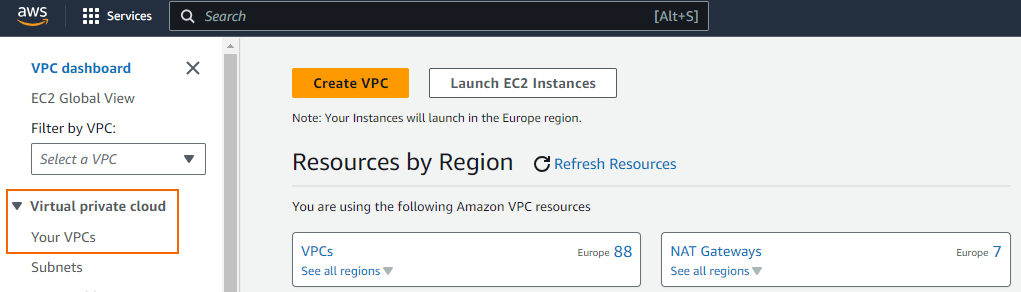
- Click Services and select VPC.
- In the left menu, click Your VPCs.
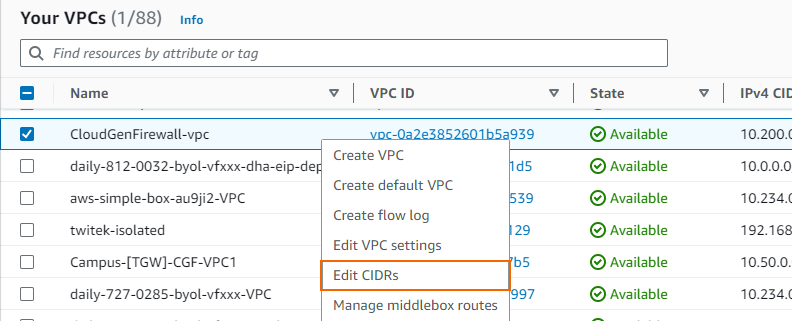
- Right-click your VPC and select Edit CIDRs.
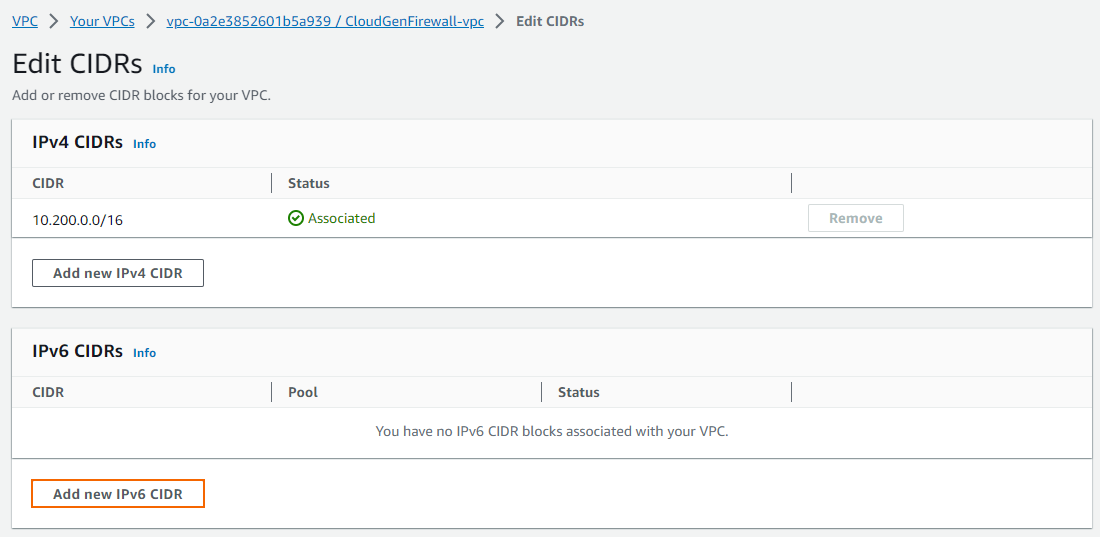
- The Edit CIDRs window opens. Click Add new IPv6 CIDR.
- Select the IPv6 CIDR block you wish to allocate.
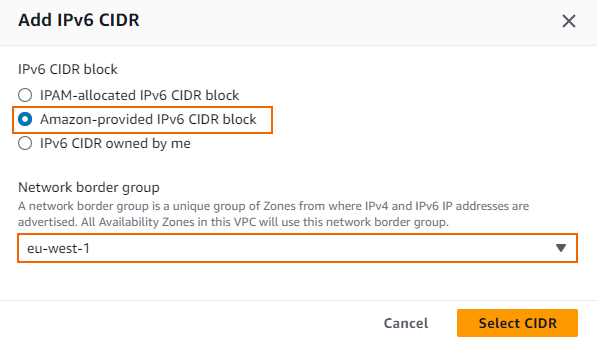
- Click Select CIDR.
- Click Close.
A /56 IPv6 network is now associated with your VPC.

Step 2. Add IPv6 Network to VPC Subnets
Assign a /64 IPv6 network out of the /56 IPv6 VPC network to each subnet. Only one /64 can be assigned per subnet.
- Log into the AWS console.
- Click Services and select VPC.
- In the left menu, click Subnets.
- Right-click the subnet and select Edit IPv6 CIDRs.
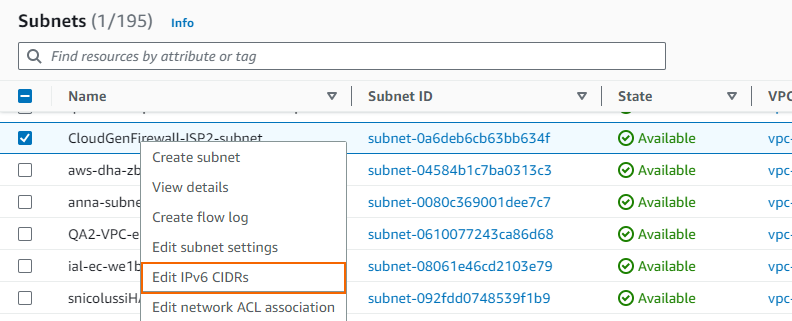
- Click Add IPv6 CIDR.
- Enter the last two digits of the /64 IPv6 network.

- Click Save.
- Repeat for all subnets in the VPC.
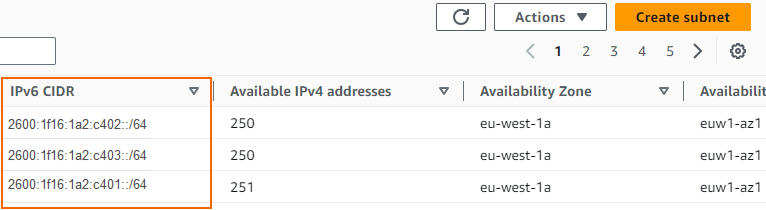
All subnets in the VPC now have both IPv4 and IPv6 networks assigned to them.
Step 3. Edit the Route Table to include a default IPv6 route
- Log into the AWS console.
- Click Services and select VPC.
- In the left menu, click Route tables.
- Select the route table associated with the public subnets.
- In the lower half of the screen click on the Routes tab.
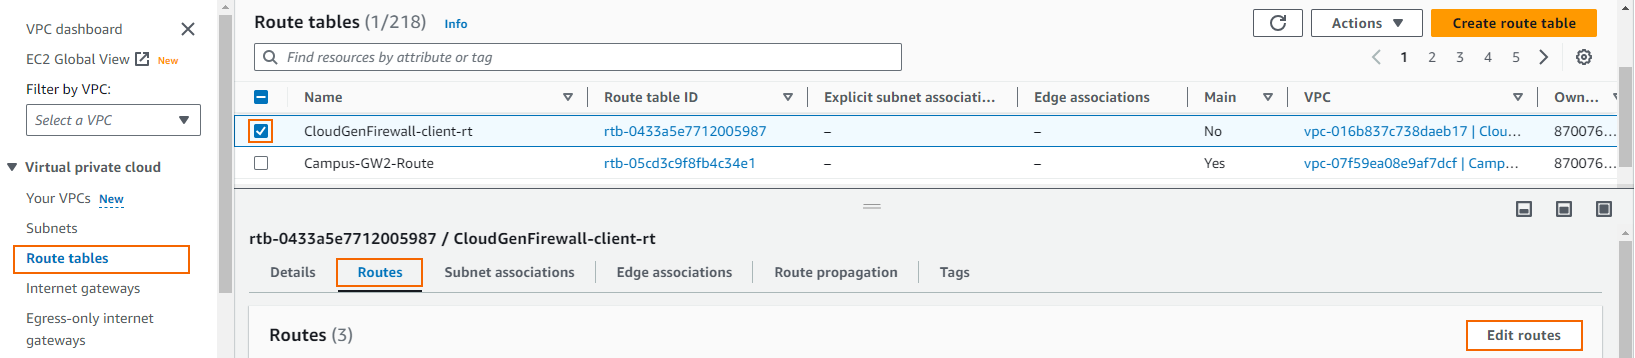
- Click Edit routes.
- Click Add route.
- Enter the IPv6 default route:
- Destination – Enter
::/0 - Target – Enter the Internet gateway id. E..g.,
igw-123456
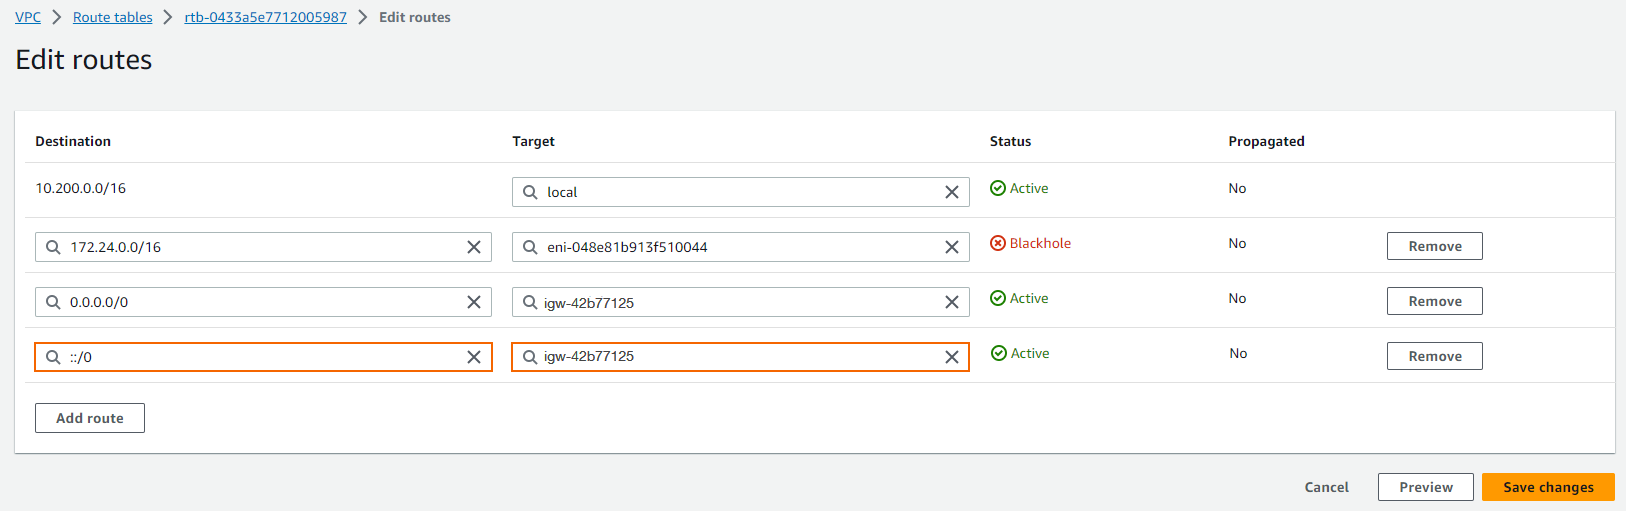
- Destination – Enter
- Click Save changes.
IPv6 traffic is now routed over the Internet Gateway of the VPC for the public subnets.
Step 4. Edit Security Groups to Allow IPv6 Traffic to the Firewall
Create rules in the security group associated with your firewall for IPv6 traffic.
- Log into the AWS console.
- Click Services and select VPC.
- In the left menu, click Security groups.
- Click on the security group associated with your firewall instance.
- In the lower half of the screen, click the Inbound rules tab.
- Click Edit inbound rules.
- For each type of traffic, click Add rule and enter the Source network. Use
::0/0to allow this type and protocol from all IPv6 networks.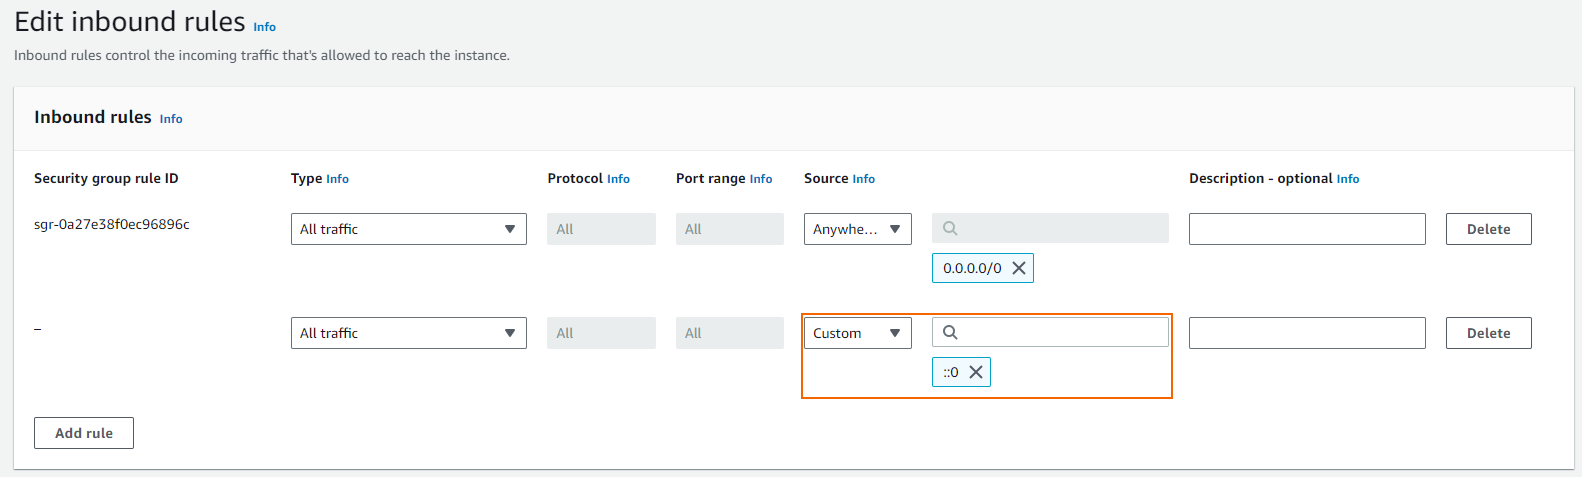
- Click Save rules.
Step 5. Assign IPv6 Addresses to the Firewall Instance
- Log into the AWS console.
- Click Services and select EC2.
- In the left menu, click Instances.
- Right-click the firewall instance, click Networking, and then select Manage IP Addresses.
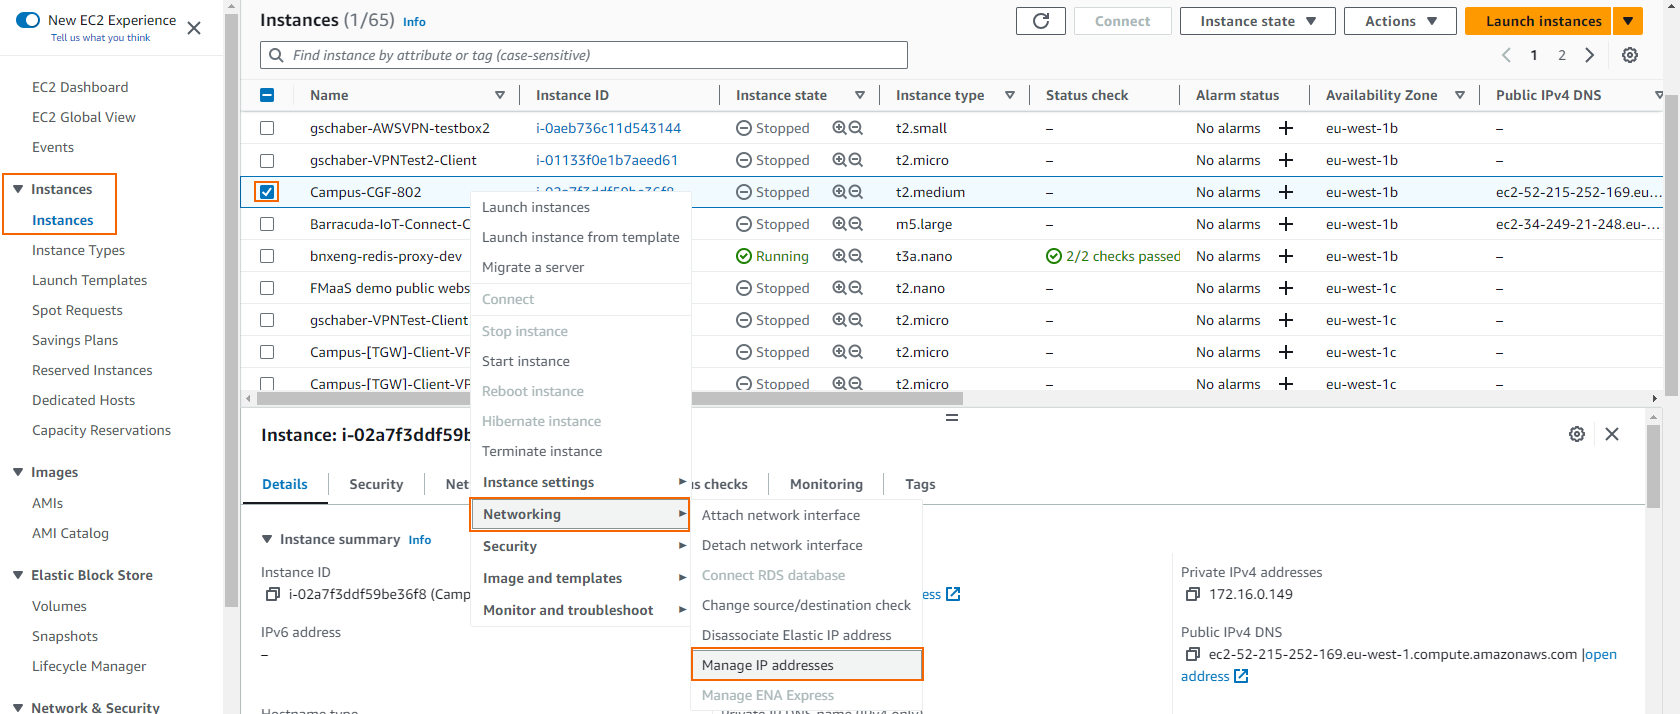
- The Manage IP Addresses window opens. Expand the IPv6 Addresses section.
- Click Assign new IP for each IPv6 address you want to add.
- (optional) Enter an explicit IPv6 address from the IPv6 network assigned to the subnet the firewall instance is in.
- Click Save.
Step 6. Enable IPv6 on the Firewall
Log into the firewall, enable IPv6, activate the network configuration, and then reboot the instance.
For more information, see How to Enable IPv6.
Step 7. Configure the IPv6 on the DHCP Interface of the Firewall
Configure the firewall to retrieve the IPv6 via SLAAC and DHCPv6 from AWS.
- Go to CONFIGURATION > Configuration Tree > Box > Network.
- Click Lock.
- In the left menu, click IP Configuration.
- In the IPv6 Stateless Configuration table click +.
- Enter a Name and click OK.
- Select the Other checkbox to be able to manually enter an interface name.
- For the Interface enter
dhcp.

- Click OK.
- In the left menu, click xDSL/DHCP/ISDN.
- In the DHCPv6 Links table, click +.
- Enter a Name.
- Click OK. The DHCPv6 Links window opens.
- In the Connection Details section, click Other to be able to manually enter a DHCP Interface.
- For the DHCP Interface, enter
dhcp. - From the Mode of Operation list, select Stateful.
- From the Use Provider DNS list, select yes.
- From the Use Provider Domain Name list, select yes.

- Click OK
- Click Send Changes and Activate.
Step 8. Activate the Network Configuration
- Go to CONTROL > Box.
- In the left menu, expand the Network section and click Activate new network configuration.
- Select Failsafe.
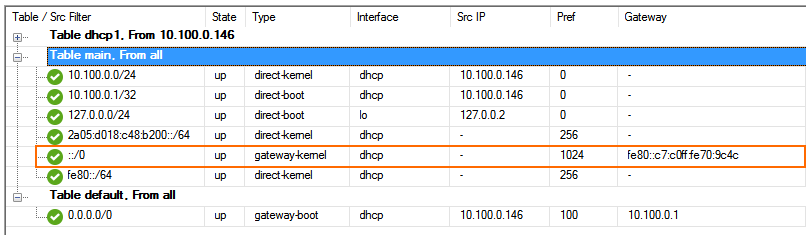
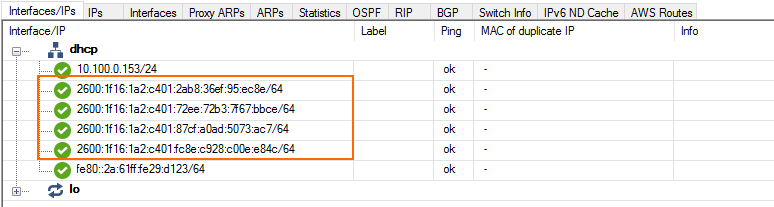
The IPv6 addresses are now listed for the dhcp interface on the CONTROL > Network page.
The default gateway learned via IPv6 autoconfiguration is now listed in the route table on the CONTROL > Network page.